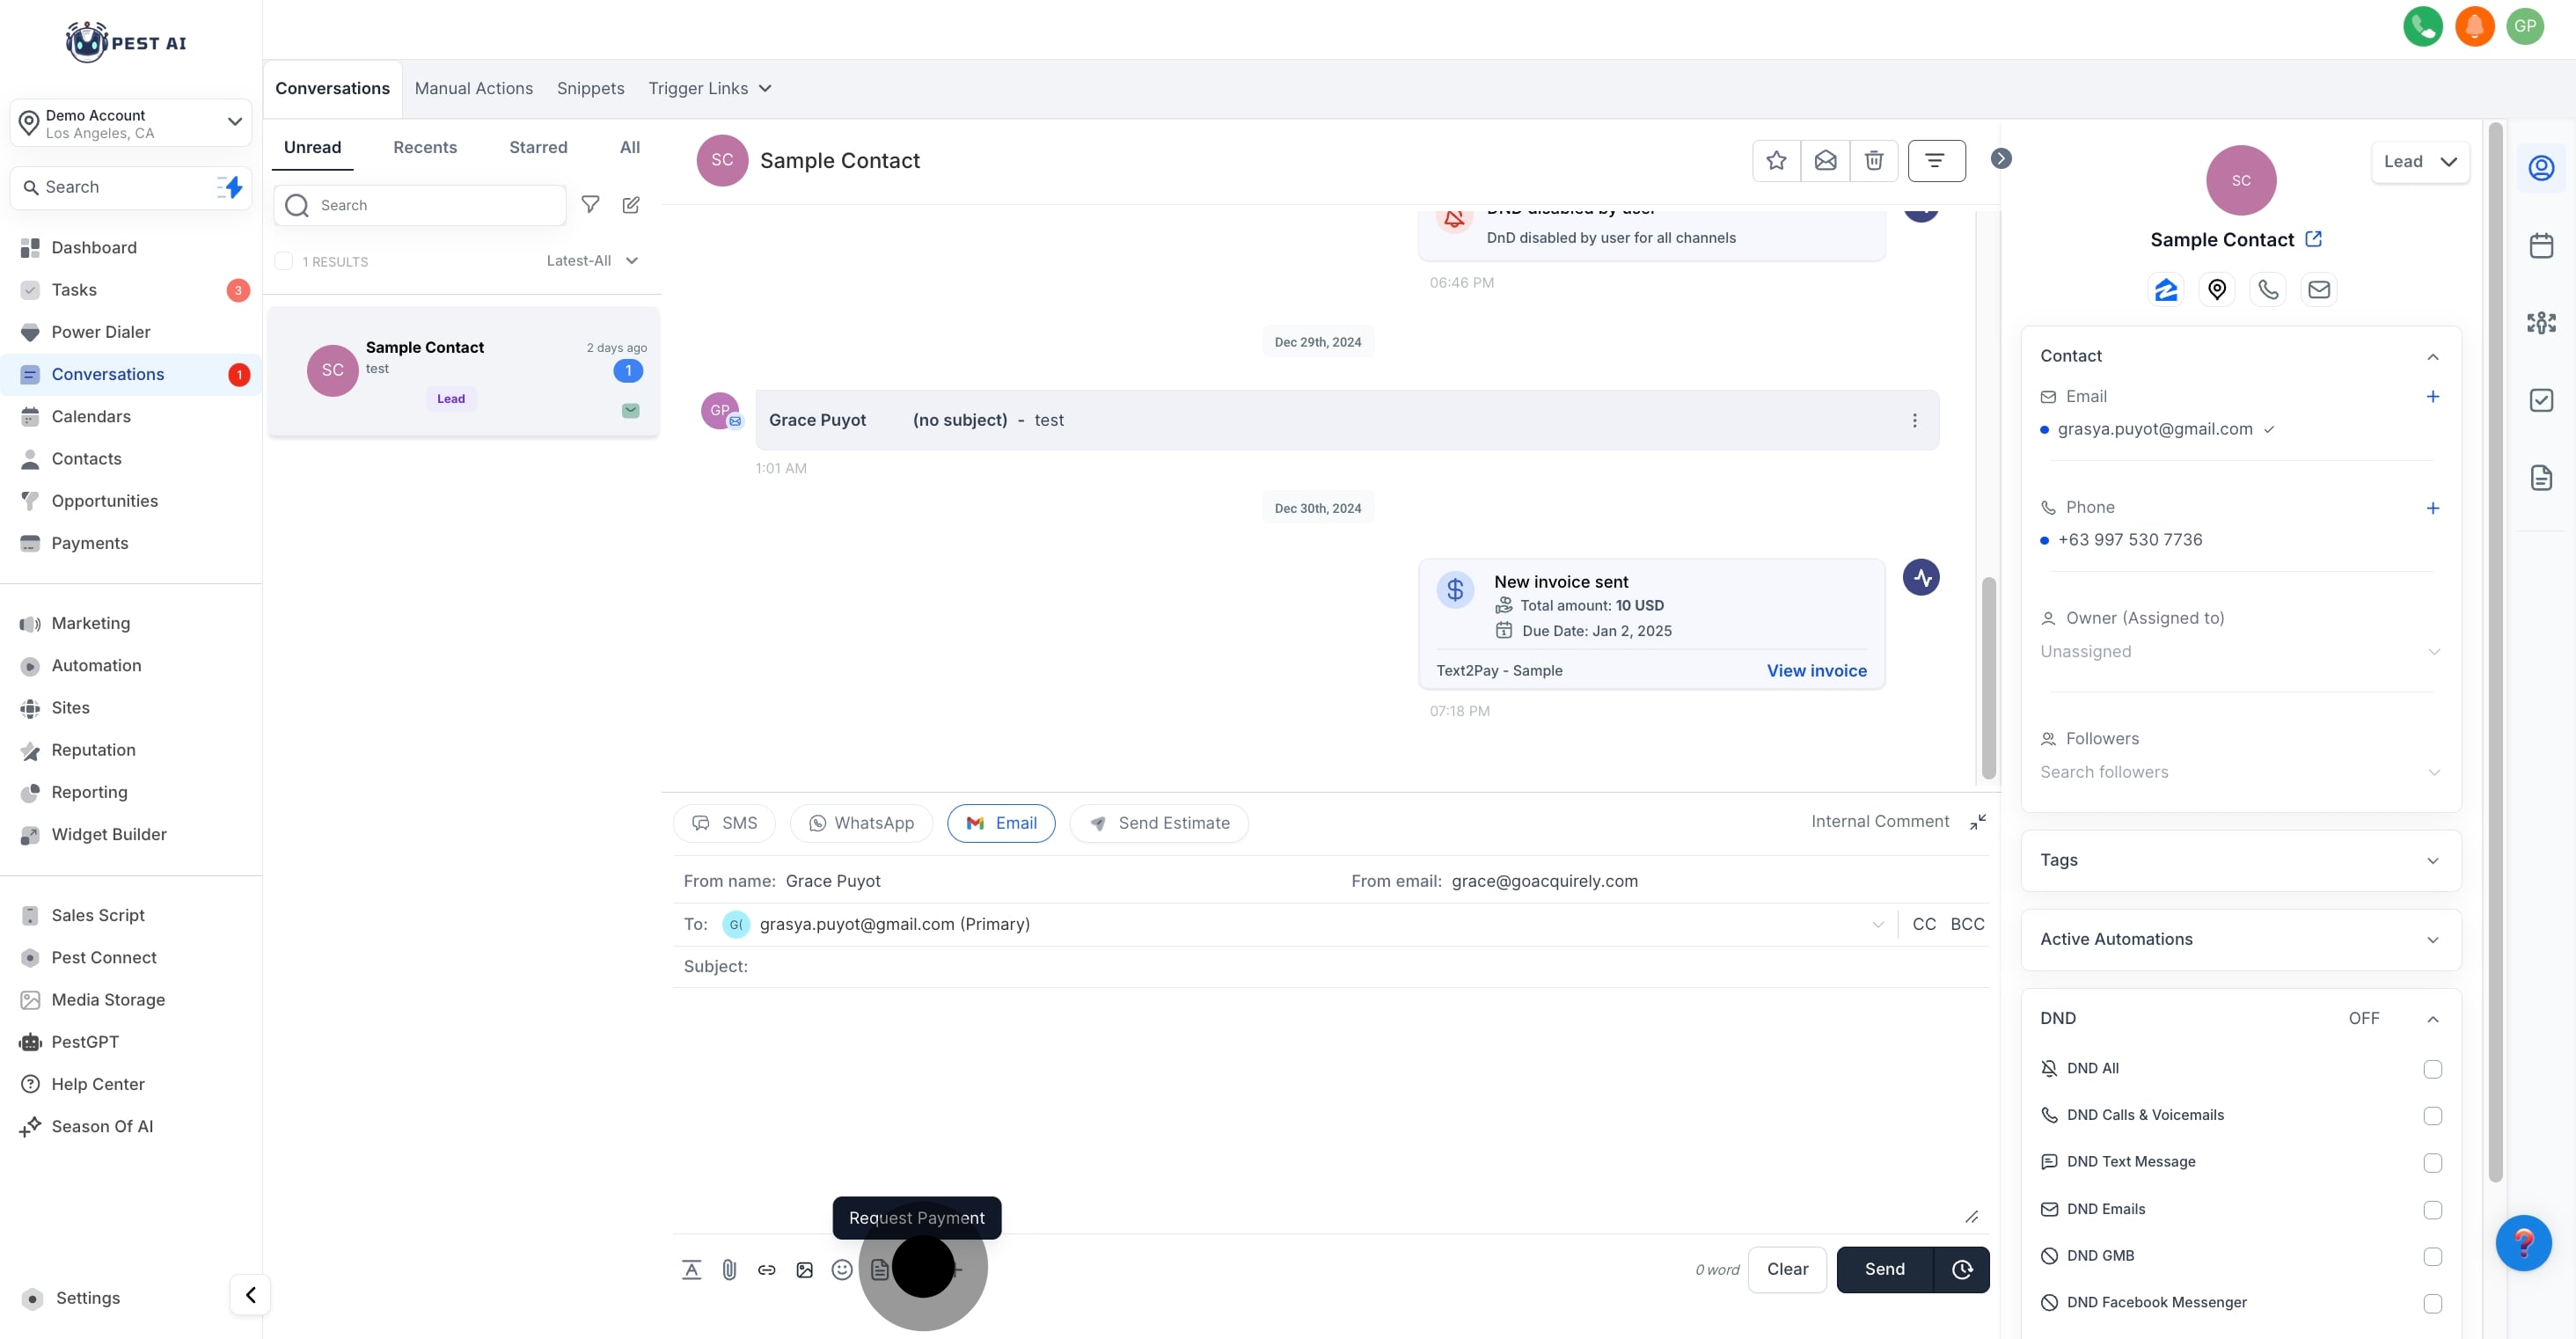
Navigate to the 'Conversations' tab on the main interface to start the process of requesting payments.
Identify and select the contact from whom the payment will be requested. Ensure you have the correct contact to avoid any miscommunication.
Click on the 'Request a payment' option available in the contact’s interaction options.
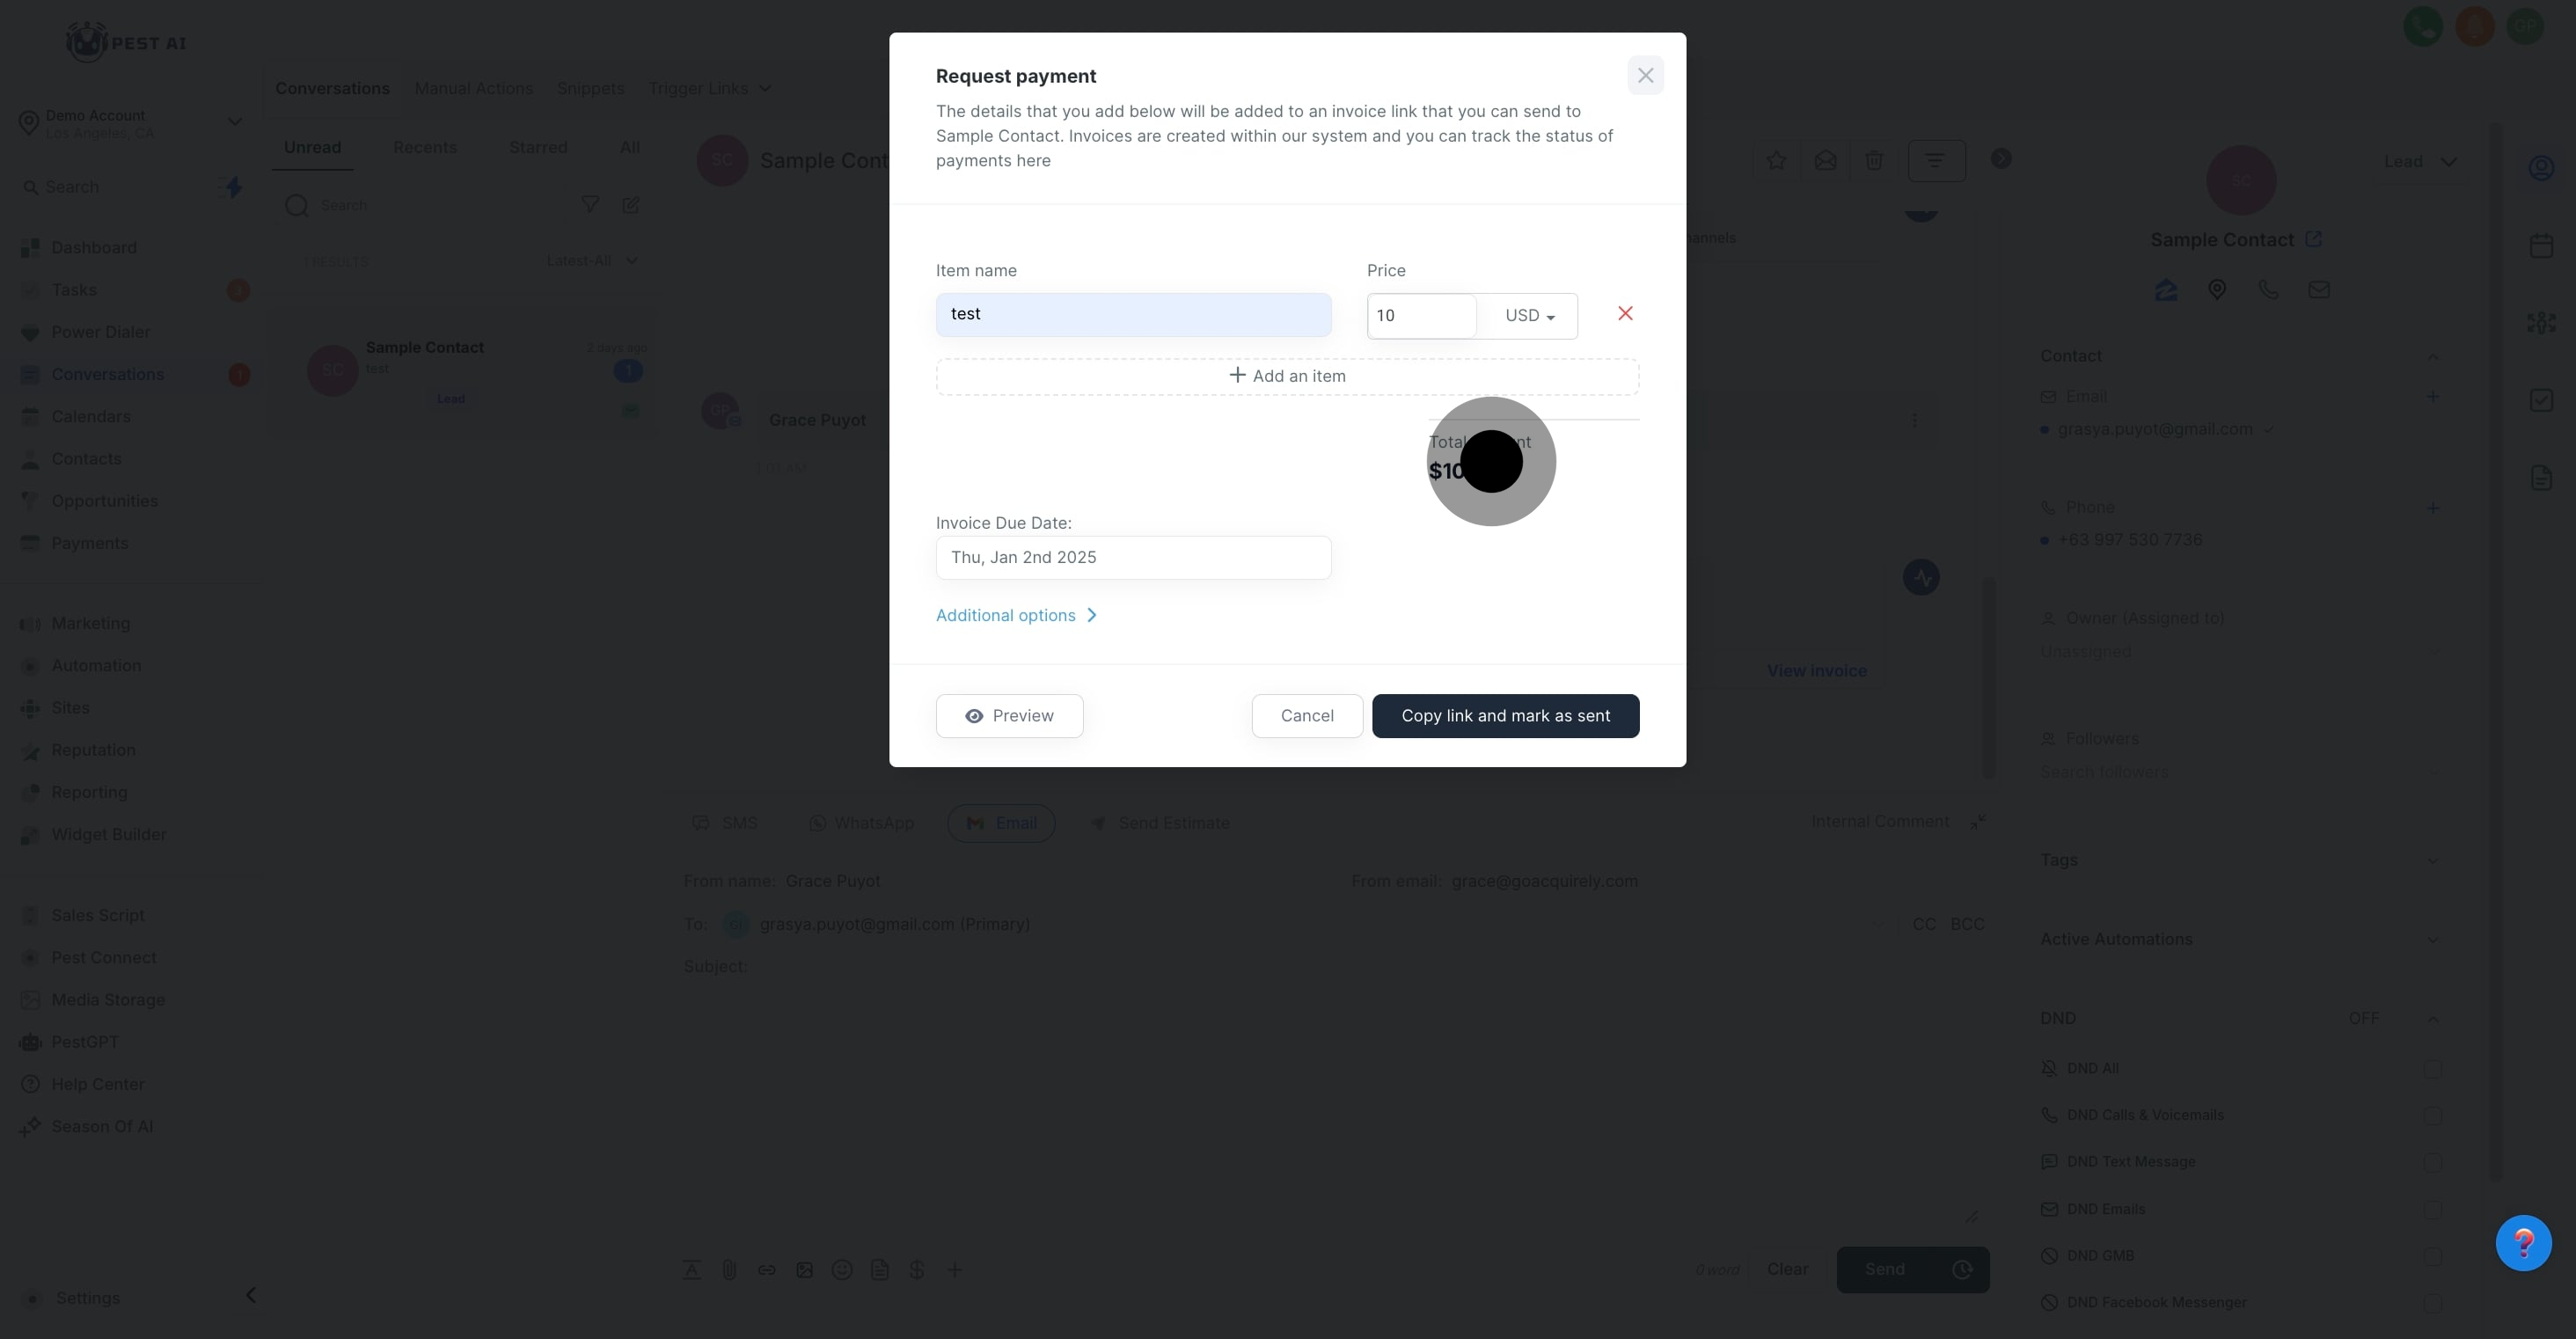
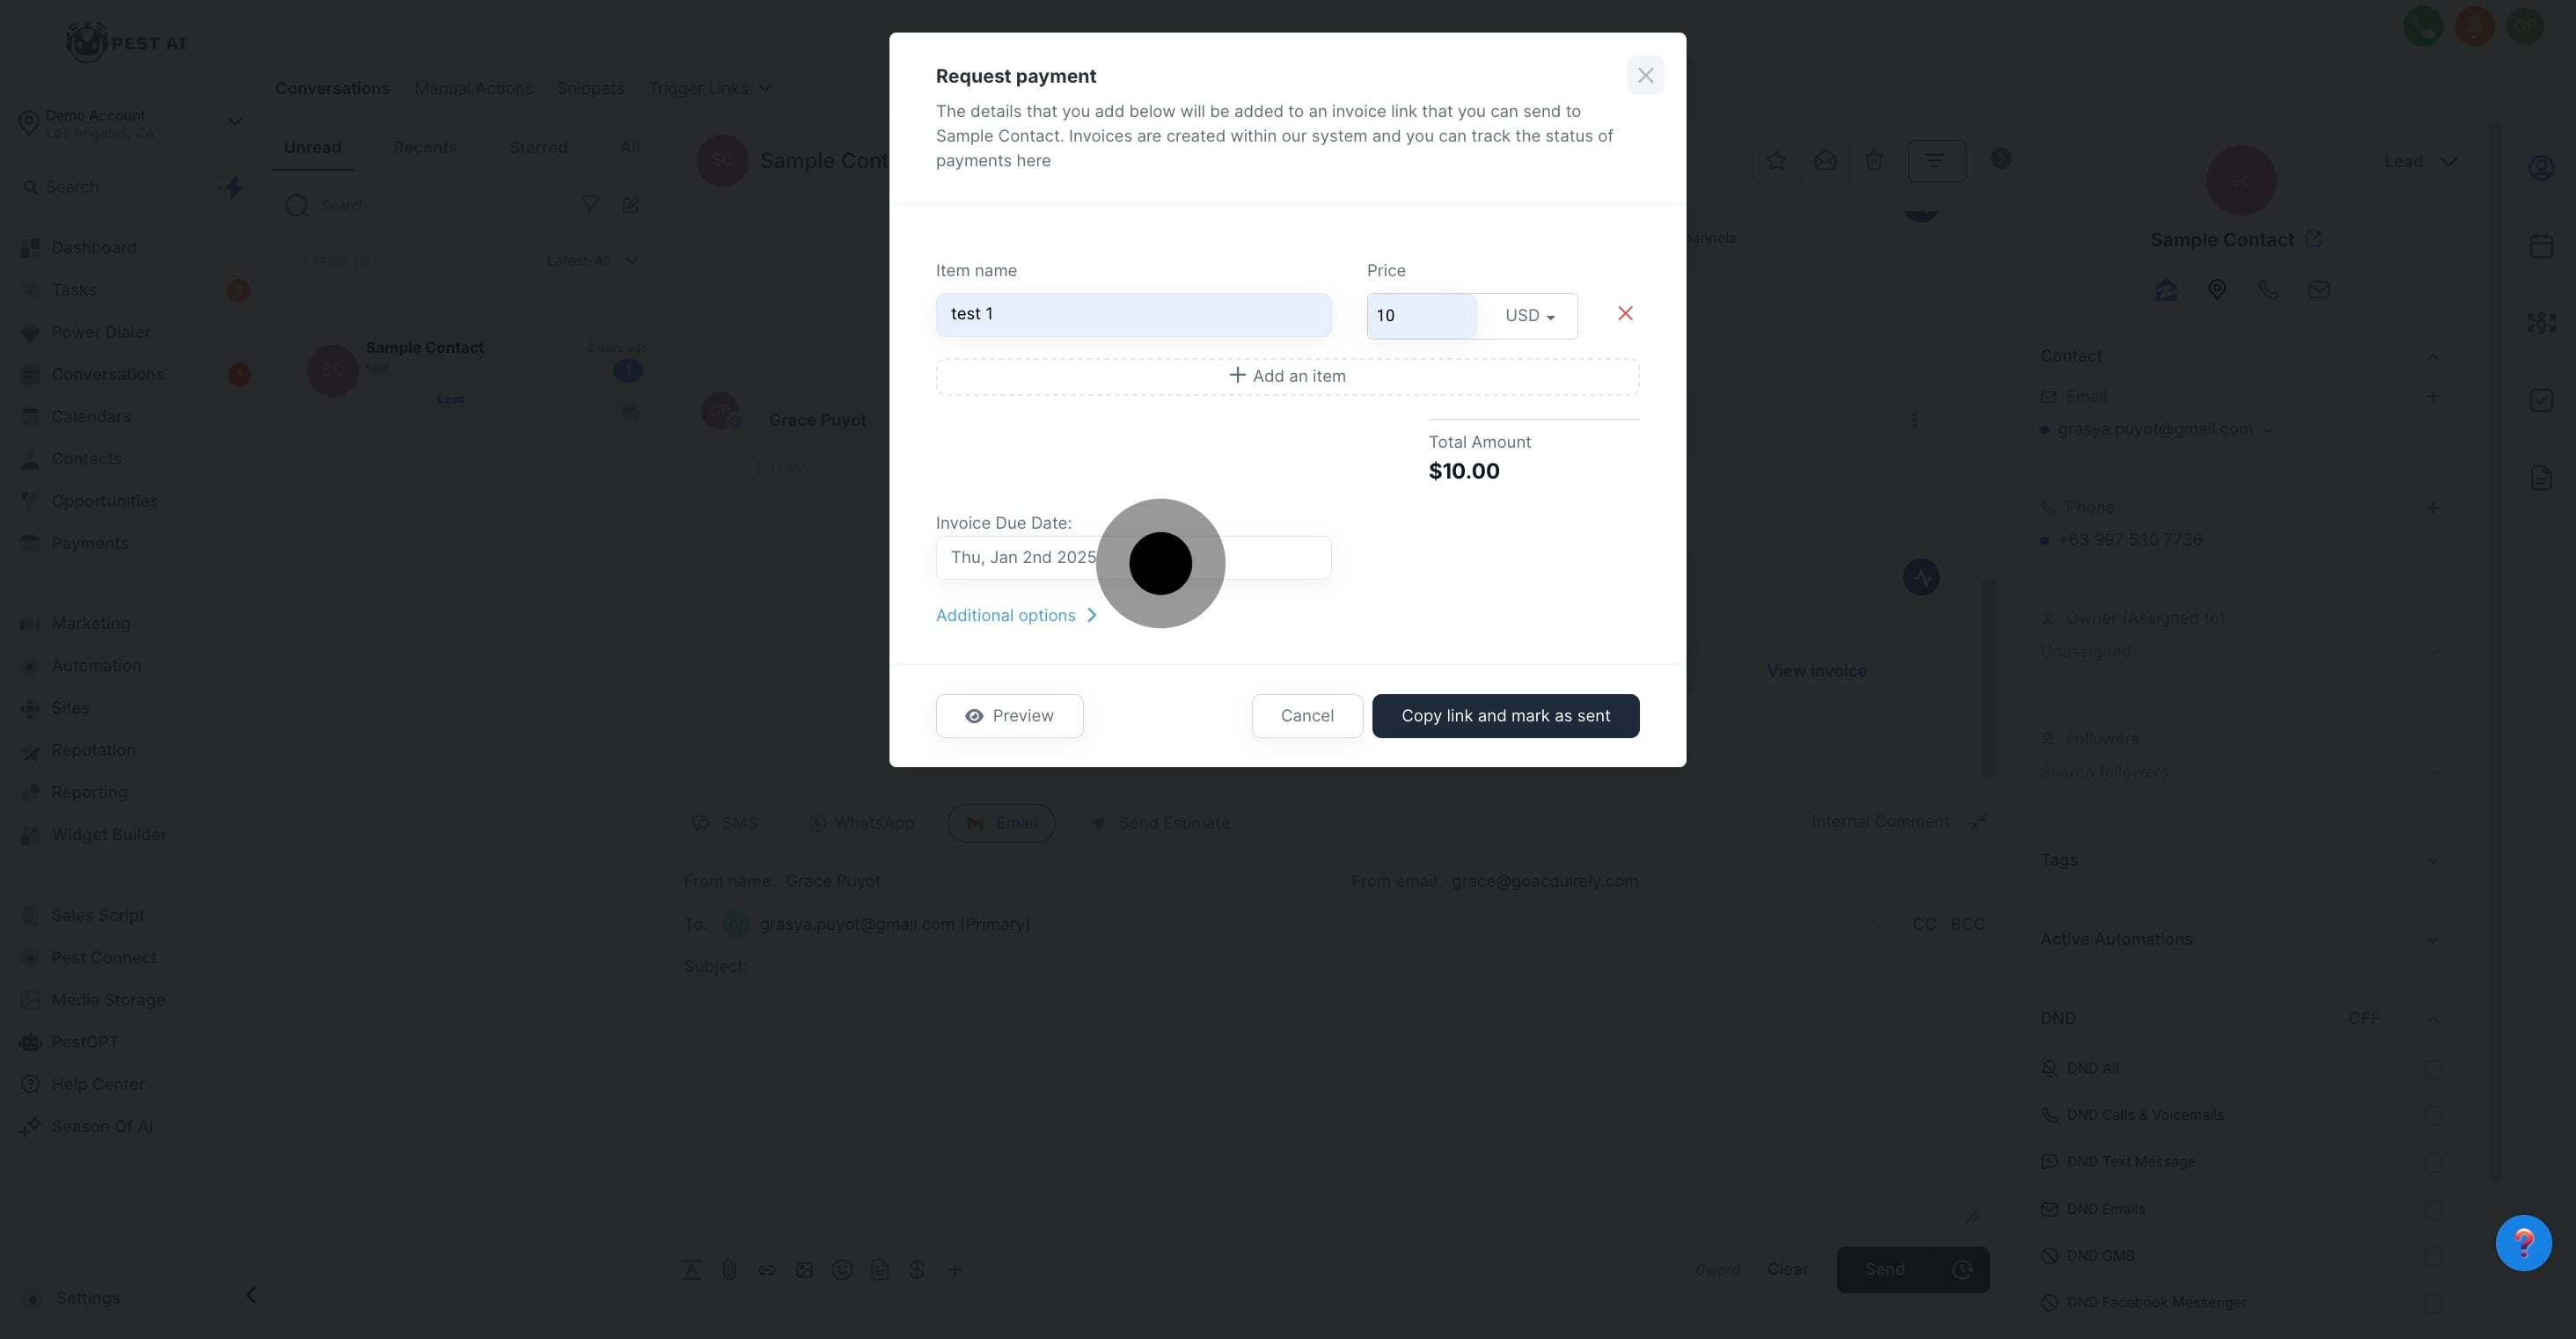
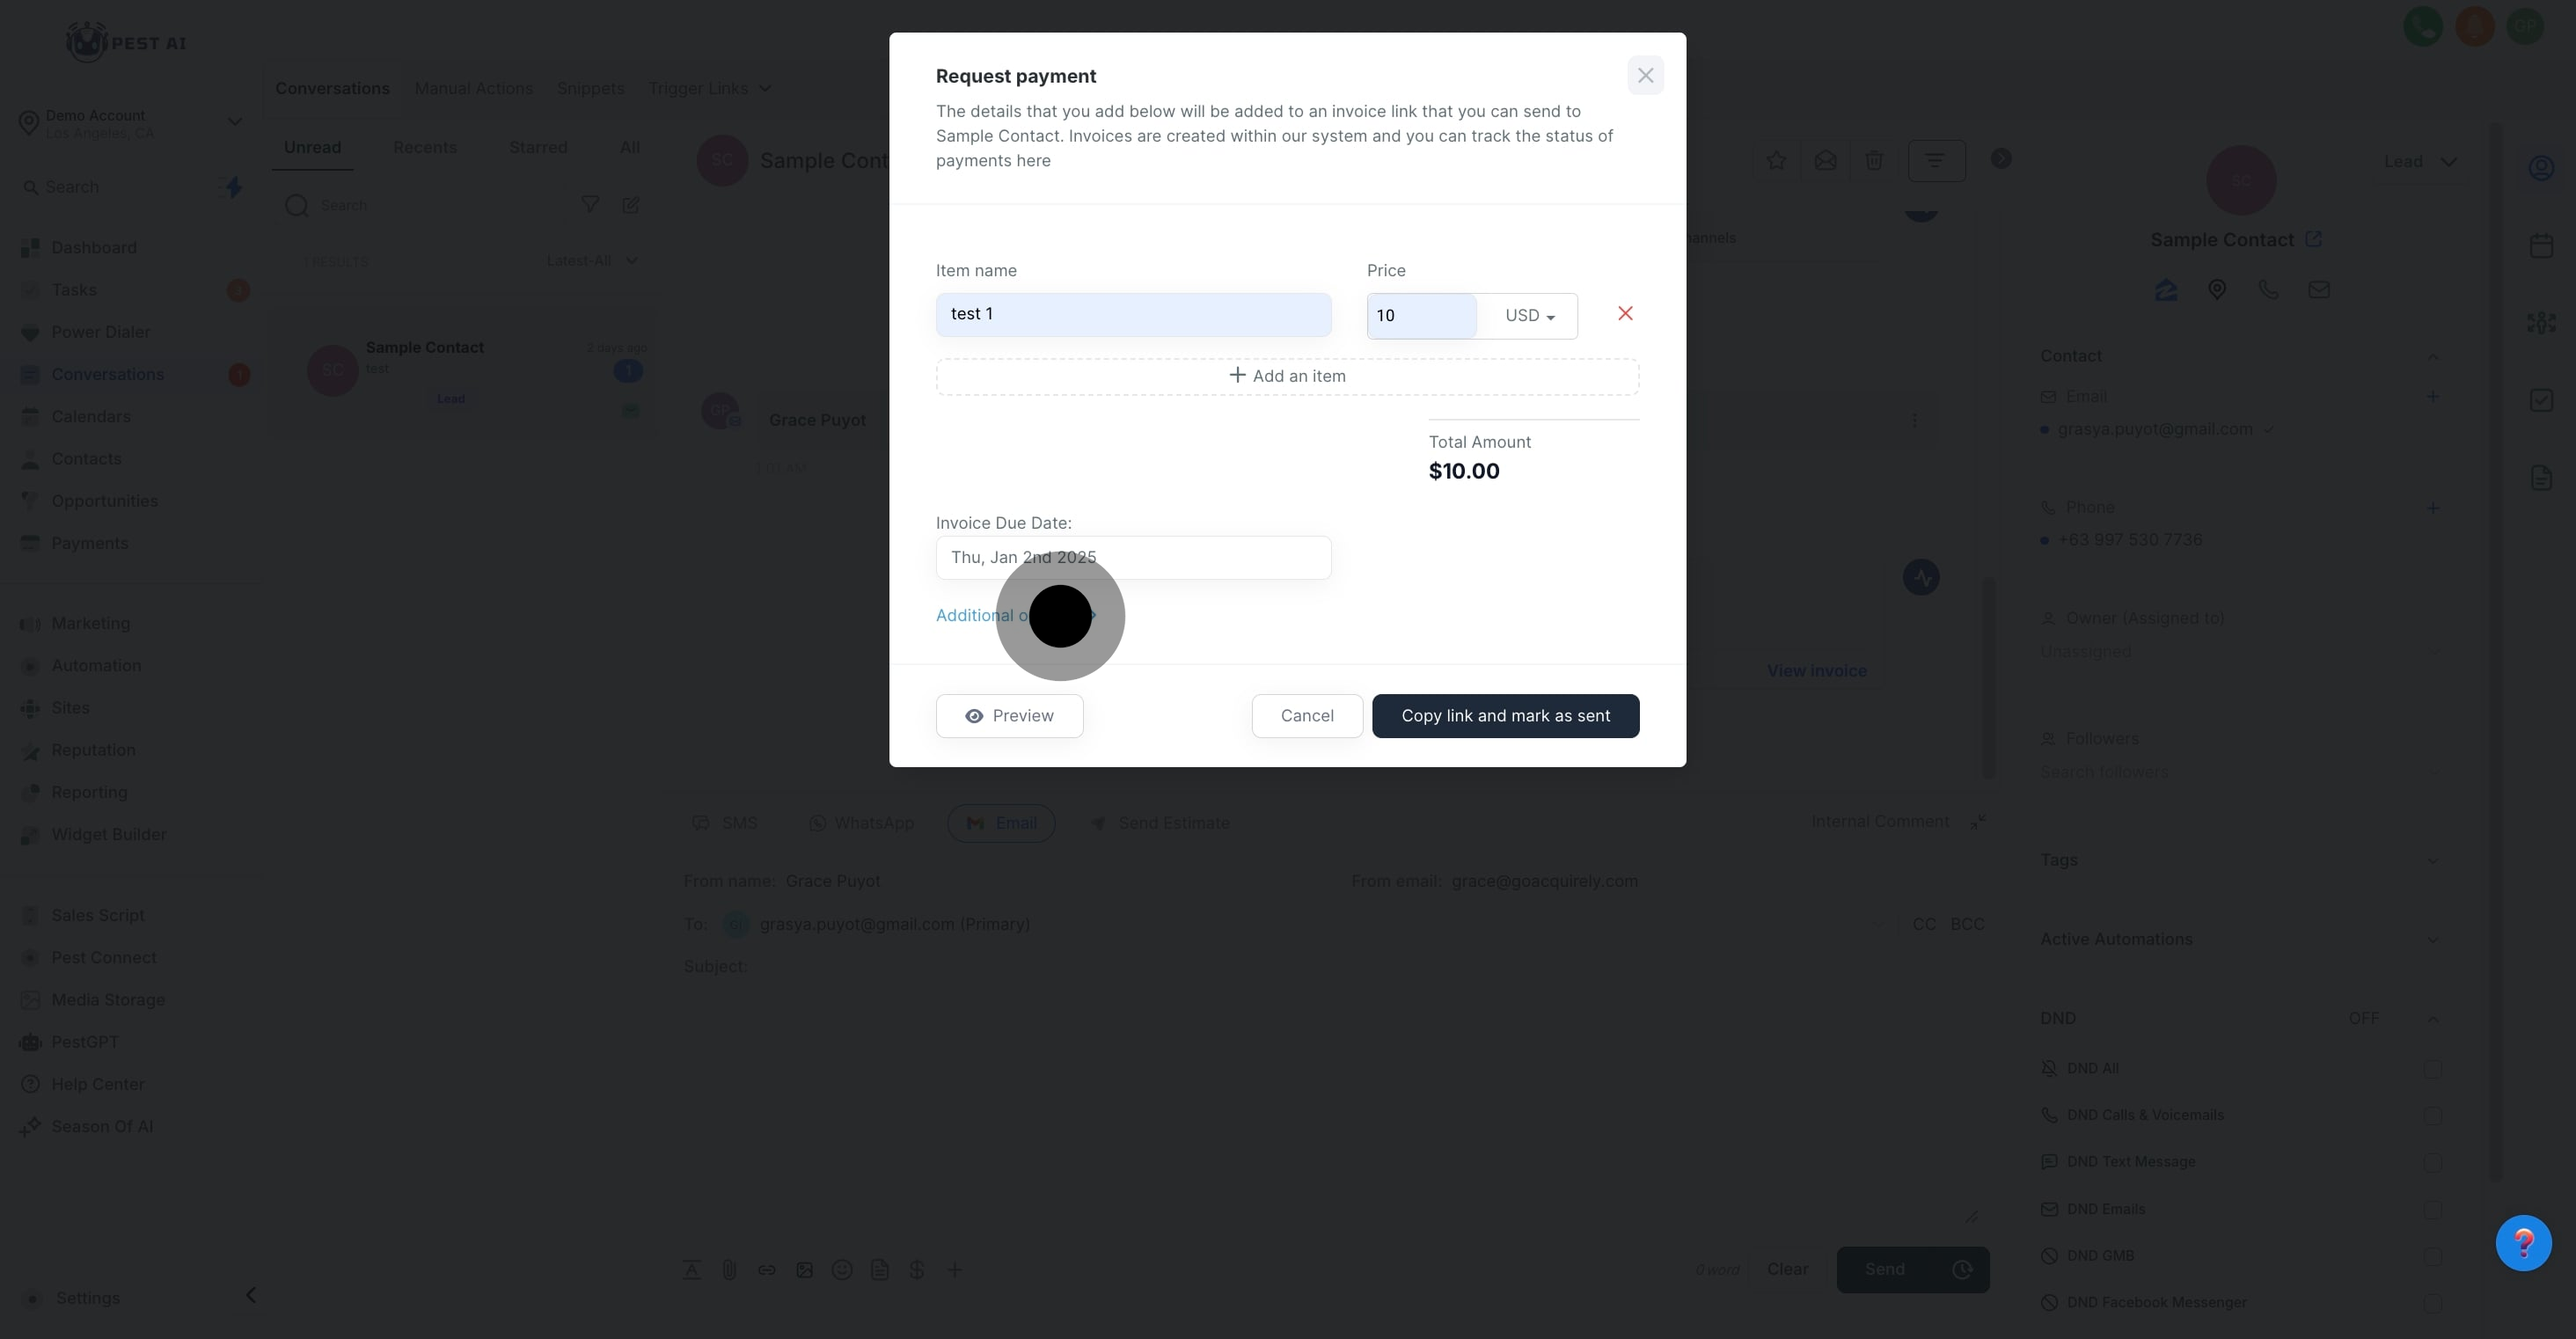
Product Name: Specify the name of the product or service.
Price: Enter the amount to be charged.
Currency: Choose the currency for the transaction, if the platform supports multiple currencies.

If you need to remove an item, simply select the red cross mark next to the item’s details.
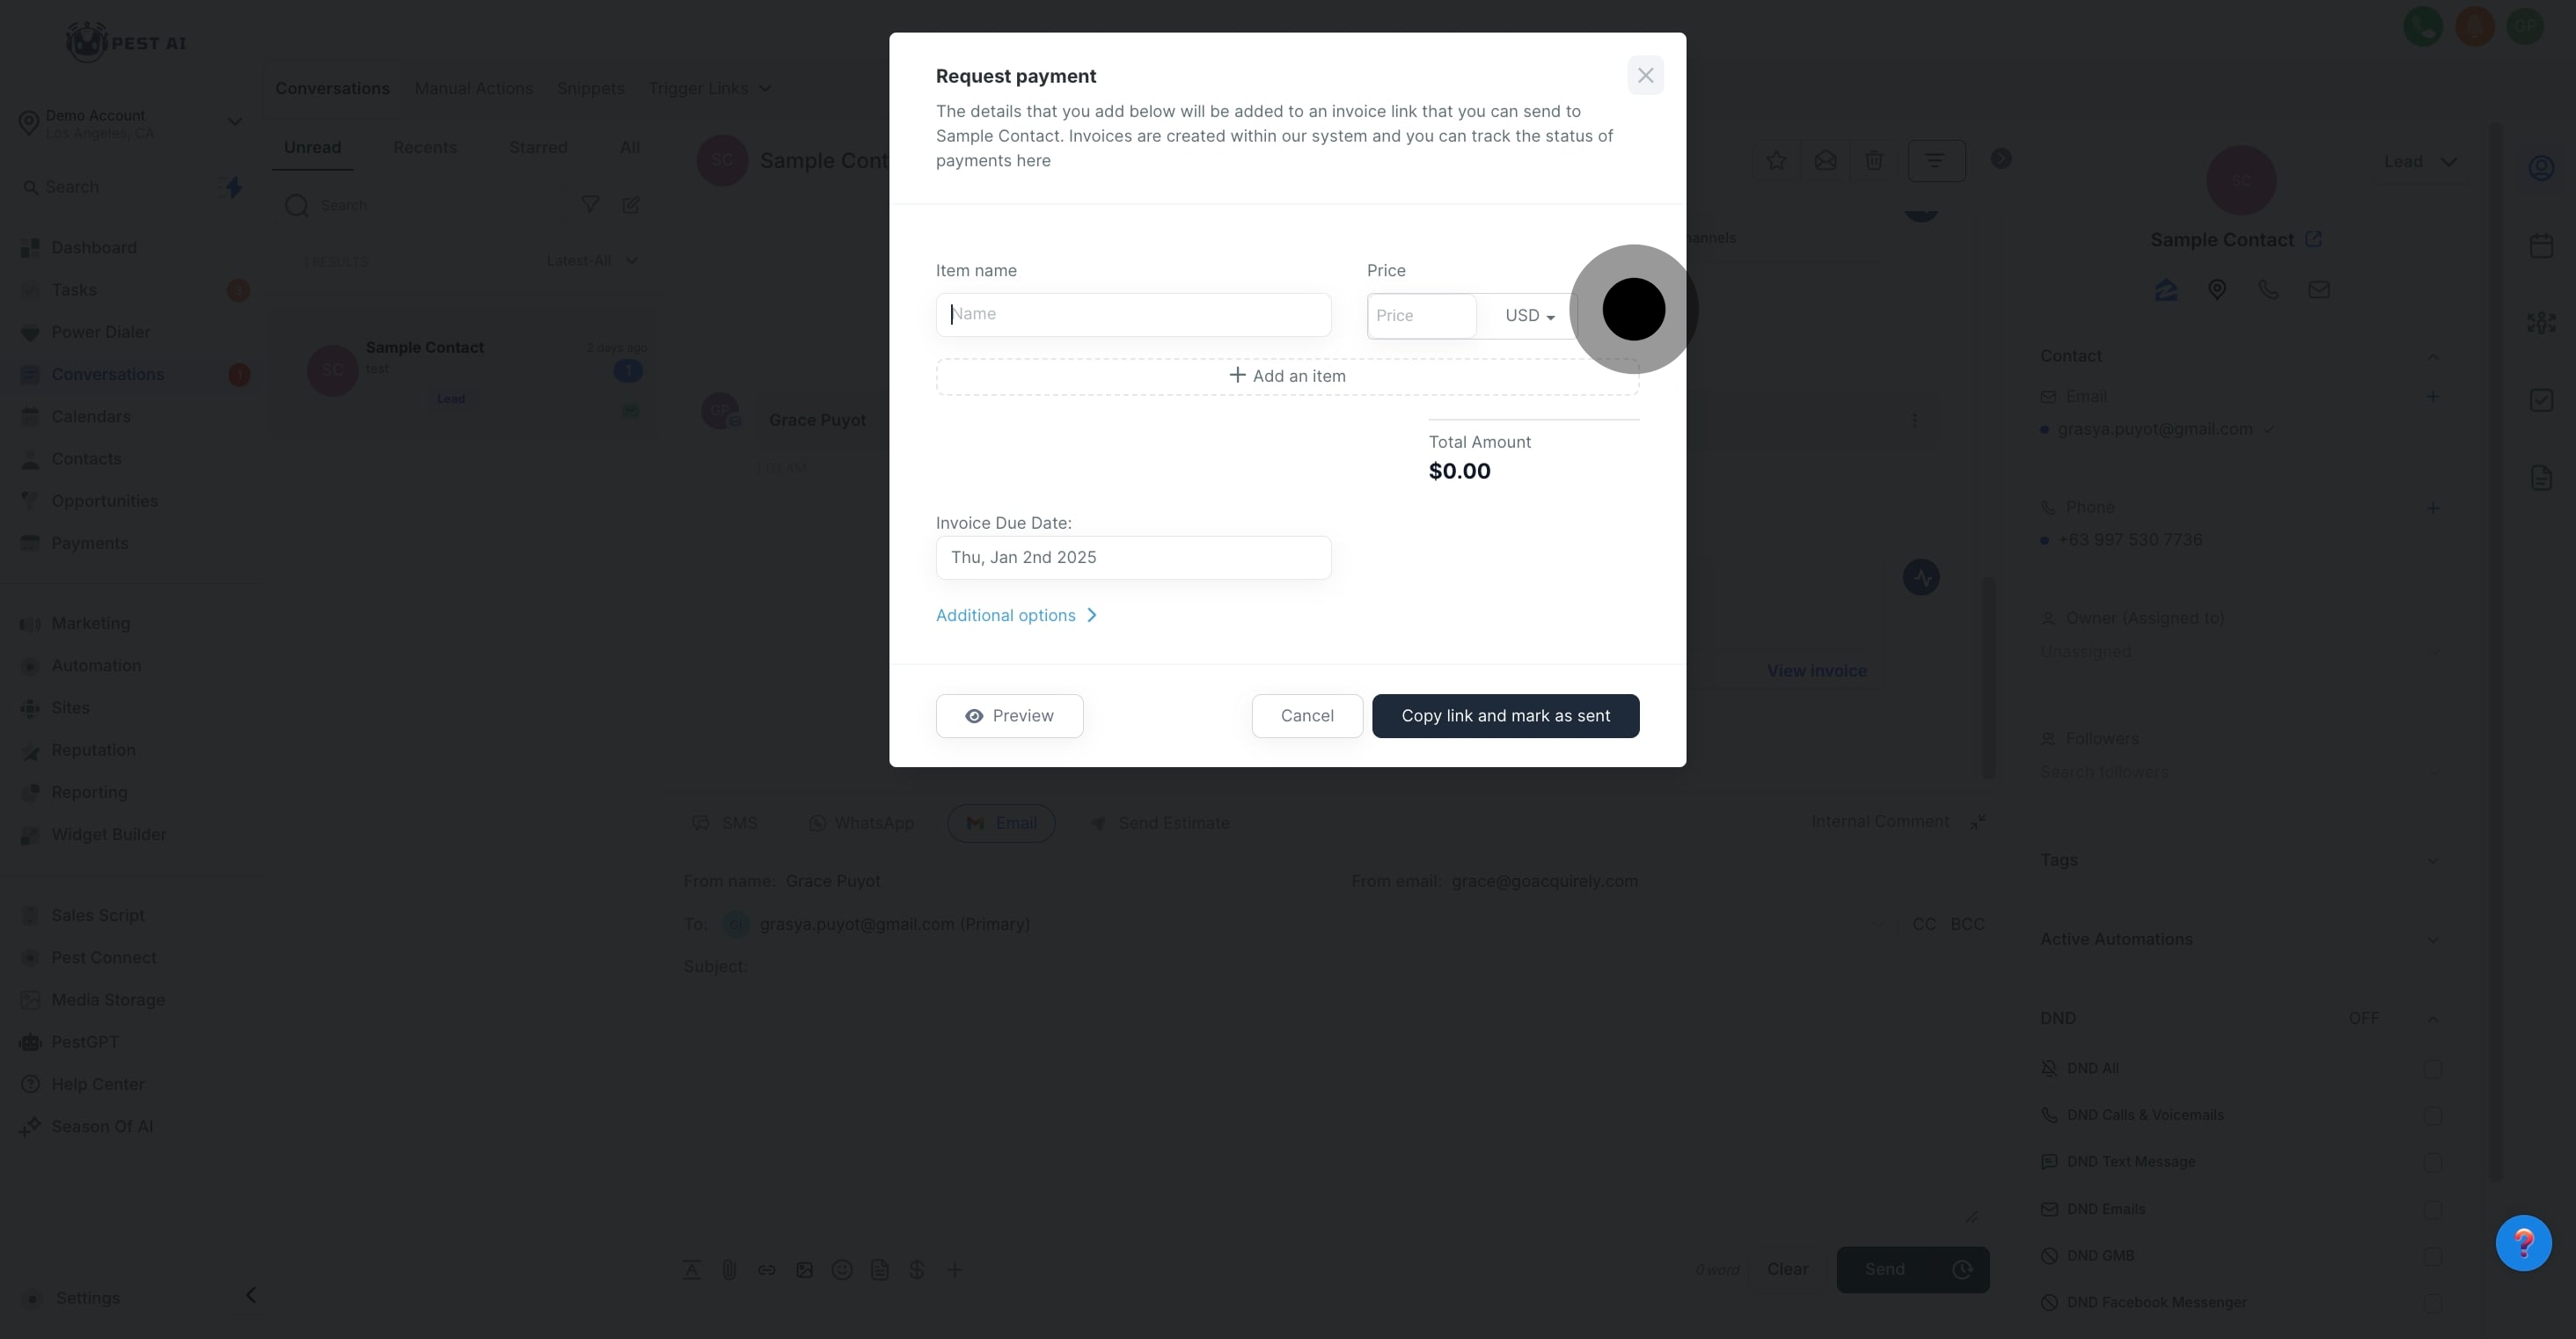
To add more items, click on 'add item' and repeat the previous steps for each new product or service.

Double-check the total amount displayed to confirm that it reflects the correct total for the products or services provided.
Define the due date for the payment, which communicates to the client when the payment is expected.
Click on “Additional information” for more detailed options, such as adding payment terms or other relevant notes to the invoice.
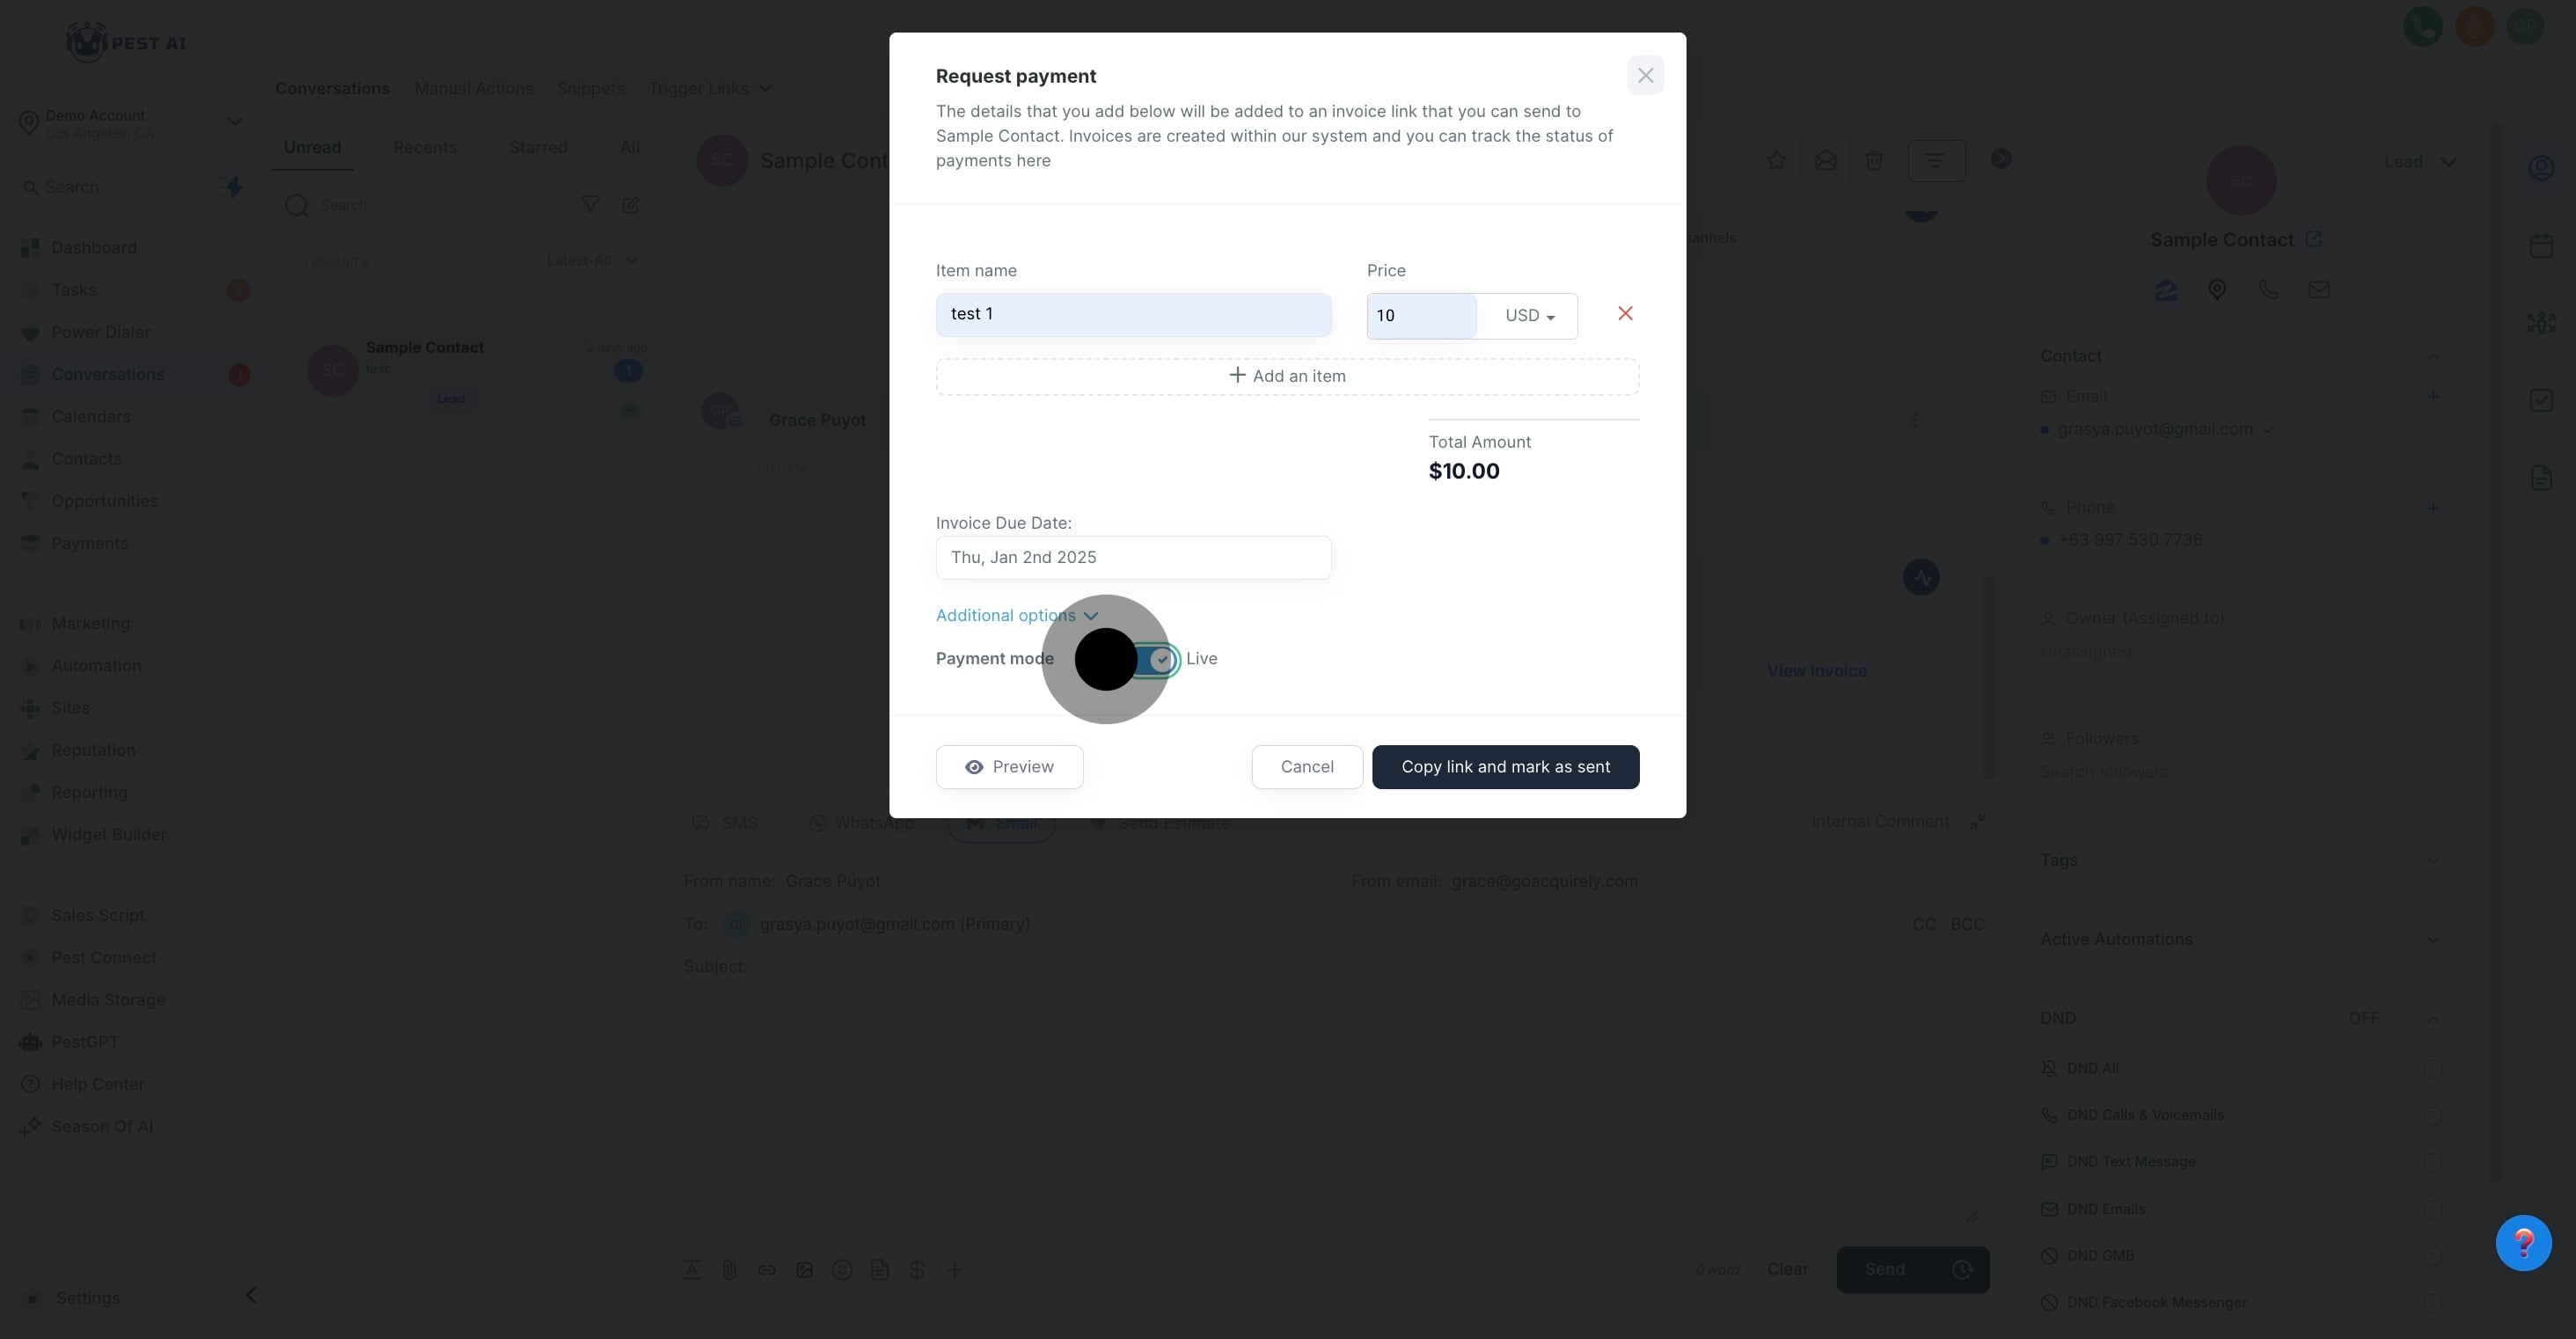
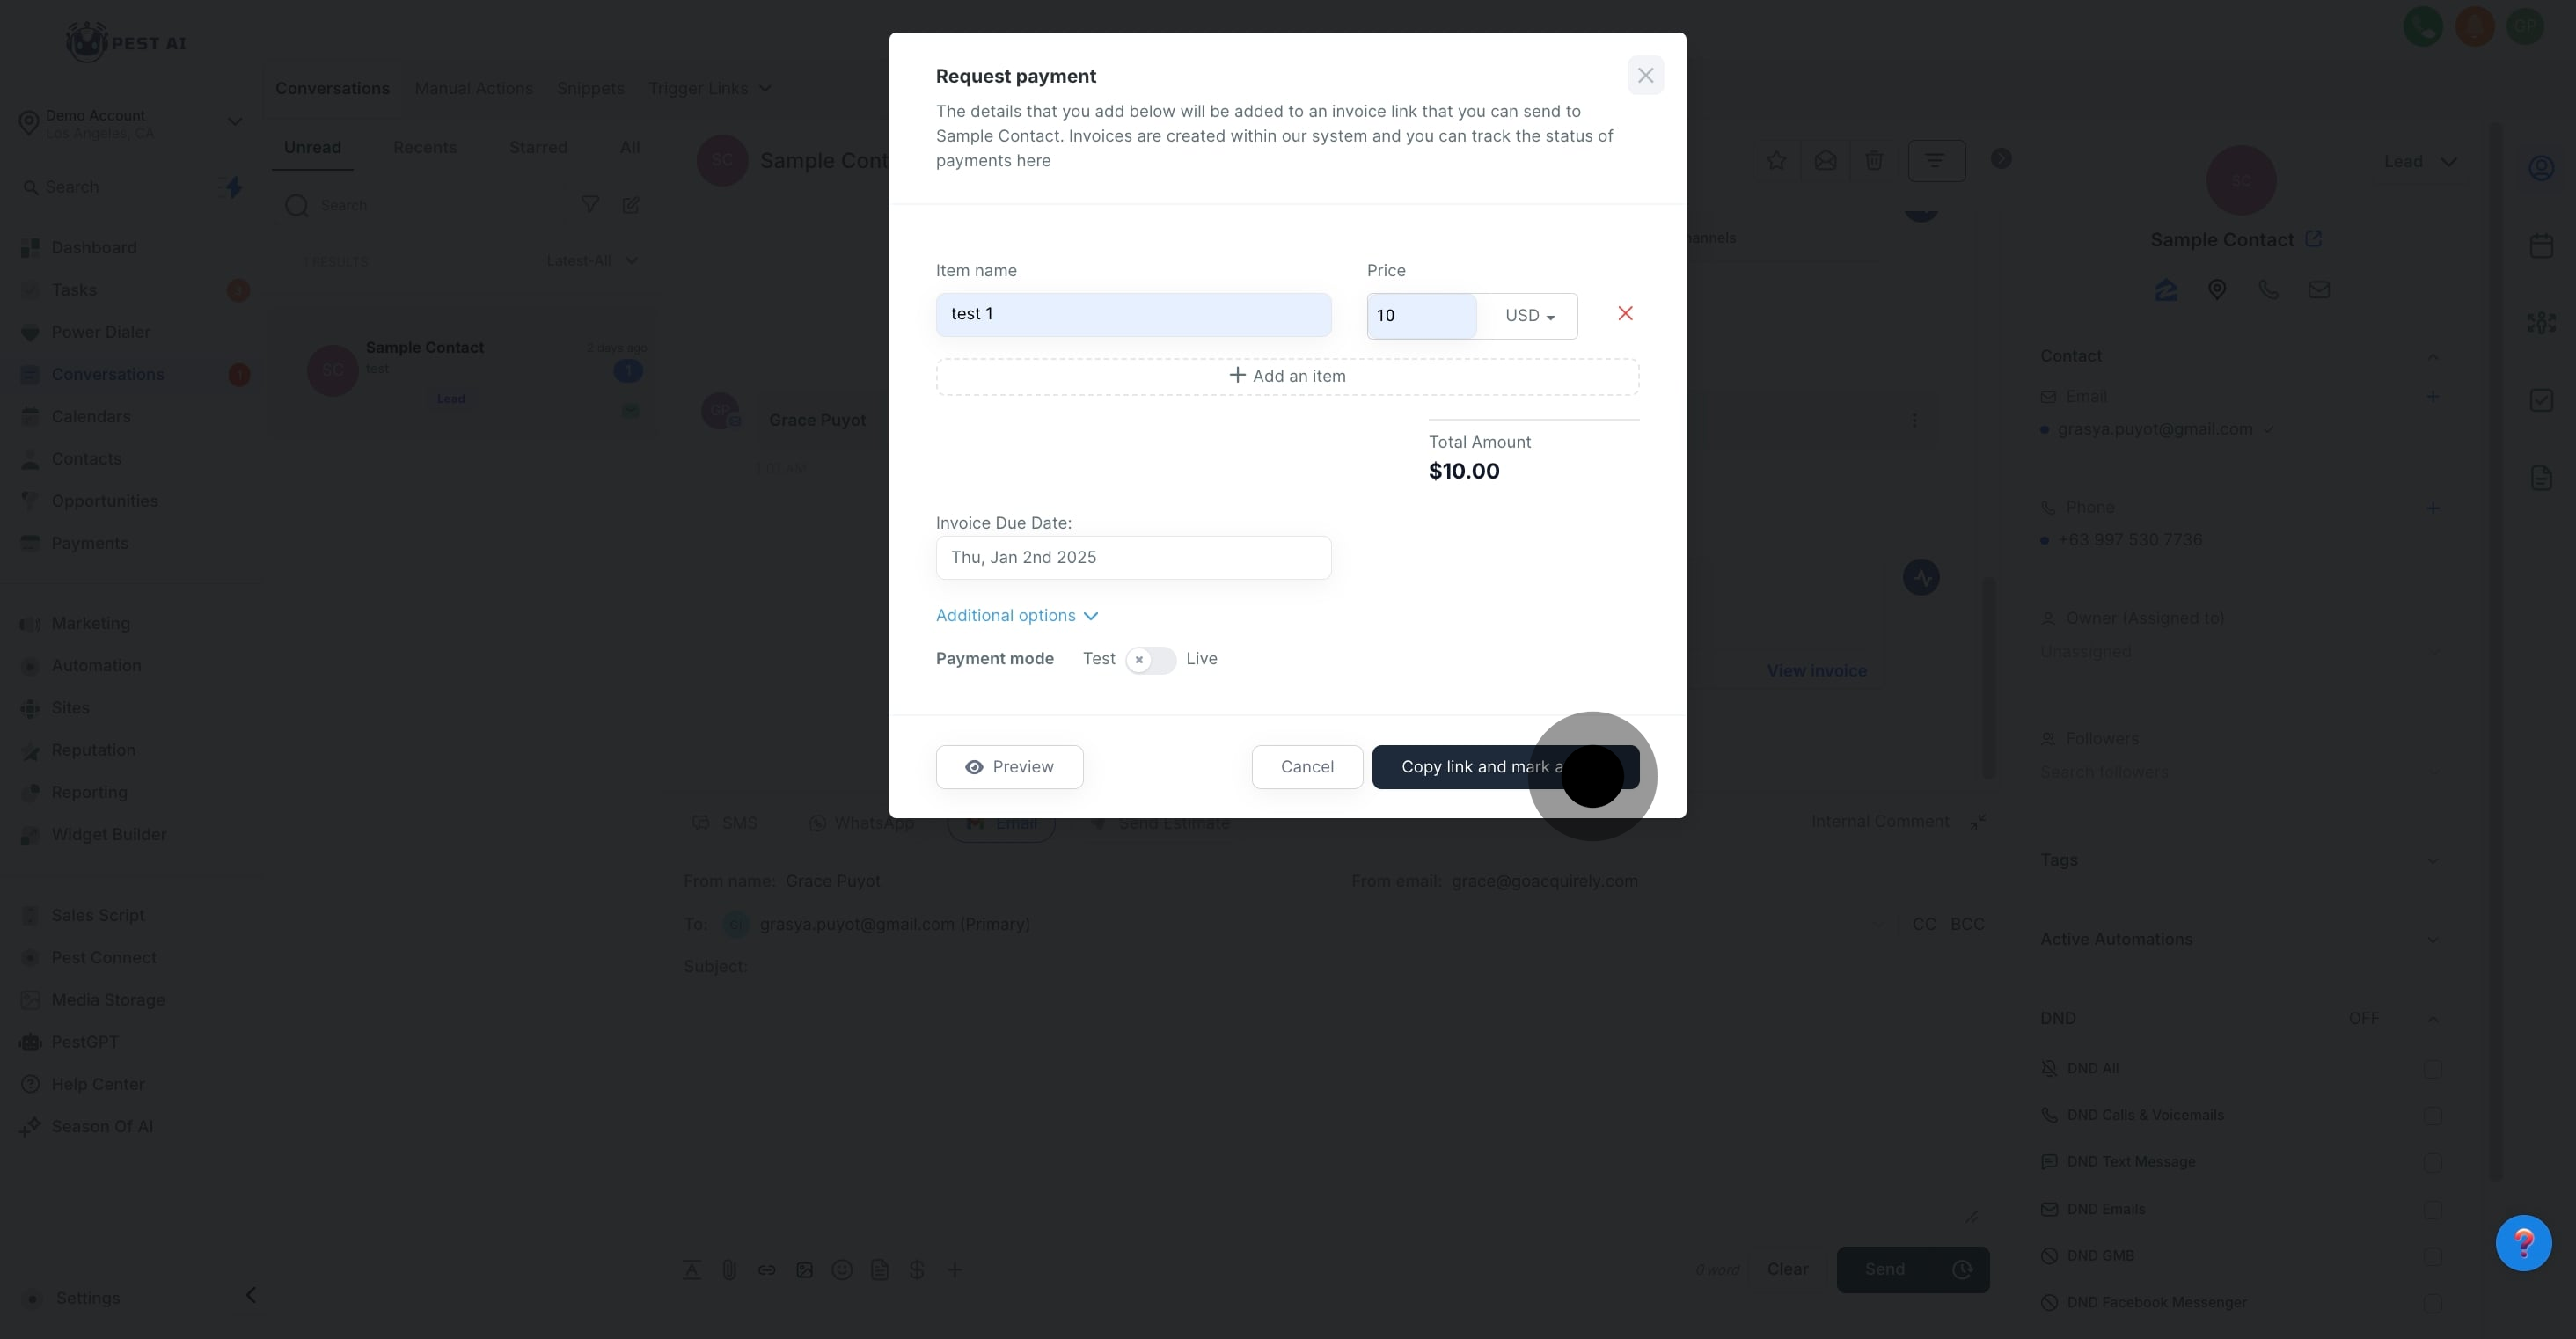
Choose the preferred payment mode that the client can use to fulfill the transaction, ensuring it’s one supported by Pest AI CRM.
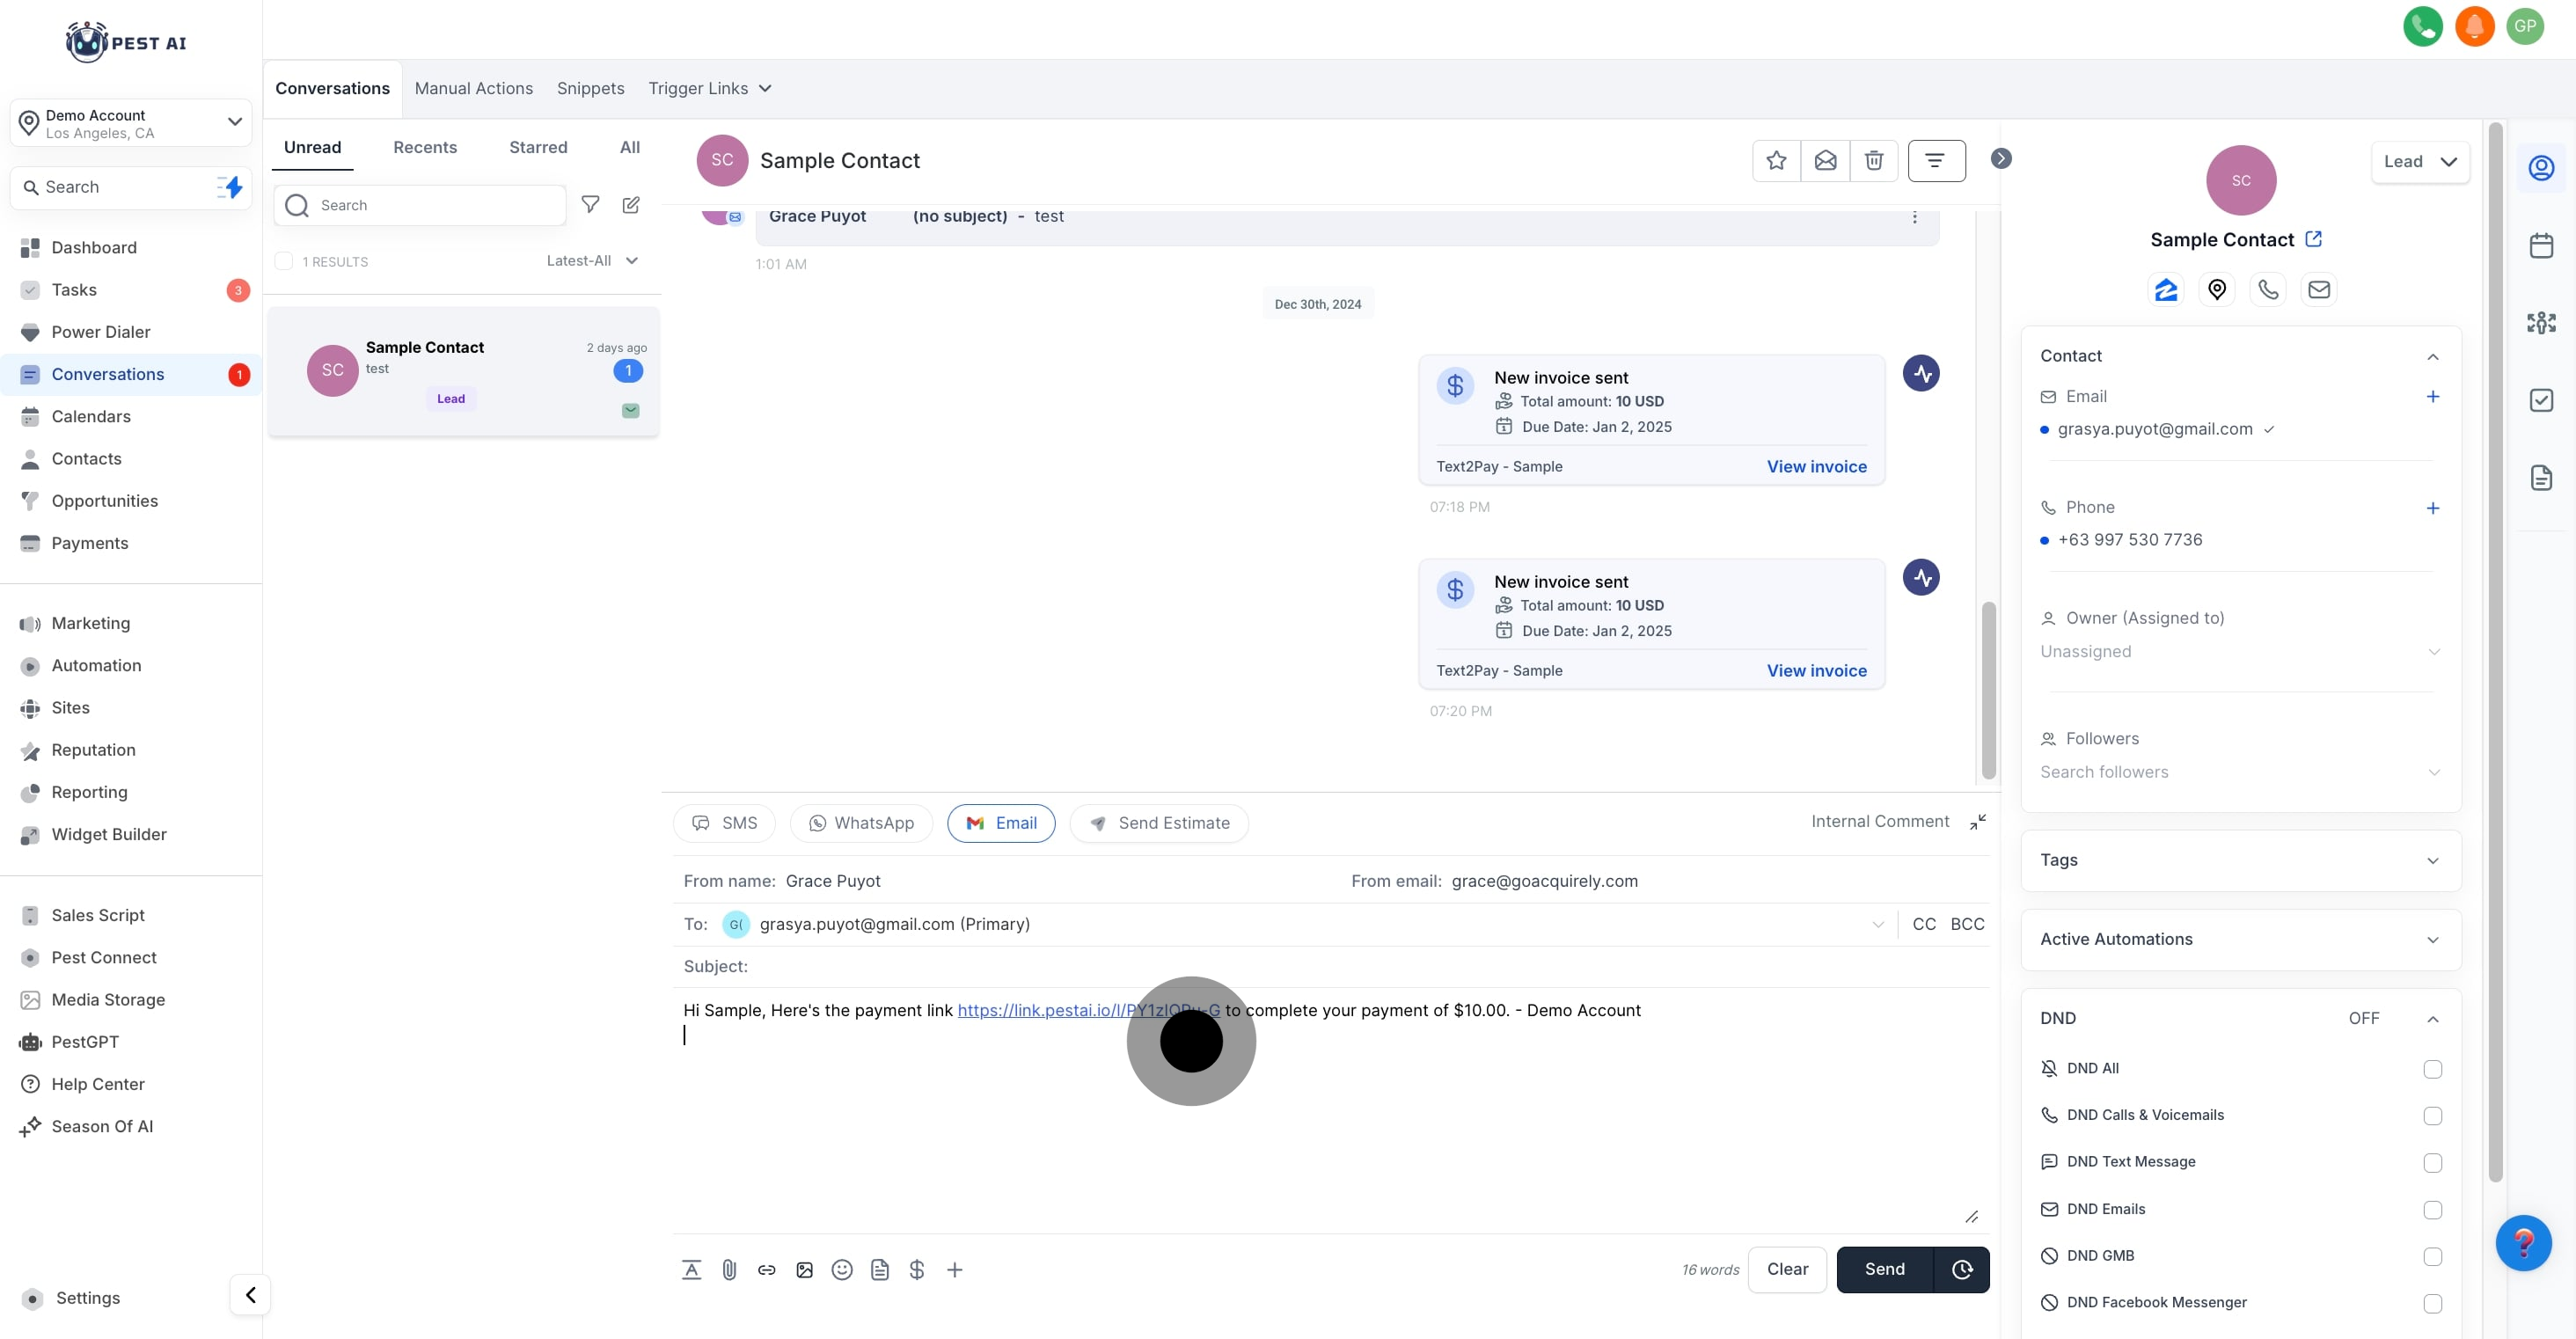
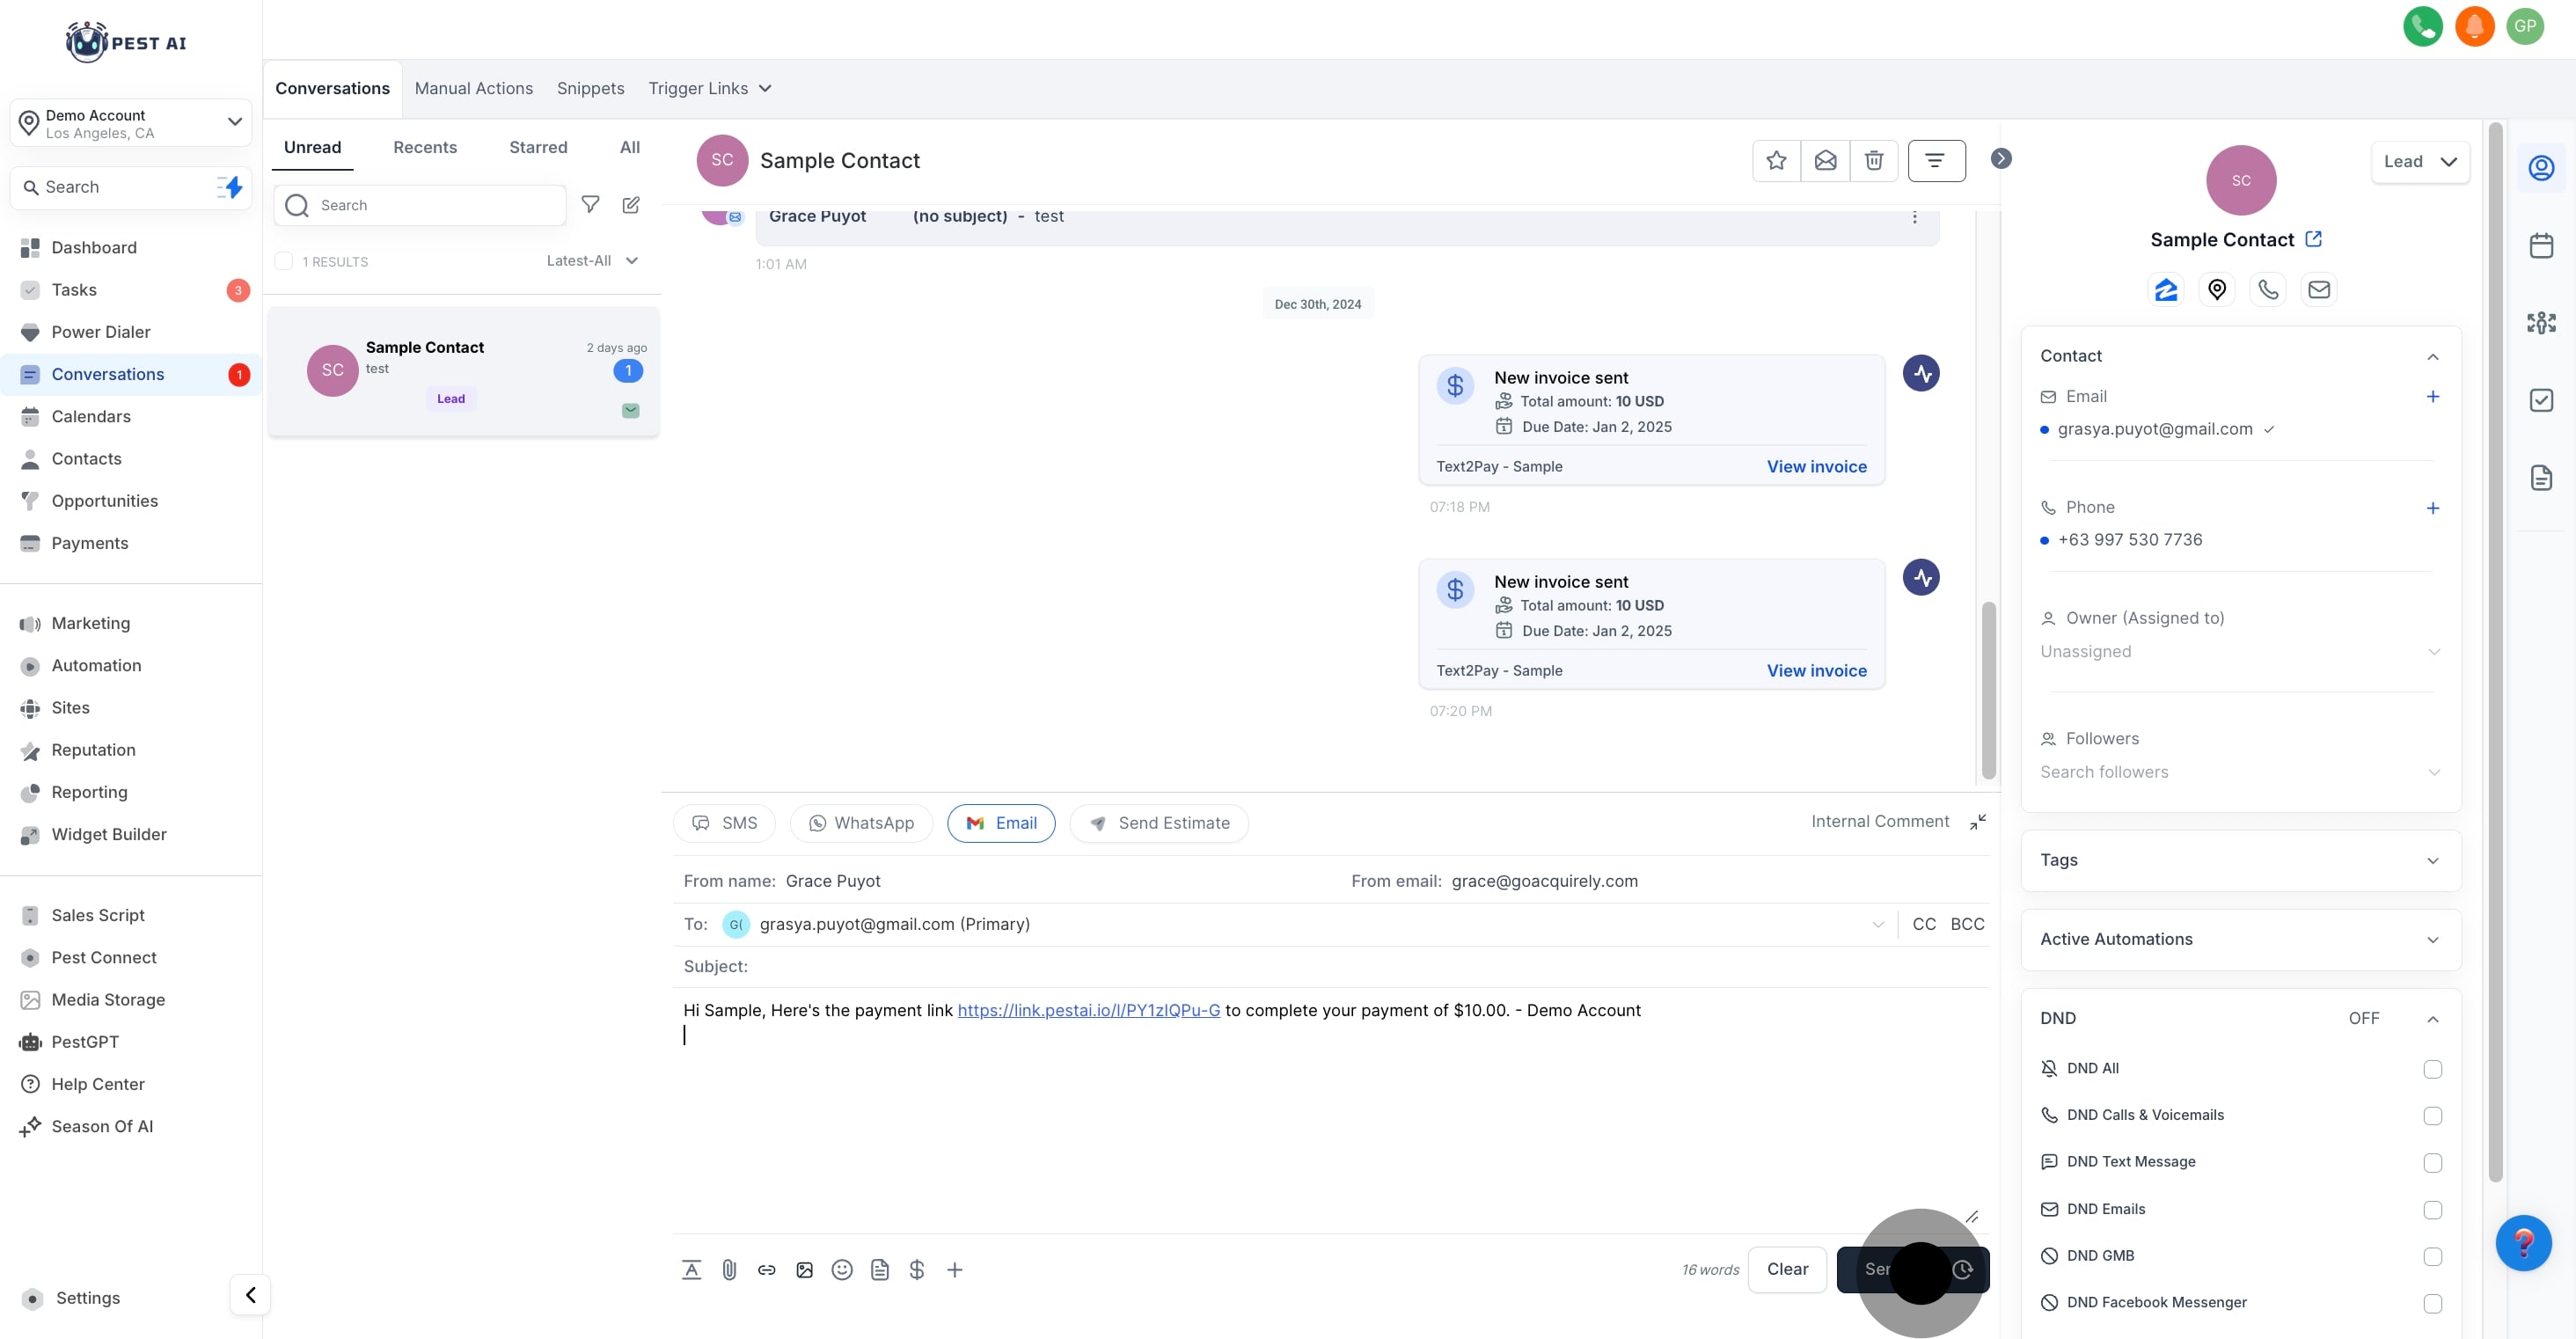
Once all details are confirmed, click the 'Copy link and mark as sent' button. This action generates a payment link and marks the invoice as dispatched in your CRM system.
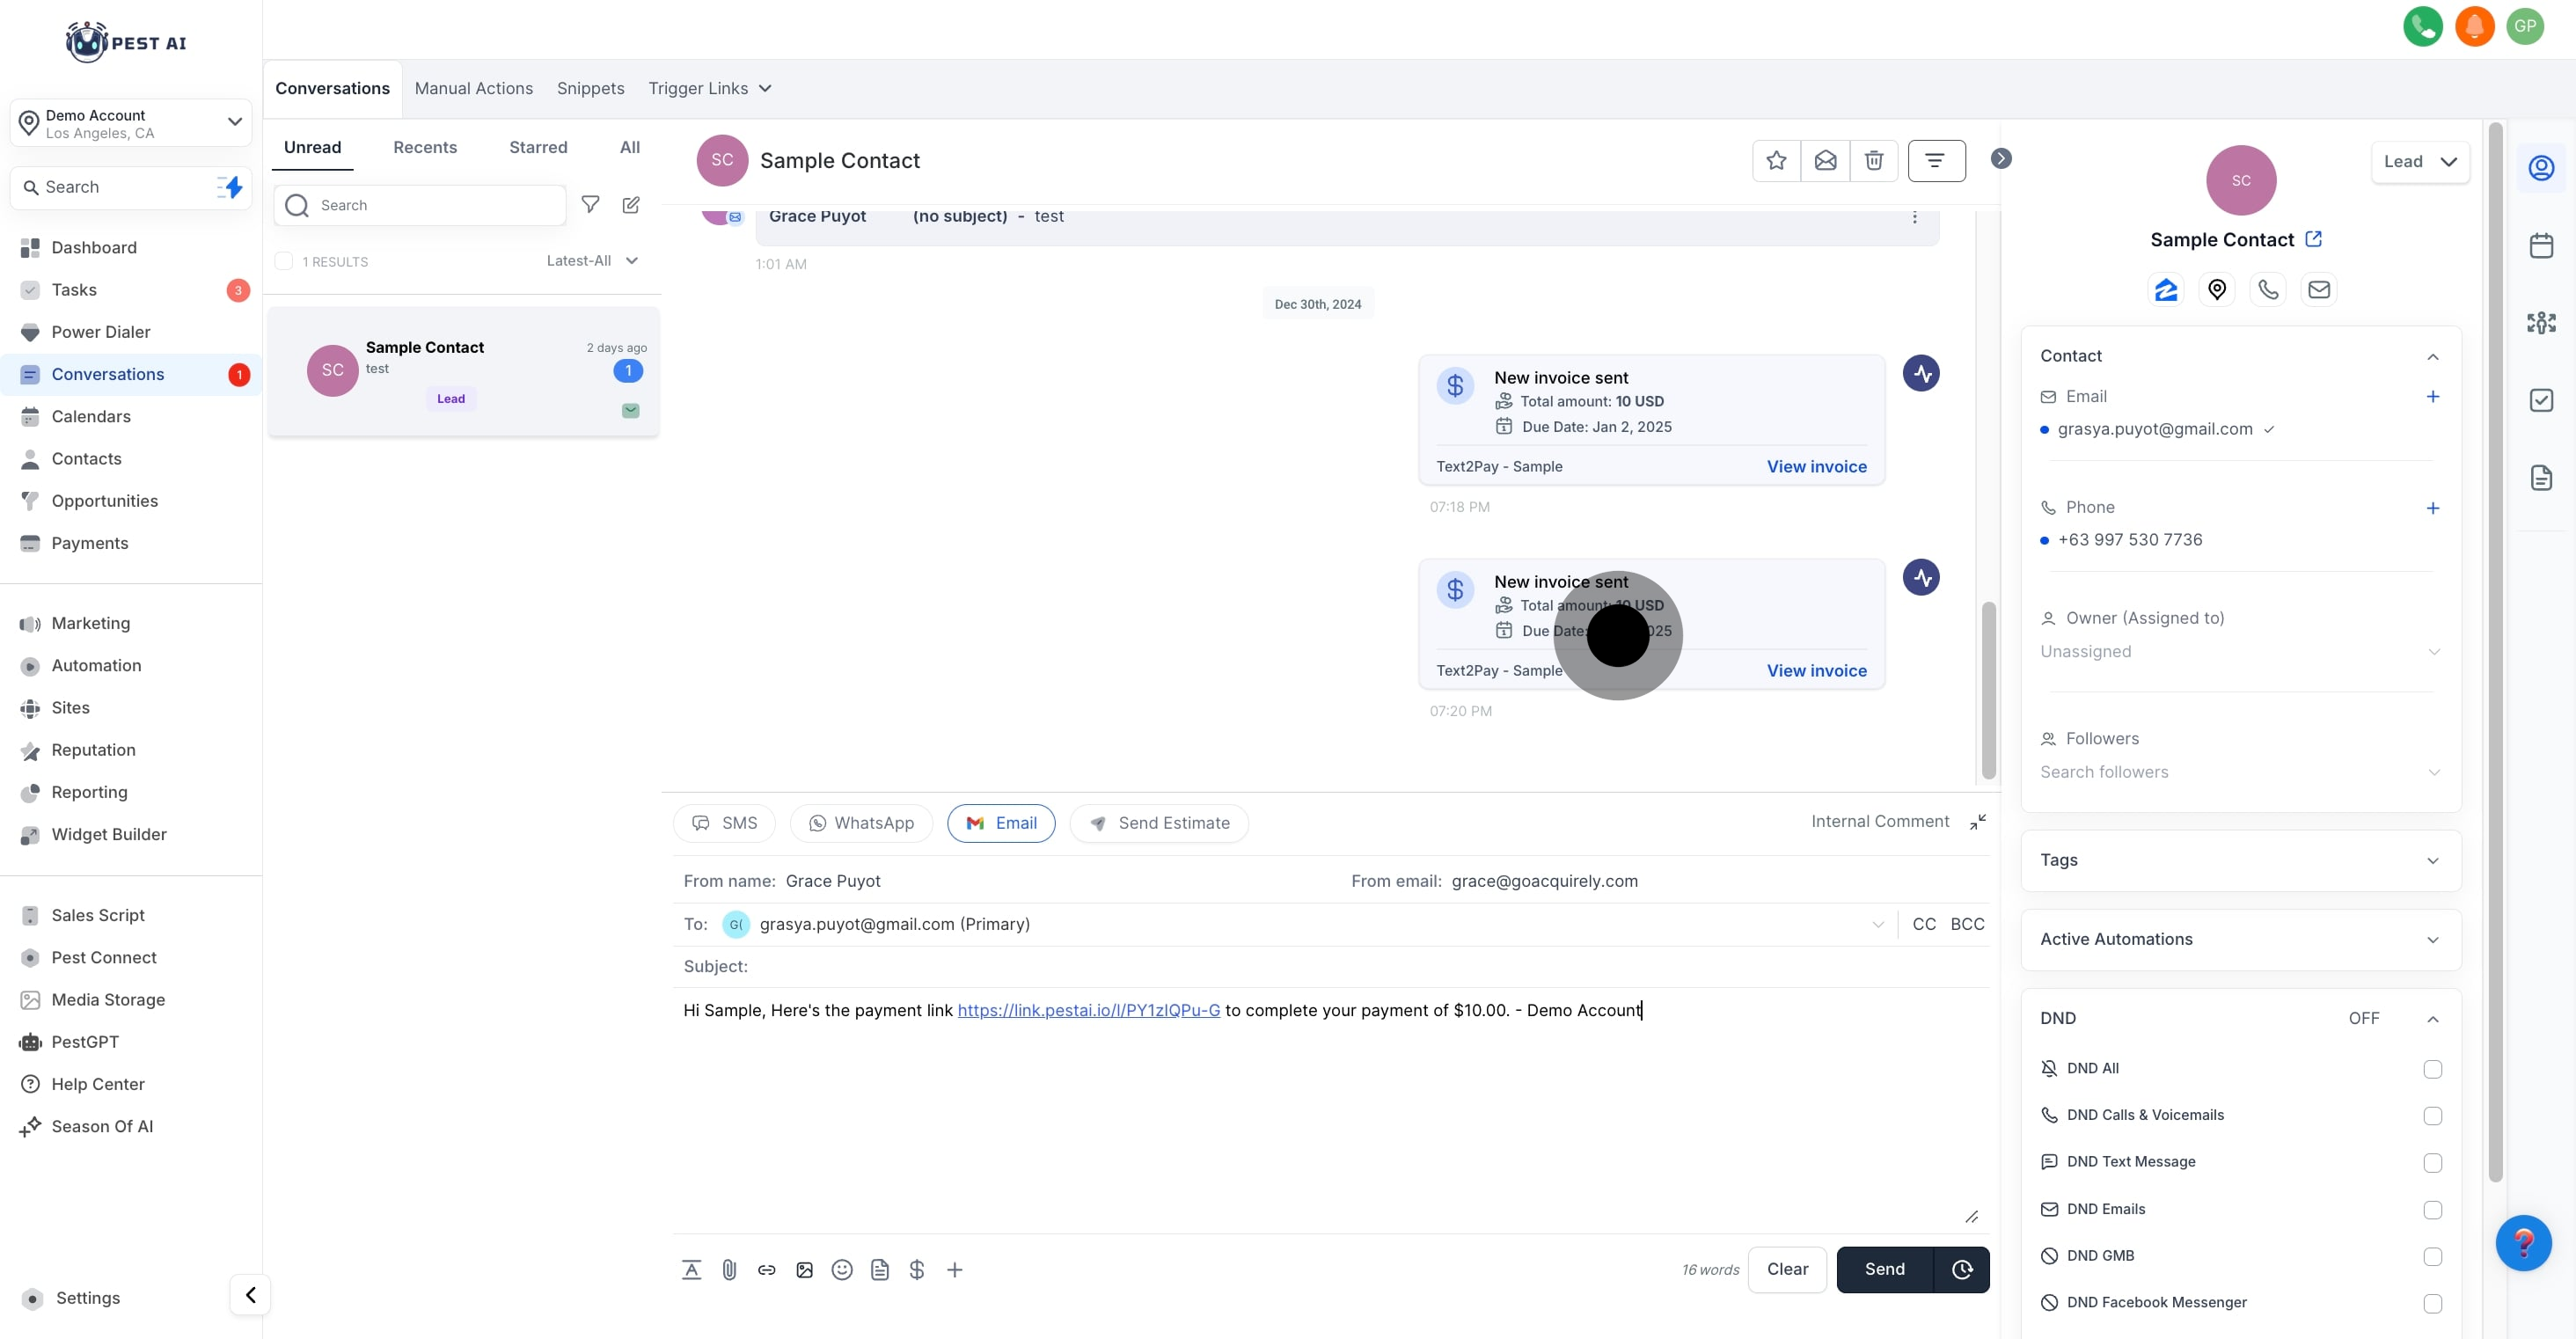
A pre-written email template with the payment request will automatically populate based on the invoice details. Thoroughly review the email to ensure all the details are accurate and reflect the agreed terms.