Step-by-Step Guide:
### Step 1: Set Up Your Webchat Widget
1. Navigate to Sites > Chat Widget
- Go to the Sites section and select Chat Widget.
- Create your chat widget and customize any features you wish.
- Note: Check out our separate tutorials on the Chat Widget for a full customization overview.
### Step 2: Download and Install the WordPress Plugin
1. Click “Get it for WordPress”
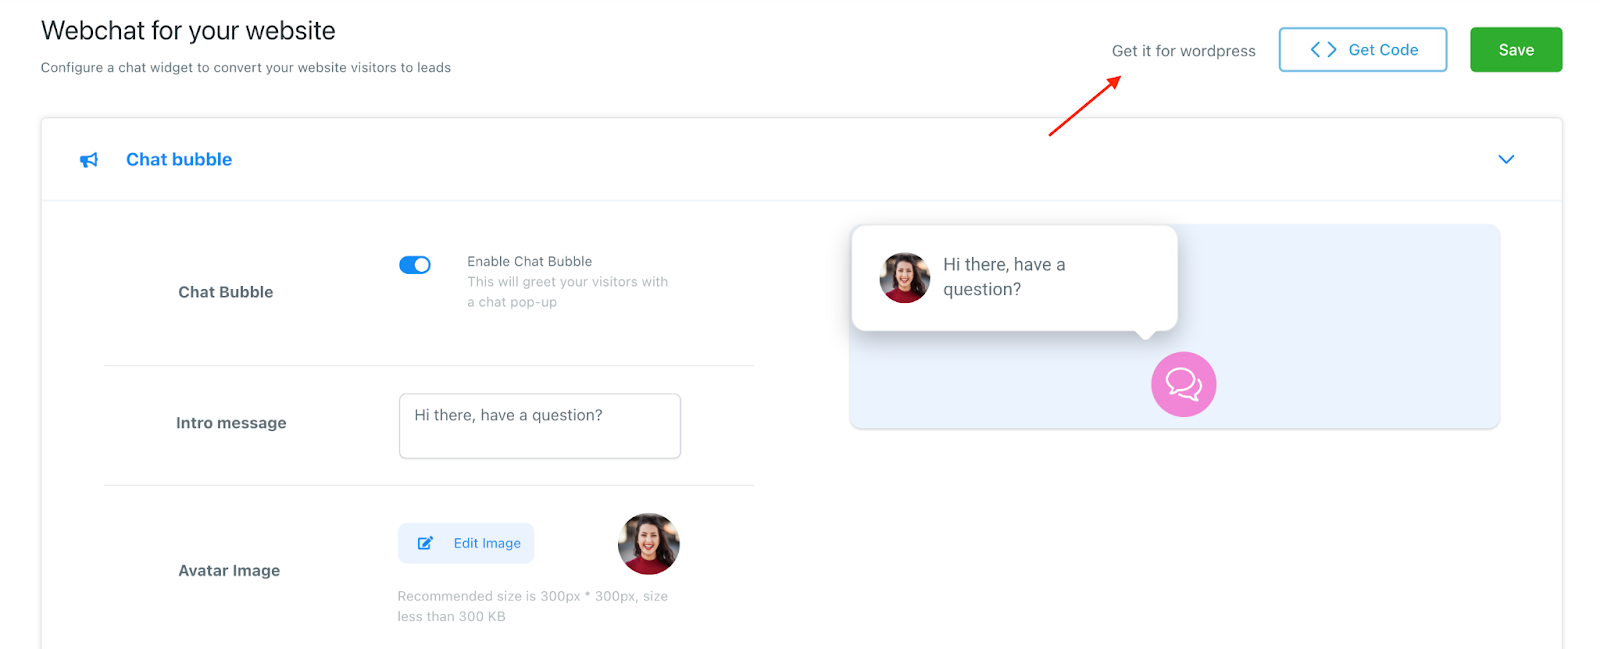
- You’ll be redirected to WordPress to download the “LeadConnector” plugin.
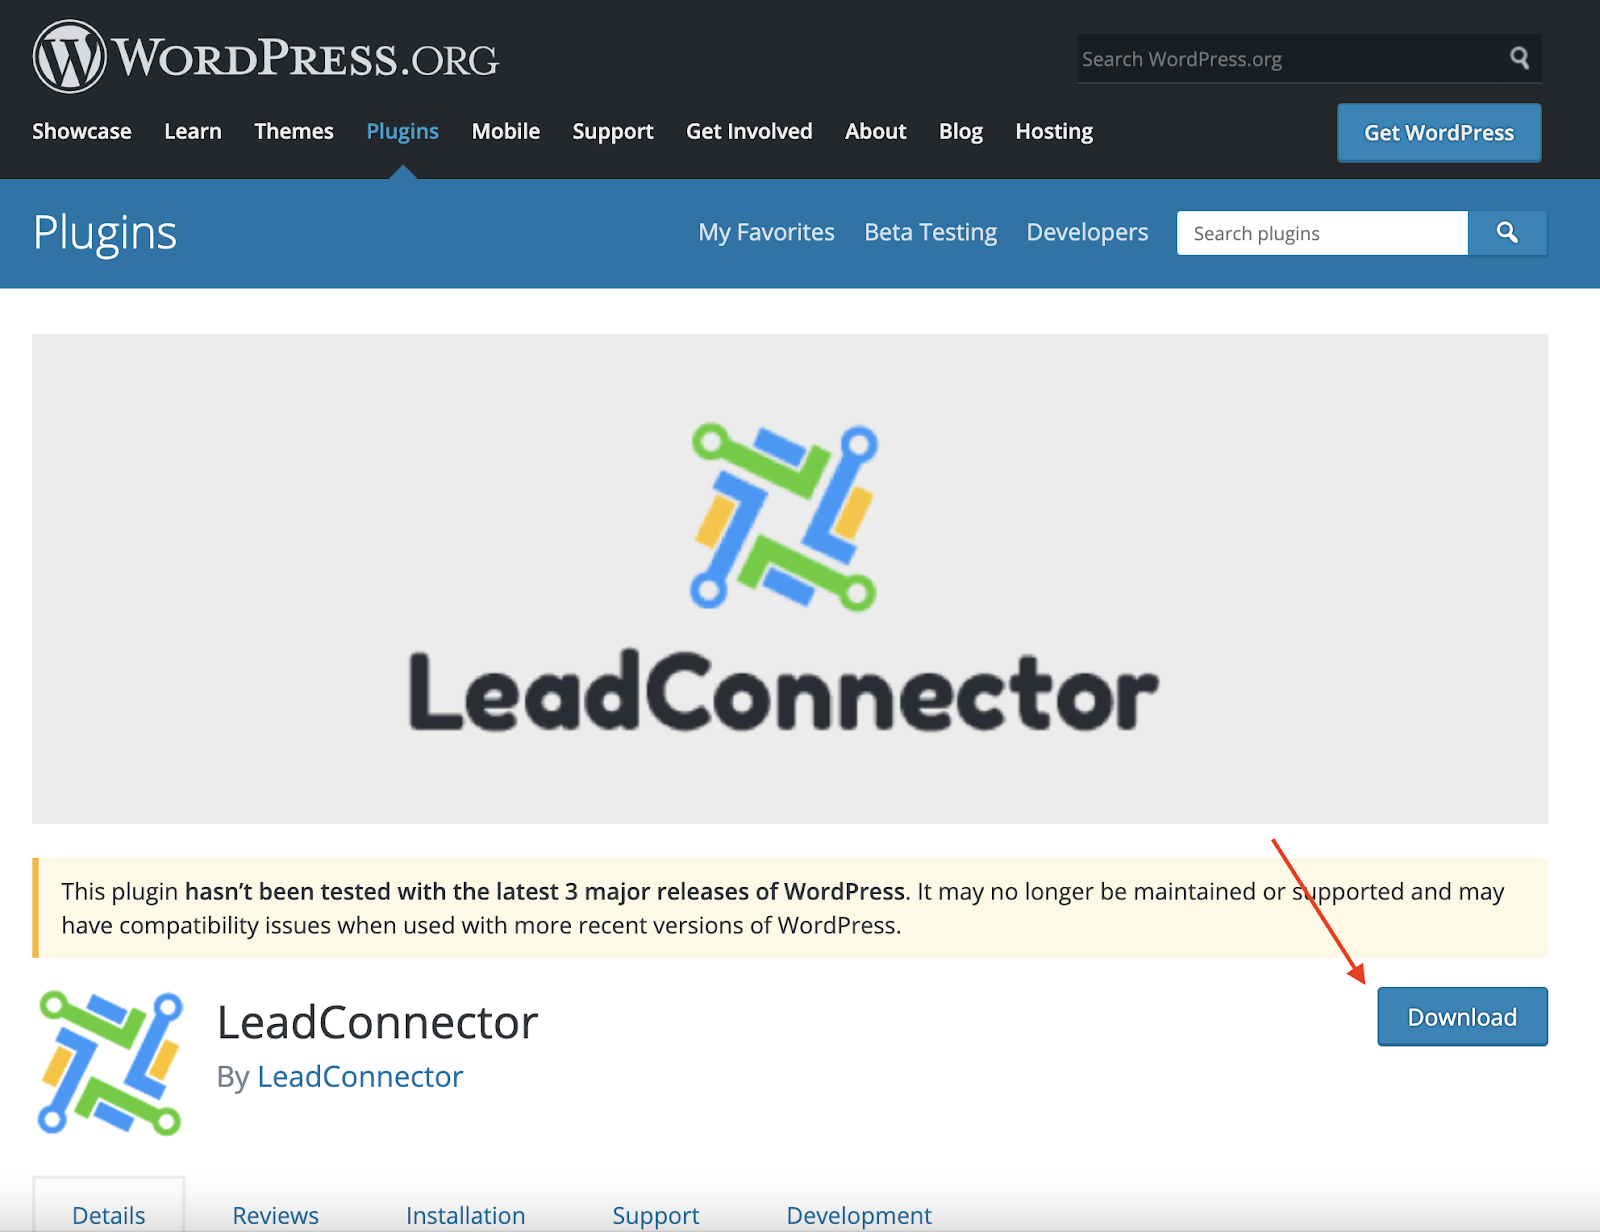
2. Install the LeadConnector Plugin
- Once installed, access LeadConnector from your WordPress dashboard menu.
- Add your API key from the system by navigating to Settings > Business Info > Company Data and copying the API key.
- Paste the API key into the LeadConnector widget settings in your WordPress dashboard.
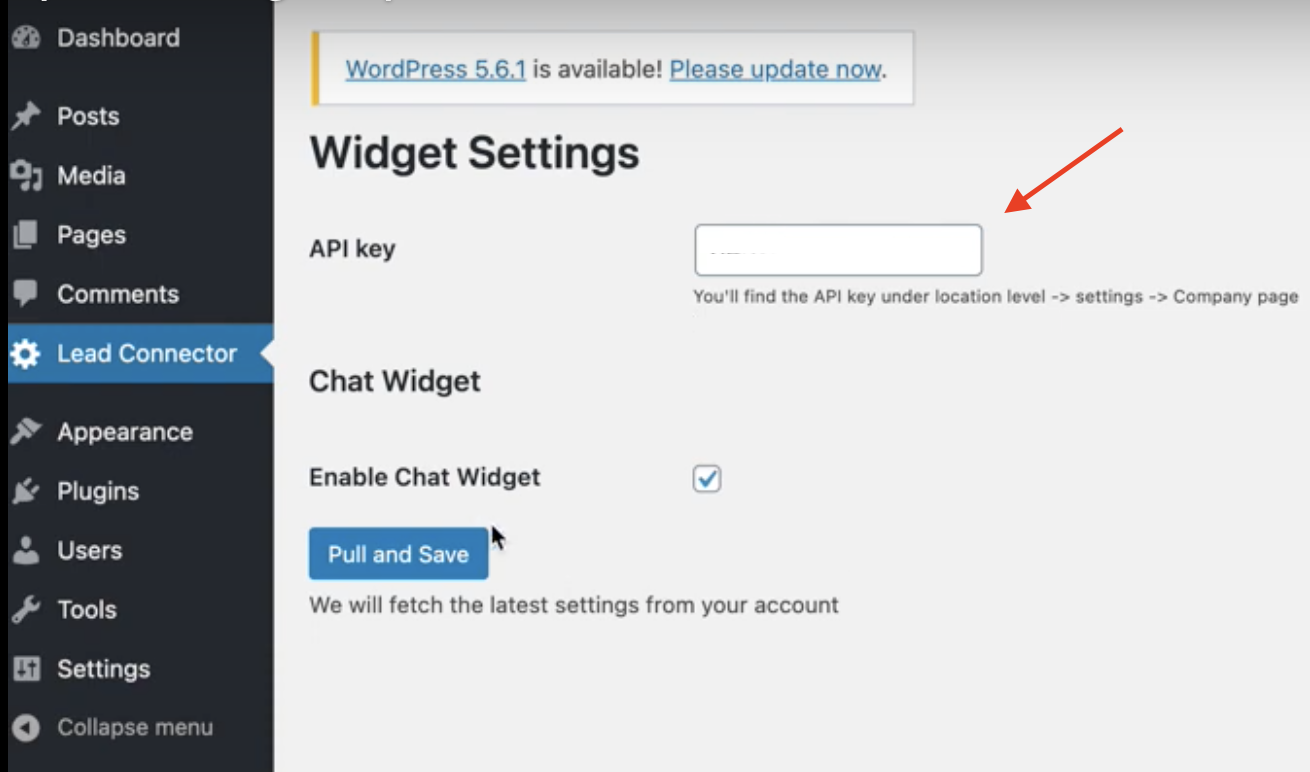
3. Save Changes
- Click “Pull and Save” to save the changes and add the widget to your WordPress site.
### Step 3: Retrieve Any Updates Using the WordPress Plugin
1. Update Your Chat Widget
- If you make any changes to your chat widget in the system, pull them through to WordPress by navigating to the LeadConnector tab in your WordPress dashboard and clicking “Pull Any Updates.”
2. Reinstall the Plugin (if needed)
- If you already have the WordPress plugin installed, you may need to uninstall and reinstall the plugin for the most updated version to run.
Steps to Remove and Reinstall the Plugin:
- Navigate to the WordPress Dashboard > Plugins.
- Under “Active,” deactivate LeadConnector.
- Go to the “Inactive” tab and click Delete to remove LeadConnector.
- Follow the steps above to reinstall it.

By following these steps, you can successfully set up and manage your chat widget on your WordPress site using the LeadConnector plugin.
