Steps for Updating Facebook Pages in CRM Integration:
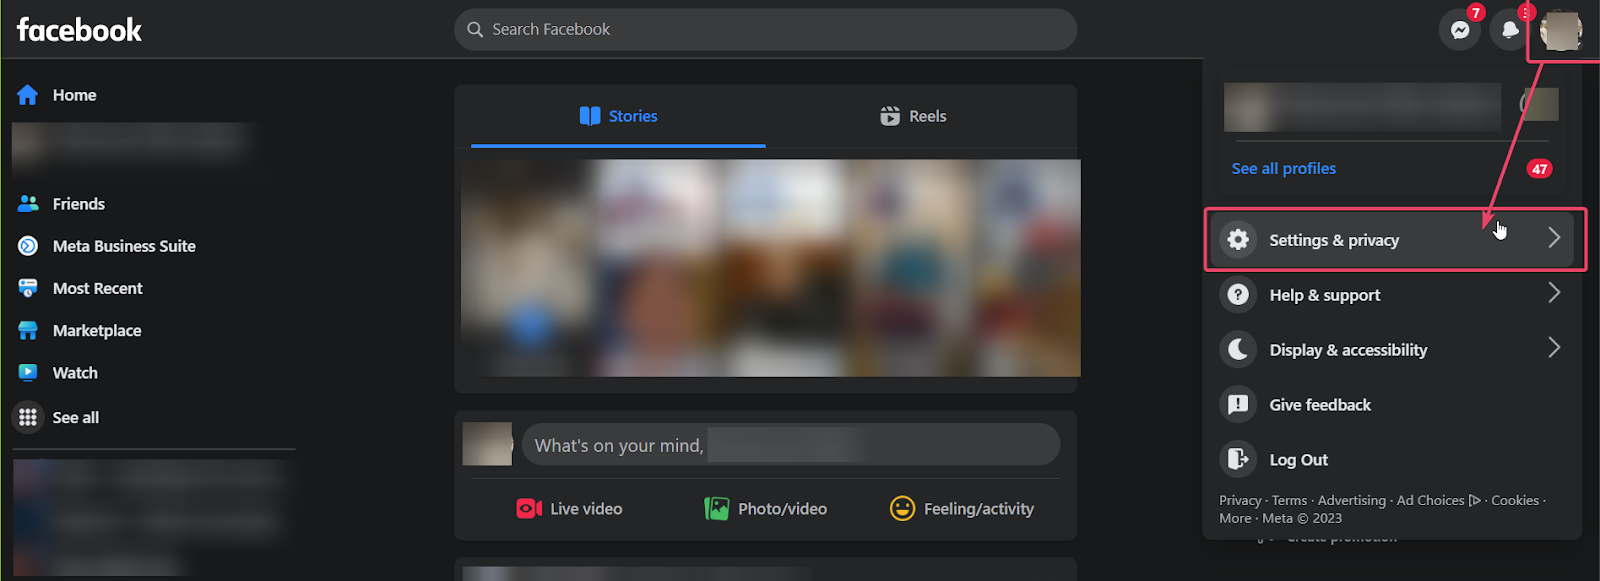
Step 1: Access Your Facebook Settings
Log into your Facebook account.
Click on the avatar icon featuring your profile picture at the top right corner of your screen.
From the dropdown menu, select "Settings and Privacy."
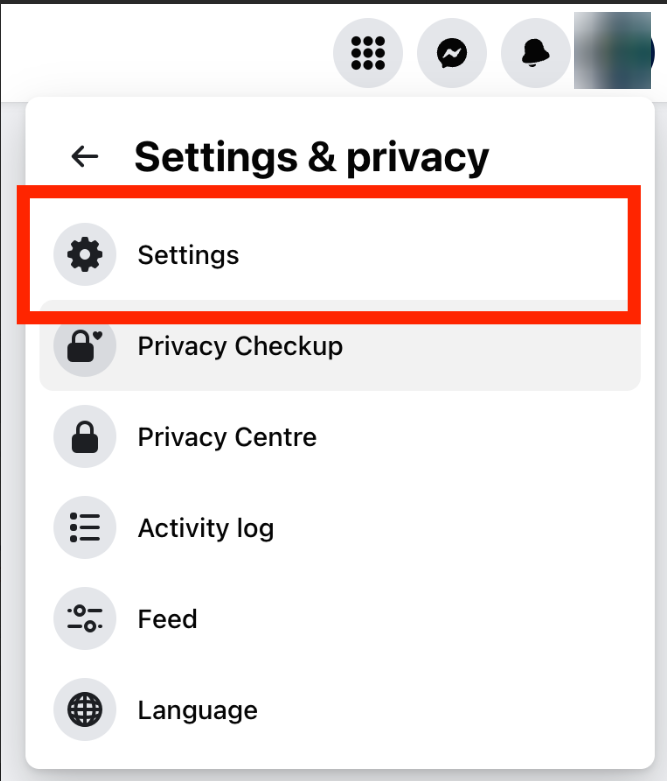
Step 2: Navigate to Business Integrations
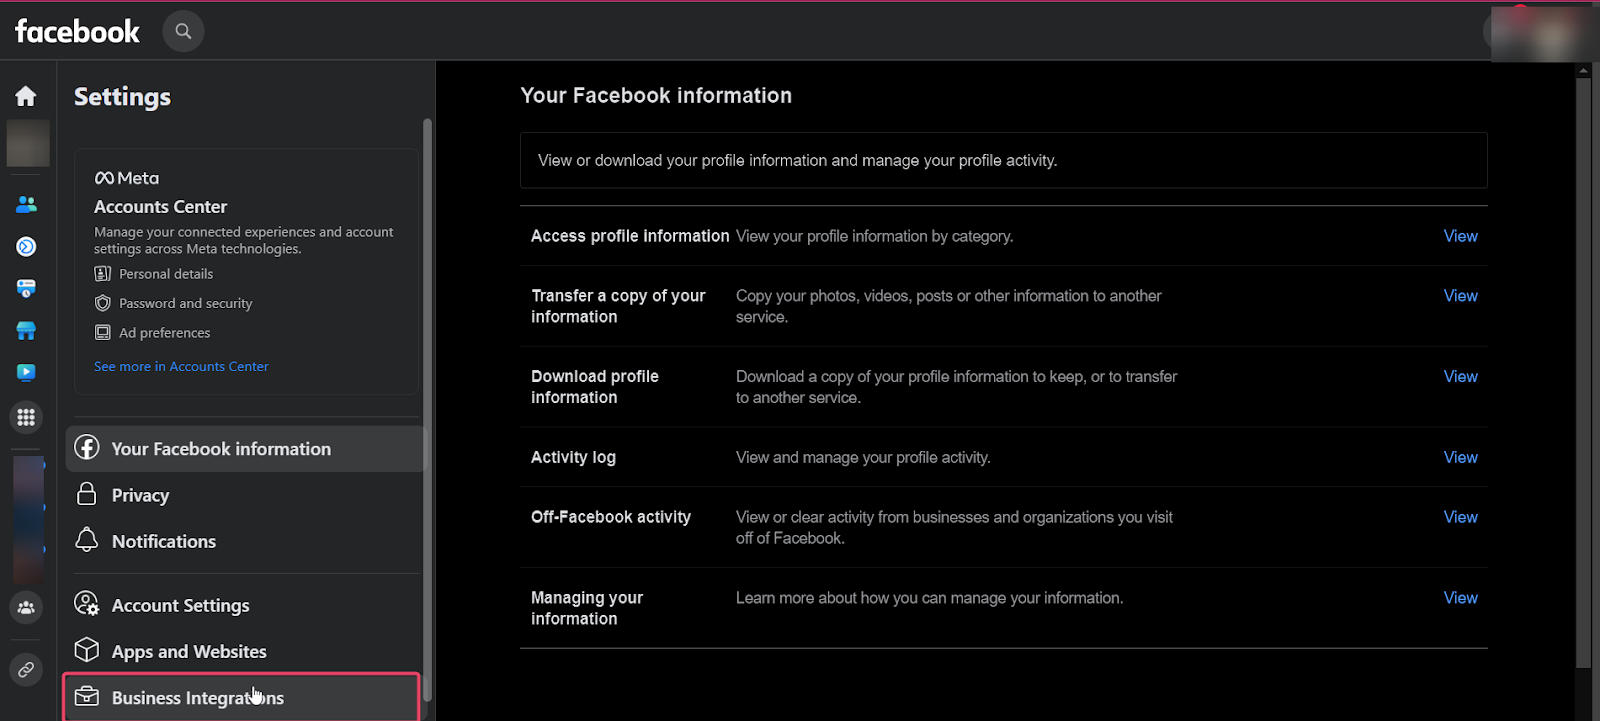
Within the "Settings and Privacy" menu, click on "Settings."
From the left-hand sidebar, locate and select "Business Integrations."
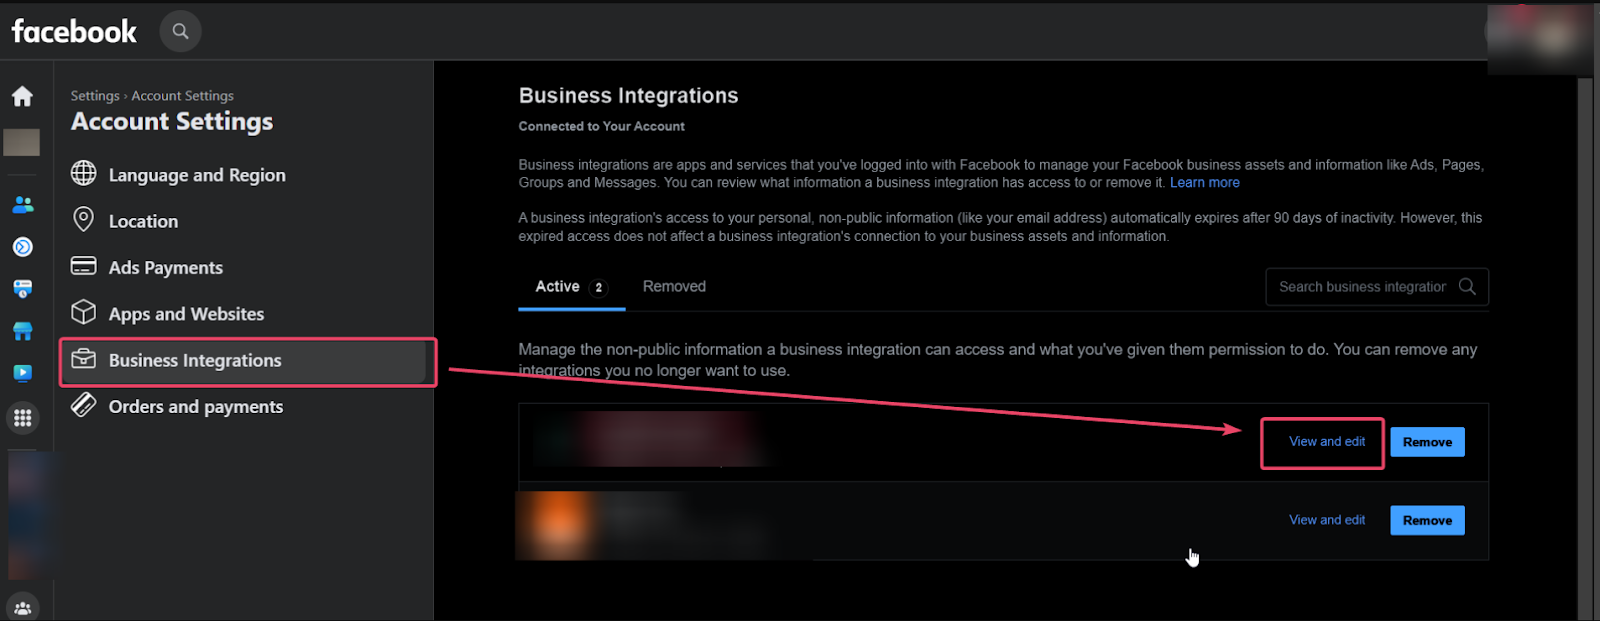
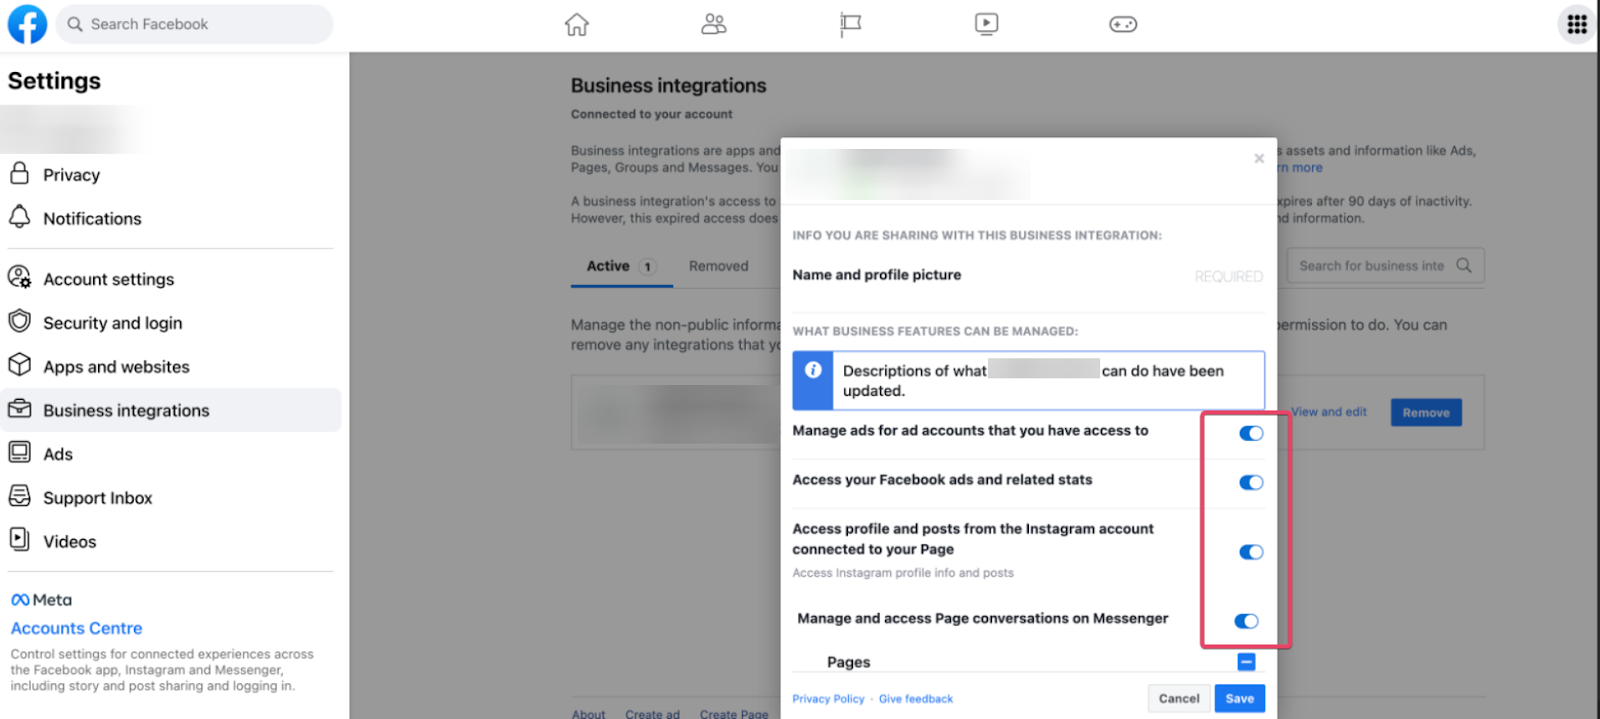
Step 3: Modify App Settings
Find the app listed among your integrations.
Next to it, you will see an option that says "view and edit." Click on it.
Step 4: Enable All Available Options
Scroll through all the available toggles and make sure each one is enabled.
Turn them on if they aren't.
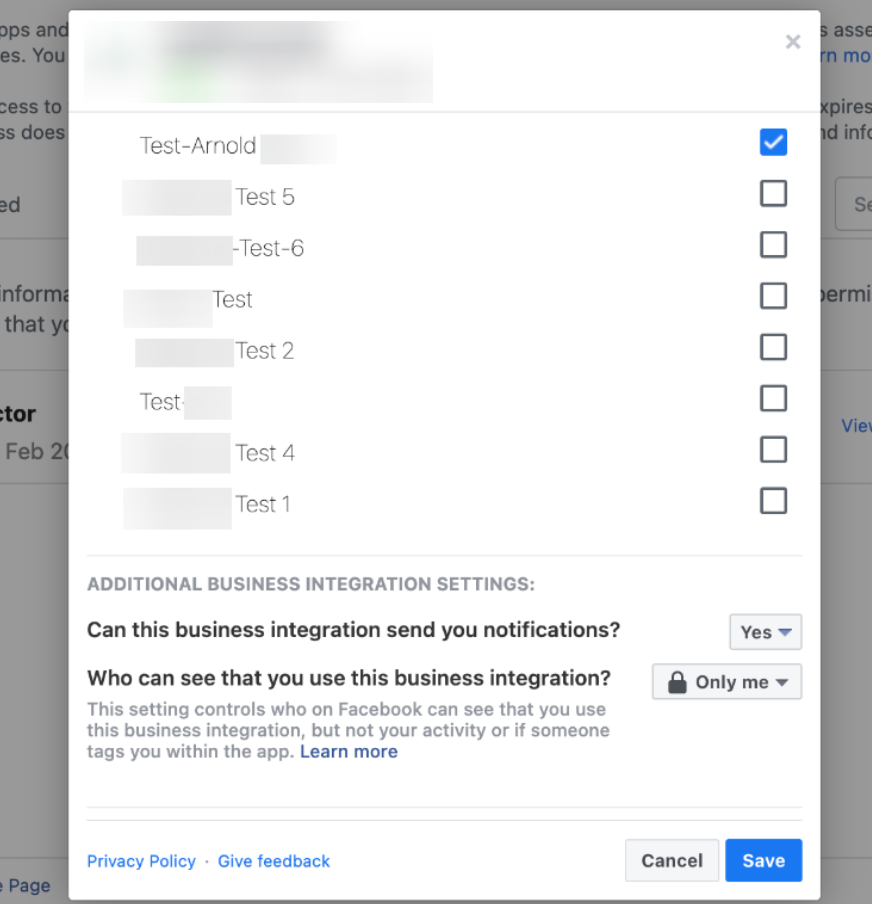
Note: Only the individual who initially integrated the Facebook page and is the admin of that page can view that specific page in the dropdown menu. Other Facebook pages you need to be an admin of won't be visible.
Step 5: Select Applicable Pages for Your Account
You will see a list of your Facebook pages with checkboxes beside them.
Check all the pages you need to link with your account.
Step 6: Save Your Changes
After making the appropriate selections, click "Save" to finalize your settings.
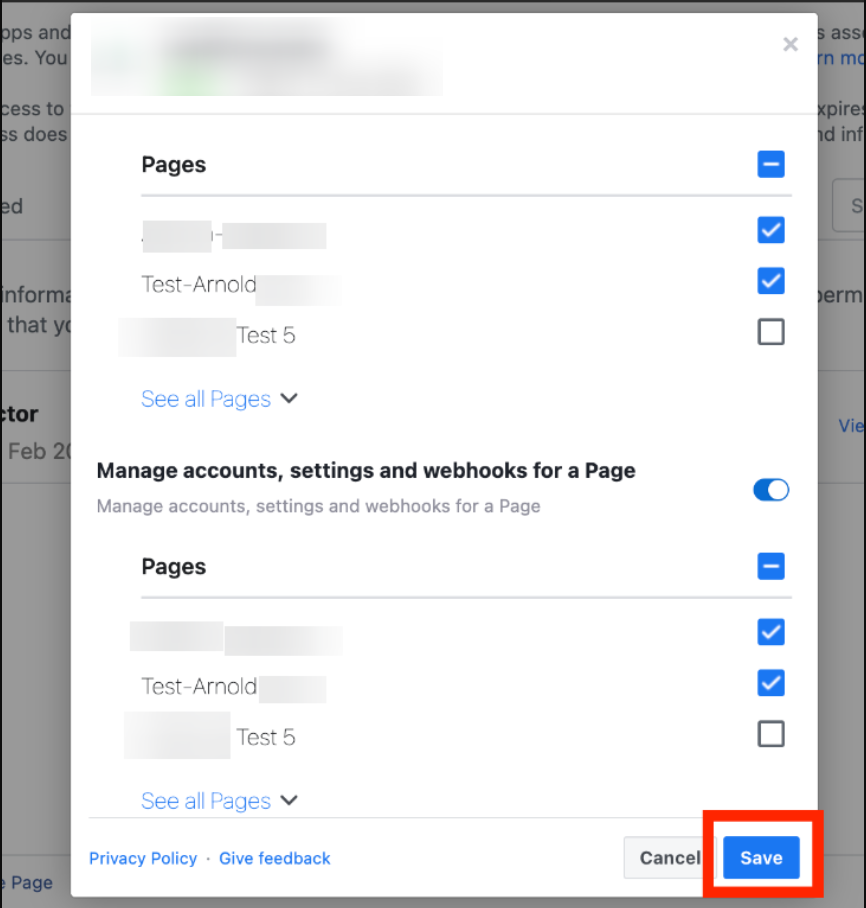
Important: If any pages are already selected, refrain from deselecting them. Doing so could disrupt their existing integration with other accounts, even if they differ from those you're currently working on.
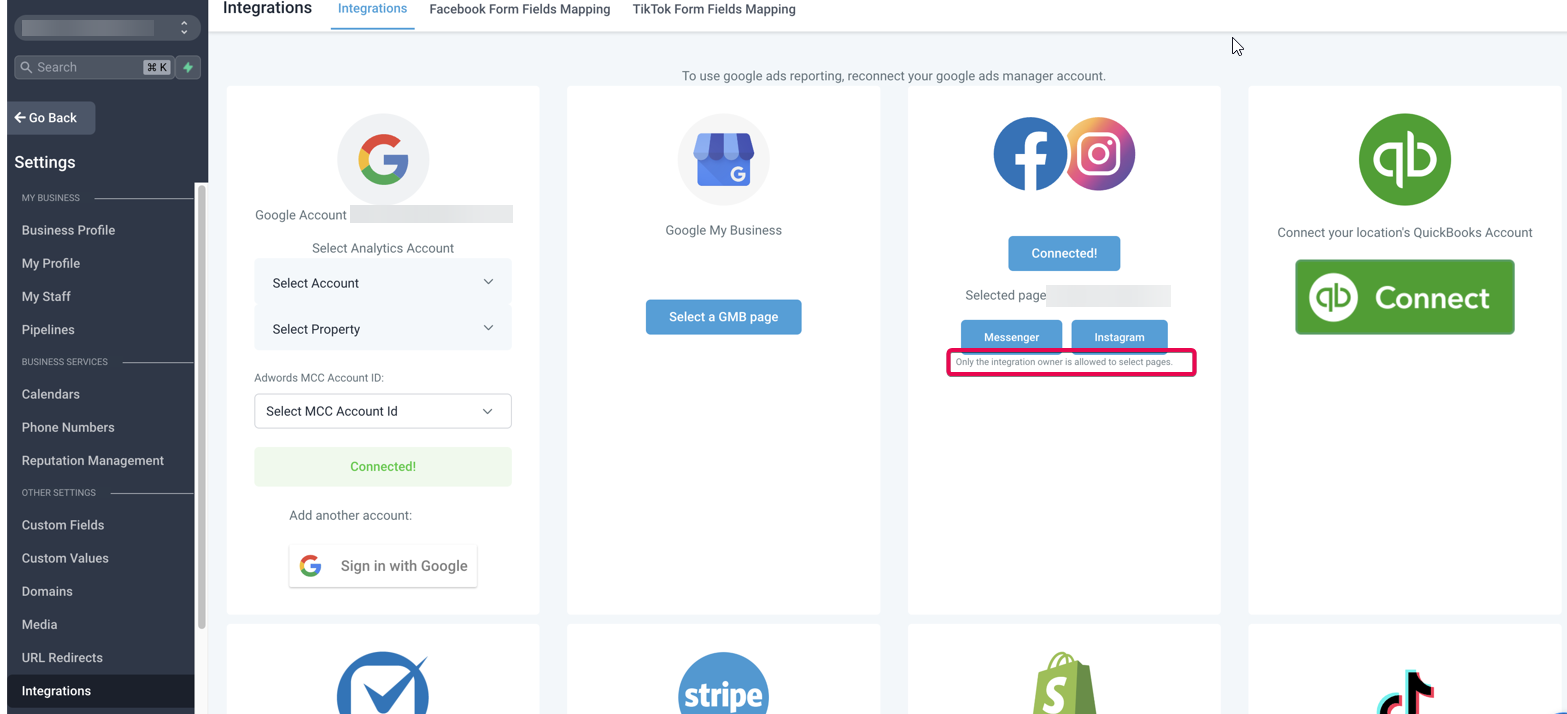
Step 1: Navigate to Facebook Integration in CRM
Go to Settings > Integrations > Facebook.
Click "Select a Facebook Page."
Step 2: Select the Desired Page
A new window will load, and a dropdown will allow you to select which page you want to integrate.
Step 3: Connect the Page
Click "Connect Page" to save.
