Access Form/Survey Builder:
Navigate to the form or survey builder section in your platform.

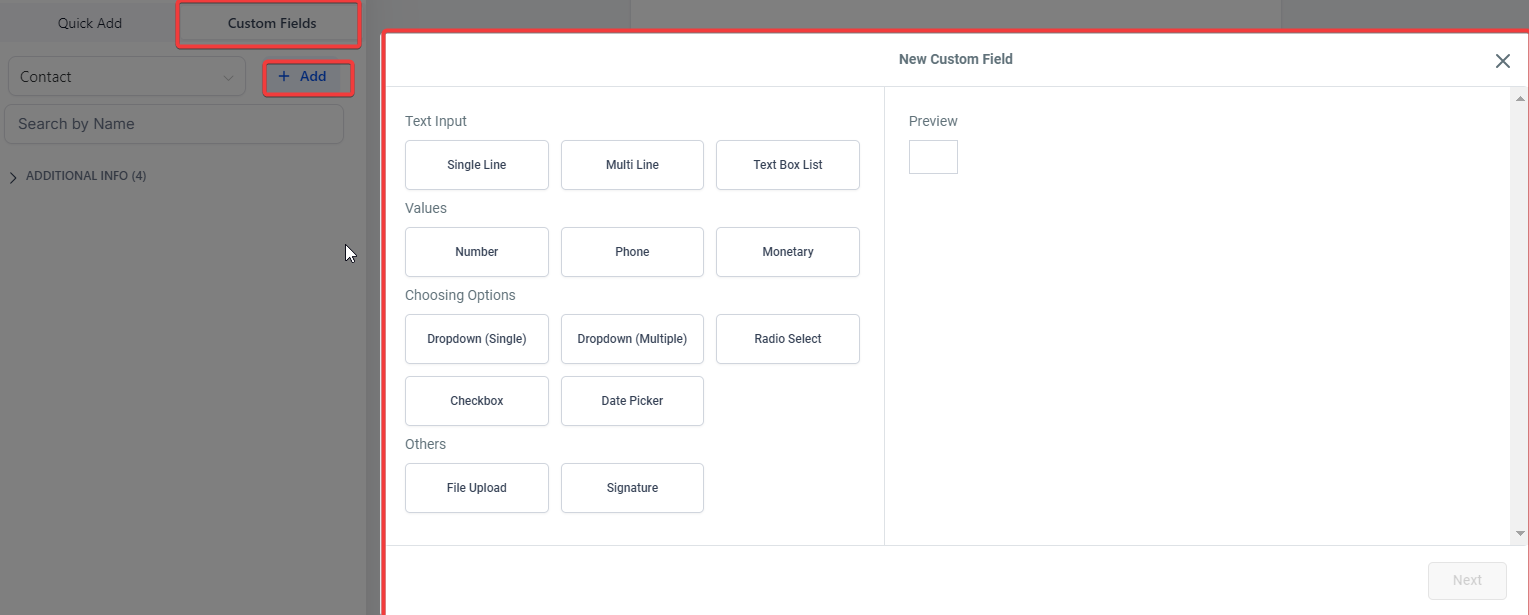
Drag and Drop Custom Fields:
Select the desired custom field type (e.g., Radio Select, Single Line, Multi Line, Checkbox, etc.).
Drag and drop the field into the form or survey.

Customize the Field:
Customize the options for dropdowns, radio buttons, checkboxes, and file input options for file upload fields.
Set the custom field name and unique key.
Save the Form/Survey:
Once you’ve added and customized your fields, save the form or survey to make the custom fields available across all areas.

Edit Custom Fields:
You can edit properties of newly created or existing custom fields from the custom fields section.
Adjust options, reorder, or delete as needed.
Field Locking: After saving the form or survey, the custom field name and unique key are locked and can only be edited from the custom fields section.
Simplified Workflow: This feature significantly reduces the number of steps, making the process of adding and managing custom fields quicker and easier.
Organize Your Fields: Use descriptive names for custom fields to make them easily identifiable later.
Preview Changes: Always preview your form or survey to ensure all fields are correctly configured before finalizing.
Leverage Field Types: Make use of various field types like Radio Select, Multi-Line, and Date Picker to gather more specific information from respondents.
