Follow along to learn how to create and manage Membership Assessments.
Navigate to Memberships > Courses > Products to create an assessment for your Members. (You must already have a product created to add an assessment.)

Select the Product you would like to add an assessment to.
Next to the title of the Section, click the plus sign and Select “Add Assessment”.

Add to the Assessment a Title, select assignment in type, and click Save.

Click on the assessment, and you will see where to add instructions, upload a template or another document they can use, and send the confirmation message. They will see this message when the document has been submitted.


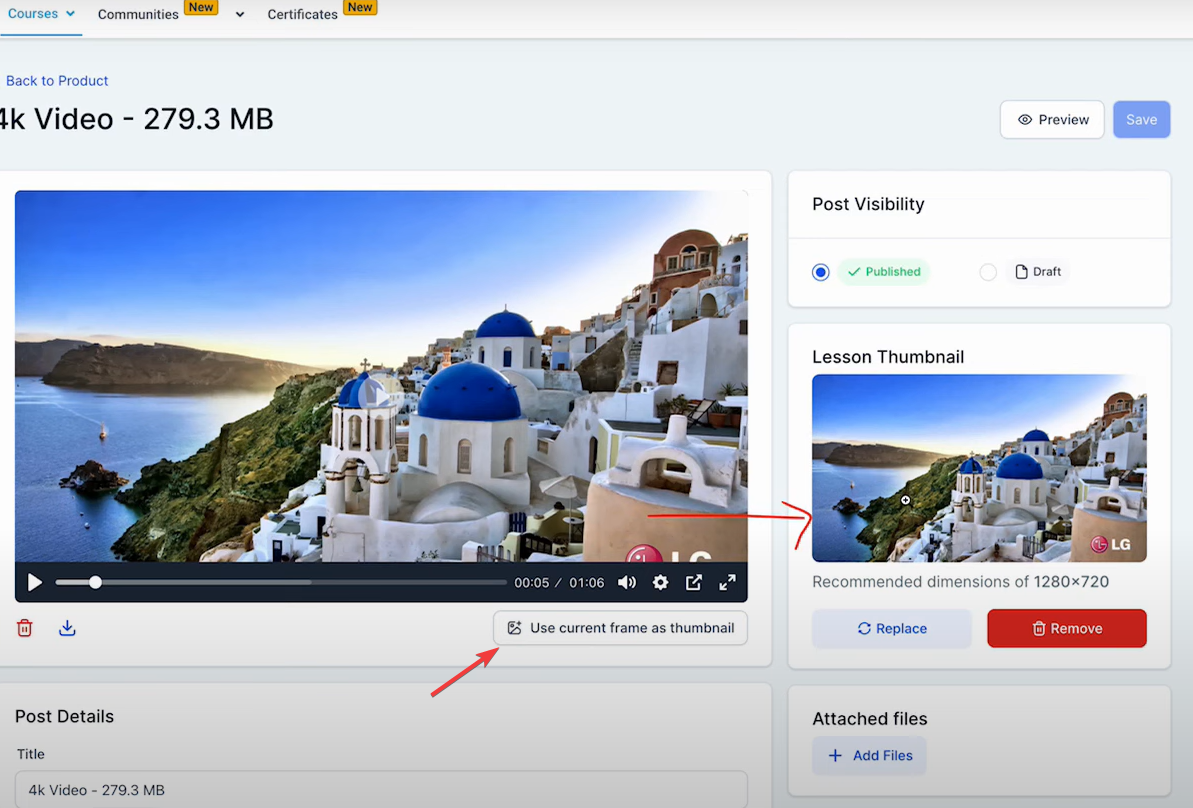
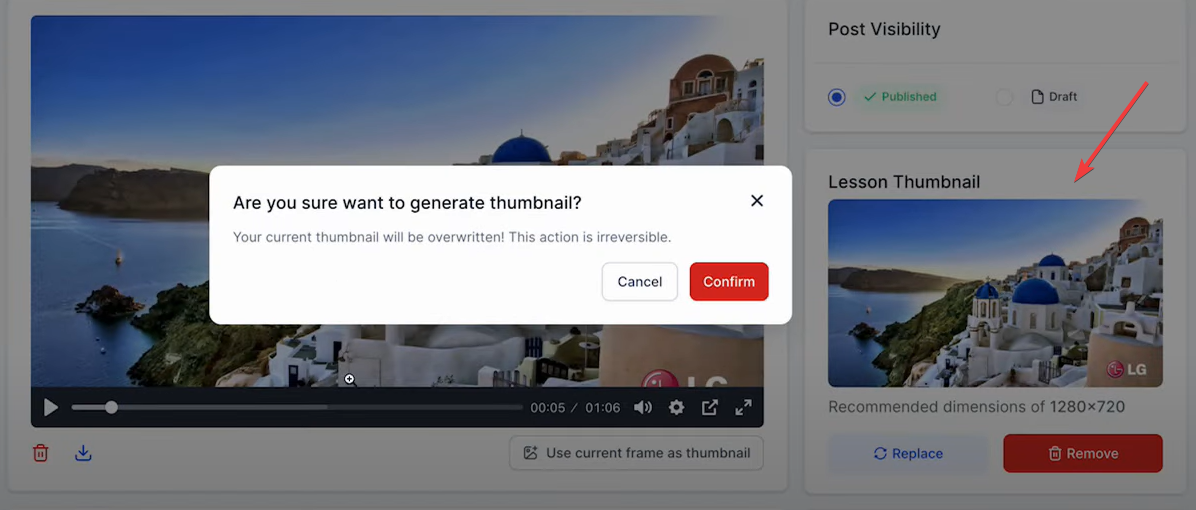
NOTE: Users can click on the "Use Current Frame as Thumbnail" button to capture and use the exact frame they want as the video thumbnail.This is integrated into the video player.This feature simplifies the process of selecting thumbnails from uploaded videos for lessons.
Once ready turn to publish mode and save

You can preview the assignment now

Follow along to learn how to create and manage Membership Assessments.
To create a quiz for your Members, Navigate to Memberships > Courses > Products.
Select the Product you would like to add an assessment to.
Next to the title of the Section, click the plus sign and Select “Add Assessment”.
Add to the Assessment a Title, select quiz in type, and click Save.

Give your quiz a title, and add a pass confirmation message and a fail message. You can also turn on the option to require a passing grade

At the bottom, you can see where to add your questions, and they can be multiple-choice or a single question.


After making all the changes, you can publish and save

You can also preview your quiz

Seamless Design: The Edit page features a sleek and intuitive design, enhancing user experience with a clean, modern interface that simplifies the creation and editing of assessments.
In-House Editor Integration: Transitioning from TinyMCE to the in-house editor, has streamlined the editing process, providing a more cohesive and efficient toolset tailored specifically to our platform's needs.
With the comments management pages (Manage Comments and Product Comments), Managing comments at both location and product levels is now more engaging and smooth.
Enhanced Management: Seamlessly manage user feedback across courses and products with improved features, including Tip-Tap Editor integration across all our text editors to maintain consistency with The CRM UI.
Multiple File Support in Lesson Attachments: Attach multiple files to lesson posts, making it easier to share comprehensive materials. Supported formats include .svg+xml, .png, .webp, .jpg, .jpeg, .mp4, .webm, .mov, .quicktime, .pdf, .doc, .docx, .ppt, .pptx, .xlsx, .zip, .mp3, .csv, .gif, .txt, font files, audio files, and other image types.
Additionally, several bug fixes and improvements have been implemented. These include improved product customization logic with upsert functionality, visibility fixes for the "Show More" button on the comments page, corrections to the course progress percentage cap, updates to the assessments analytics page, resolution of video streaming issues, enhancements to the clone product modal, and fixes for pricing modal dropdown issues, payment amount discrepancies, alert resolution for undefined scenarios, and payment UI element upgrades.
When an individual completes an assessment requiring a passing score, their results are immediately displayed, indicating which answers were right or wrong. However, the correct answers themselves are not revealed unless the assessment does not have a passing grade requirement.

In cases where no passing grade is specified, the correct answer for each question is shown along with any explanations provided for why this option is correct or why other options are incorrect.

If a participant attempts the quiz again using the same login credentials from the course, they will see their most recent score and have the opportunity to retake the quiz.

By selecting the Review button for their last attempt, participants can view their previous responses, identifying which were correct and which were not.

To examine the performance of each person who took your assessment, navigate to Memberships > Analytics. From there, select Assessments to access data on all submissions across your assessments.

To focus on assessments from a particular product, use the dropdown menu next to Products at the top right to filter the analytics. Additionally, you can filter the analytics by Results to refine your data review further.

To view an individual's submission, including their specific answers, simply click on the eye icon adjacent to their submission entry.

