Understanding a Dedicated Sending Domain:
A dedicated sending domain is used to send emails that appear directly from your brand, rather than from a shared mail server. This practice helps in maintaining a positive reputation with email services, reducing the likelihood of being flagged as spam.
Creating a Dedicated Sending Domain:
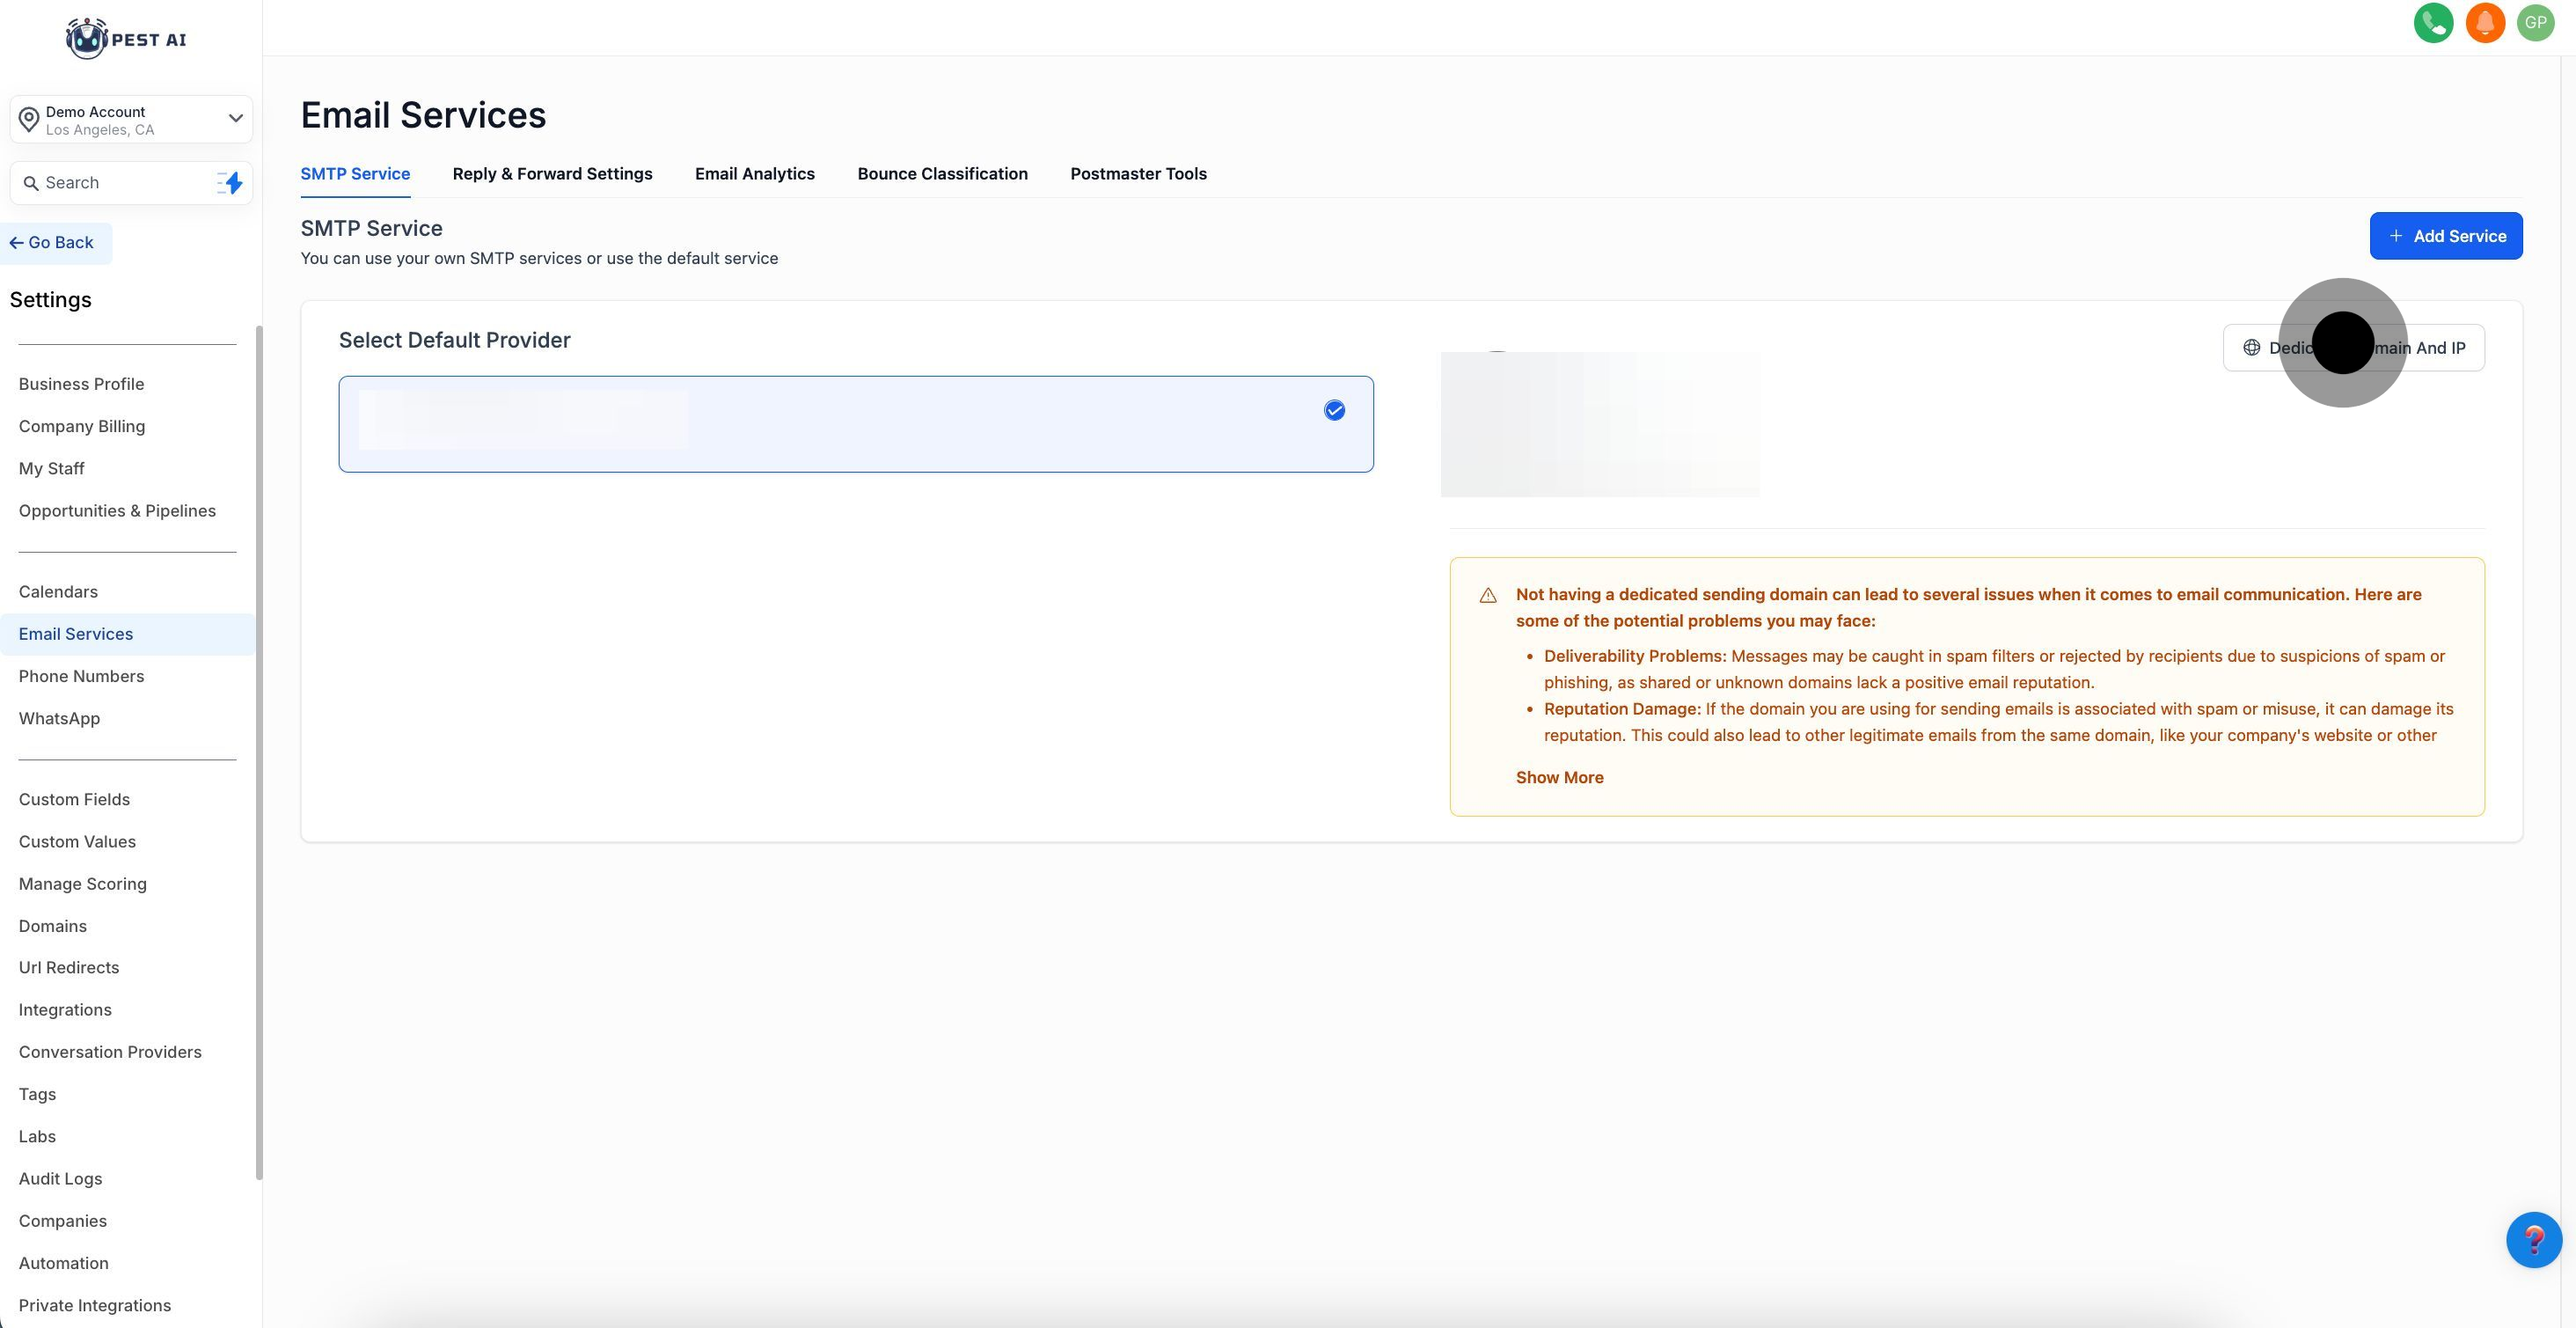
Access the Email Settings:
Navigate to: Settings -> Email settings -> Email Services.
Initiate Domain Setup:
If not already in the LC email system, switch to it to access the dedicated domain options.
Click the 'Dedicated domain' button.
Configure Your Domain:
Enter your domain details. Follow specific instructions for domain providers such as GoDaddy, Google Domains, HostGator, etc.
Verify the domain by updating DNS records with your hosting provider and waiting for them to propagate.
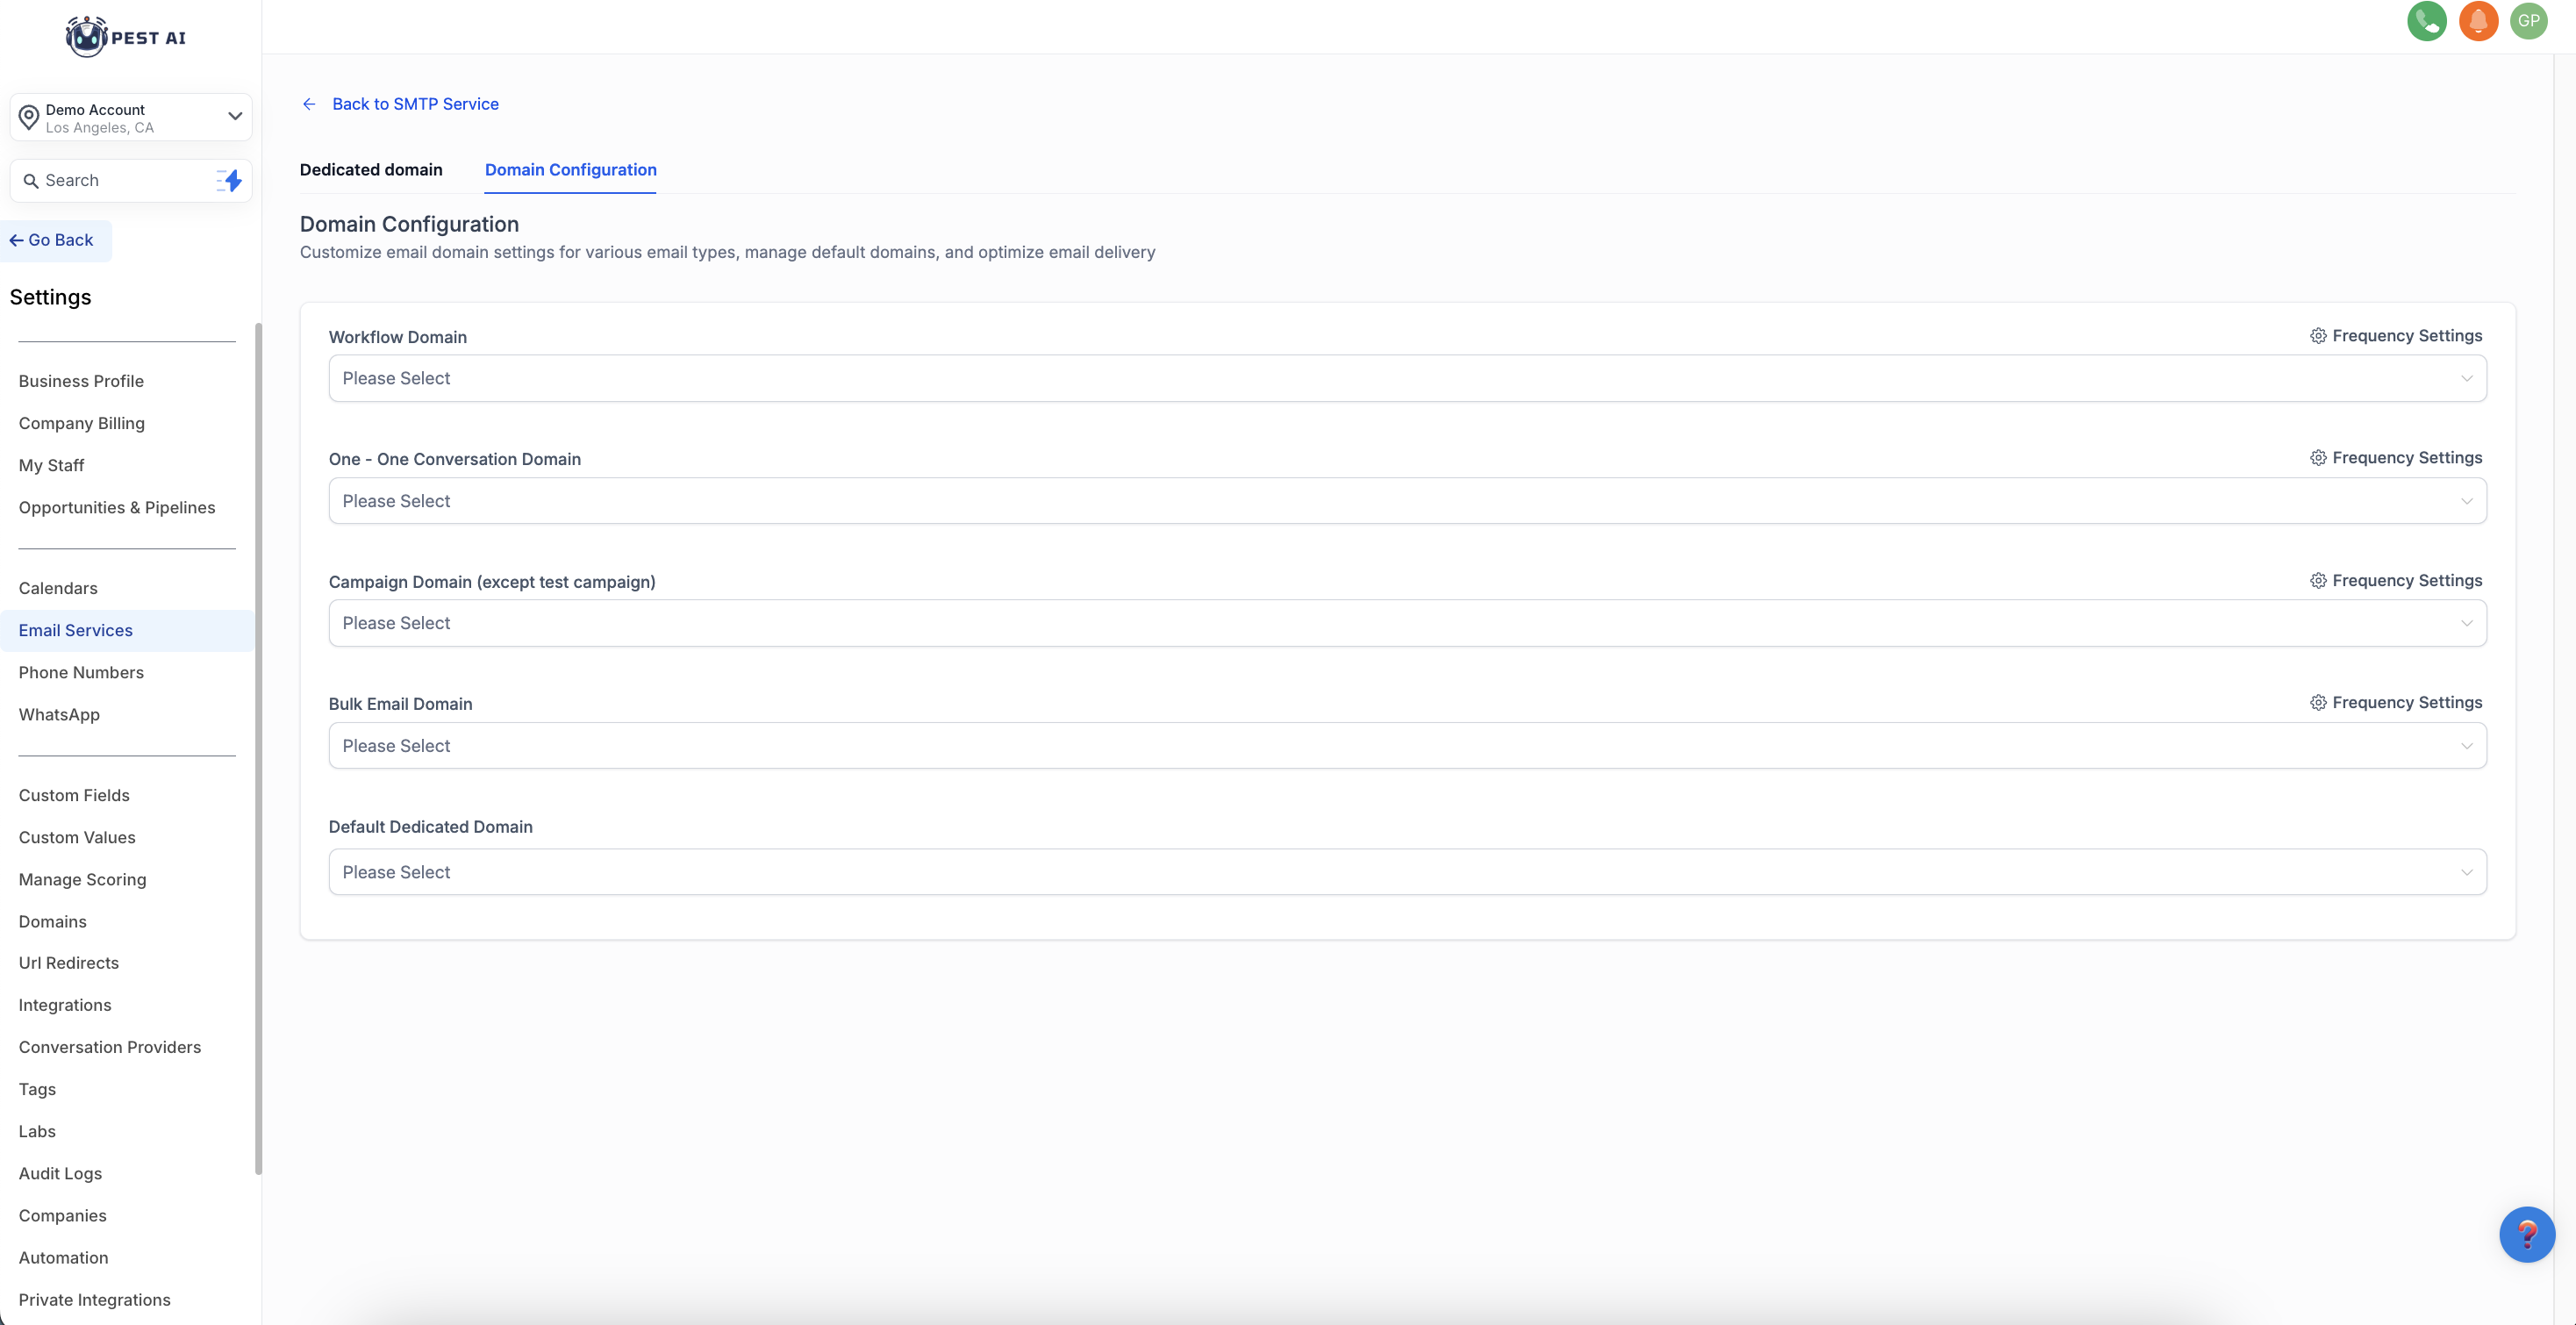
Setting Up Targeted Email Categories:
You can assign up to five dedicated sending domains to specific email categories under sub-account domains.
Configure Domain for Email Types:
Go to Sub-account Settings -> Email Service -> SMTP Service -> Dedicated Domain and IP -> Domain Configuration.
Assign domains to specific categories like Campaigns, Bulk Emails, or One-on-One Conversations.
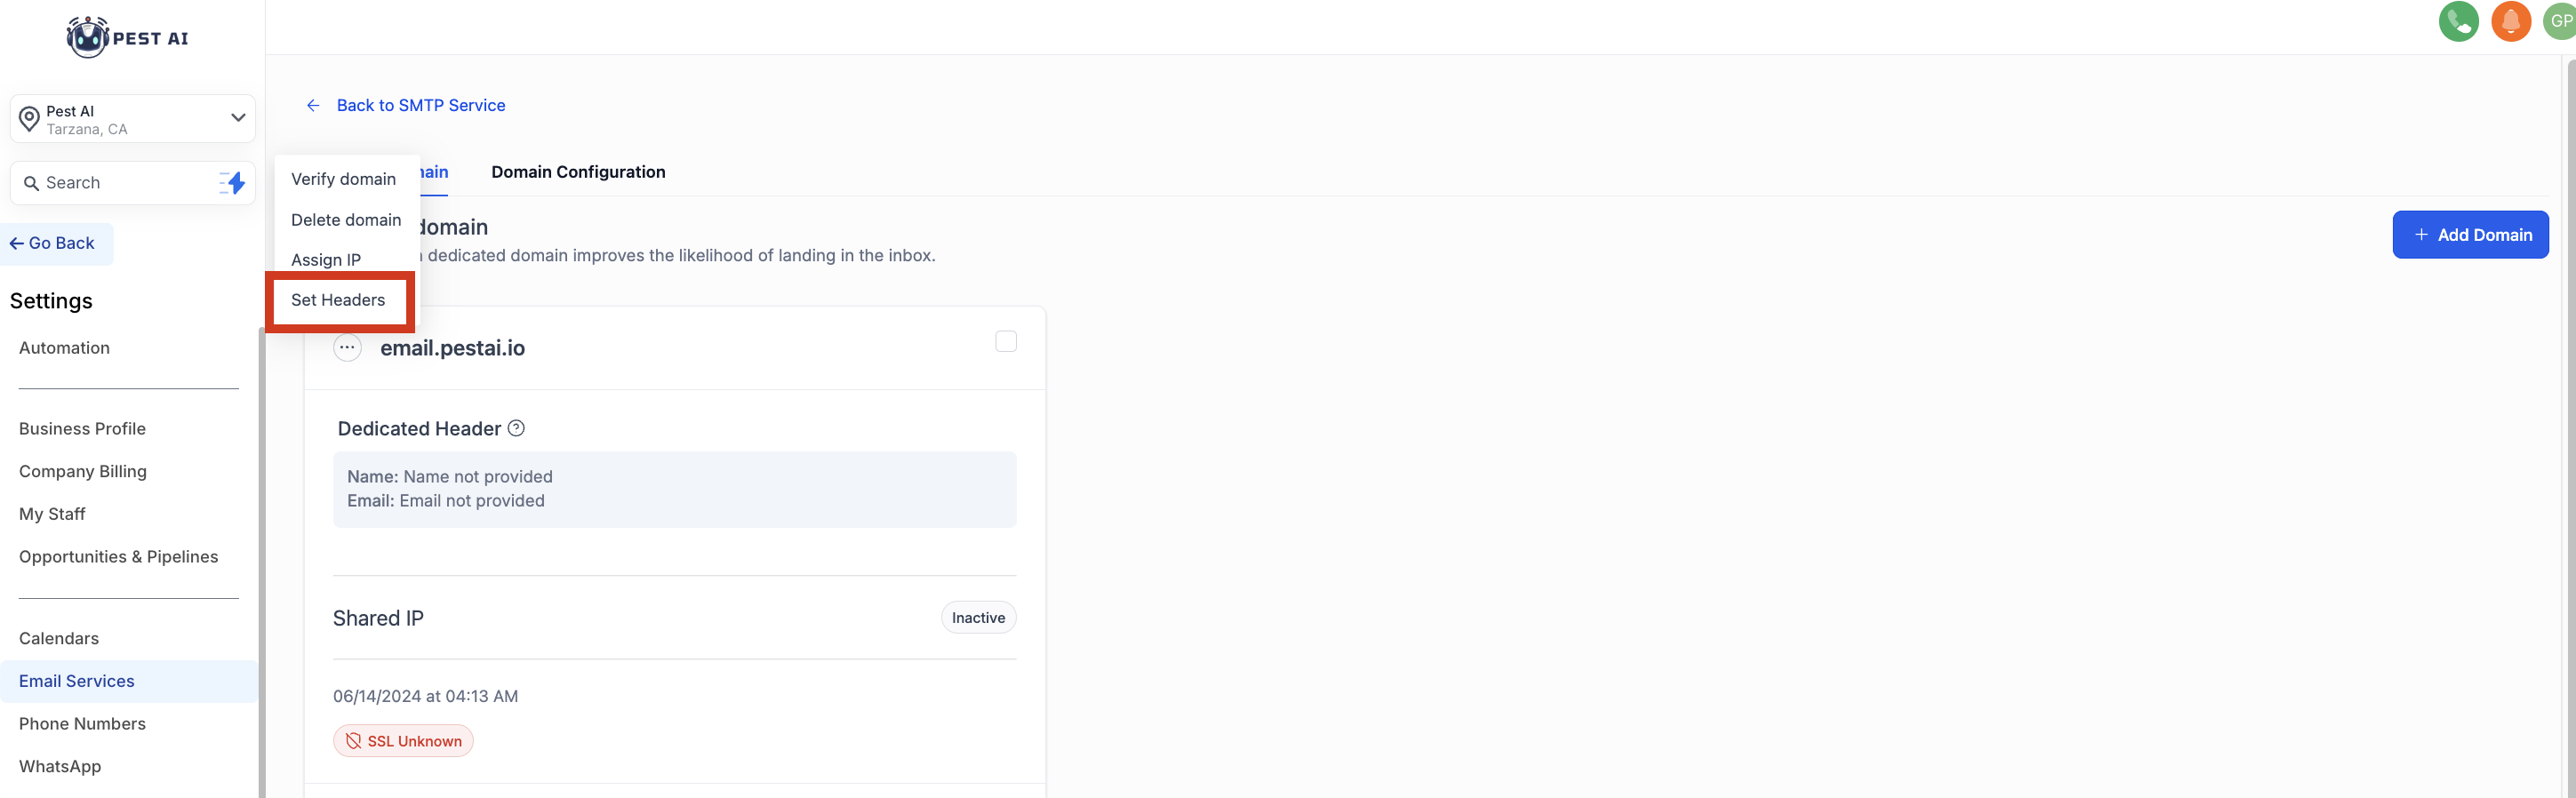
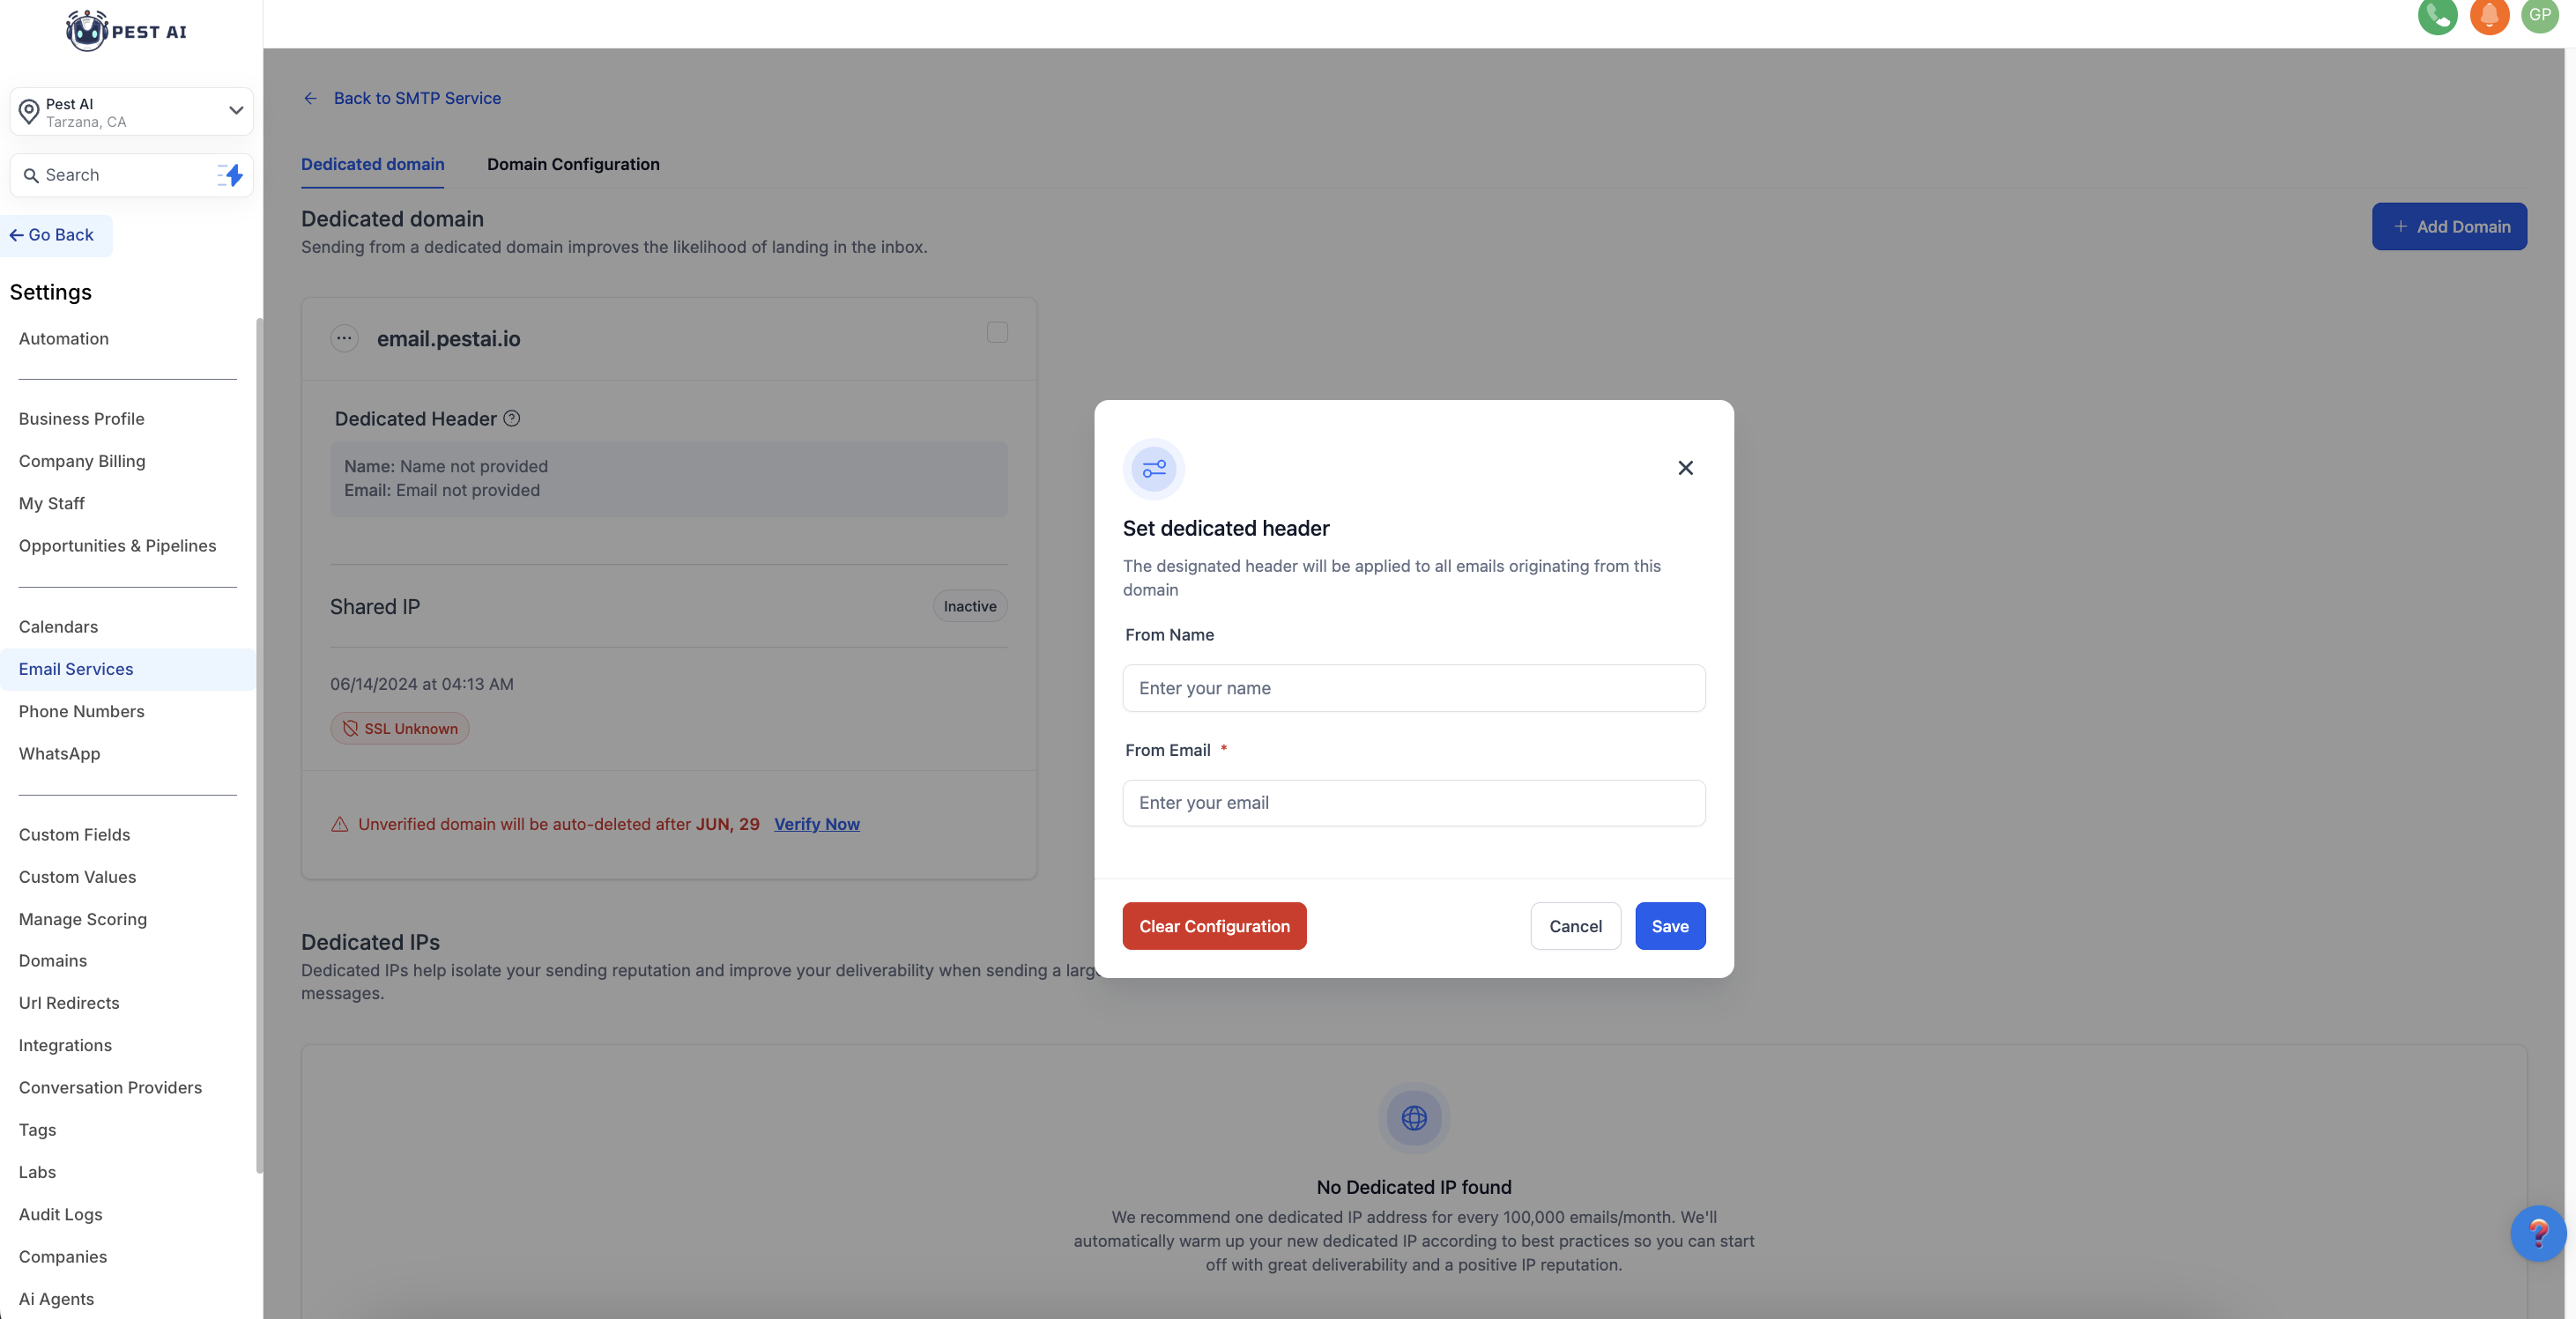
Customizing Headers for Dedicated Sending Domains:
Set Default Email Headers:
Navigate to Sub-account Settings -> Email Service -> SMTP Service -> Dedicated Domain and IP -> Set headers under dedicated domain.
Configure the "From" address and name that will appear on outgoing emails
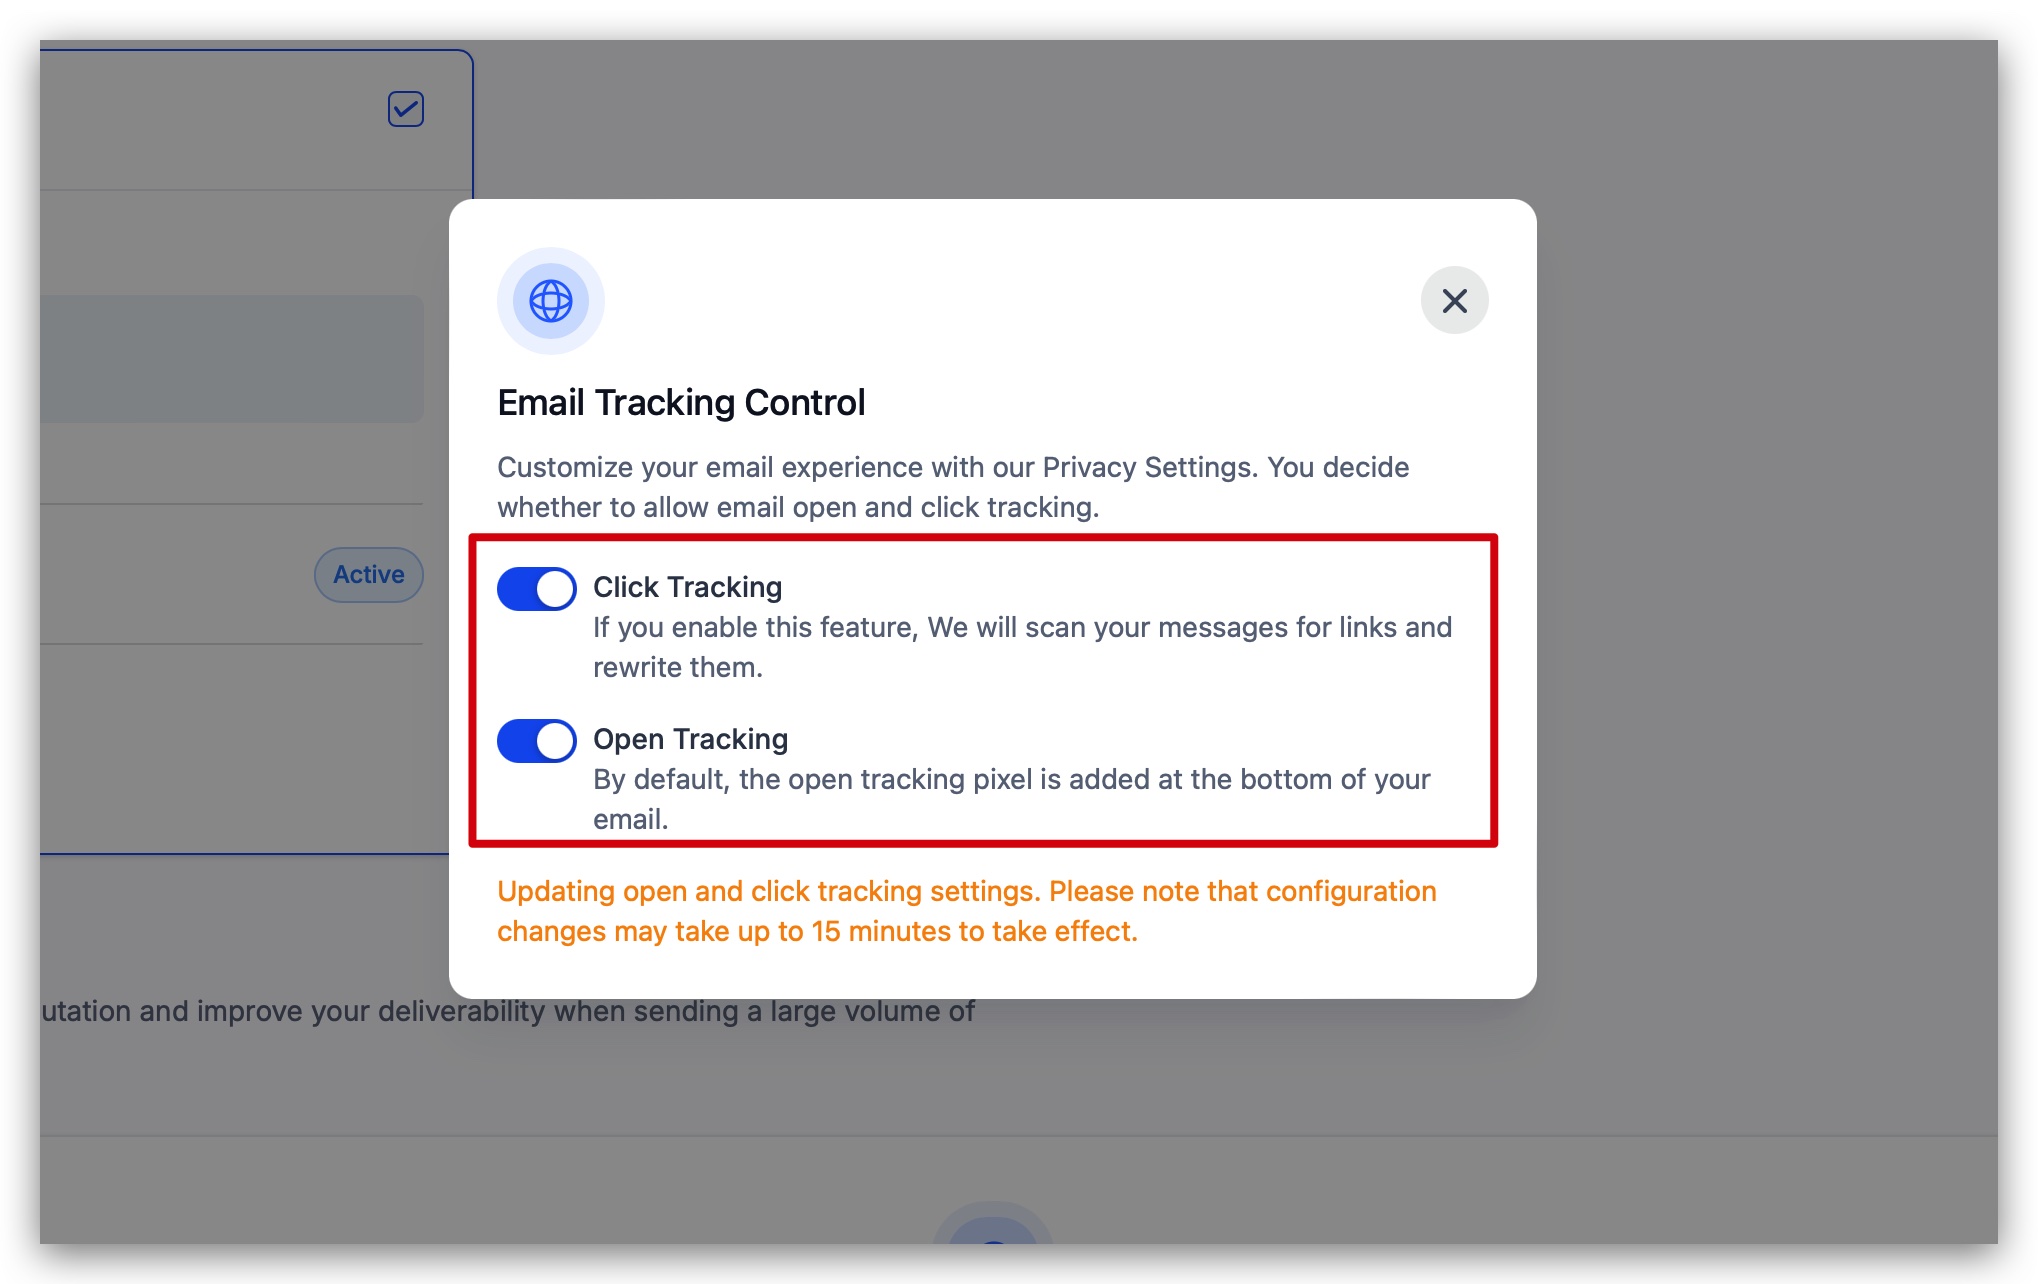
Managing Email Tracking Options:
Adjust Tracking Settings:
Visit Sub-account Settings -> Email Service -> SMTP Service -> Dedicated Domain and IP -> Domain settings under the dedicated domain.
Enable or disable open and click tracking depending on your needs. By default, both are enabled but can be adjusted to tailor your tracking preferences.
Frequently Asked Questions (FAQ):
Choosing a Sending Domain Name:
Opt for a unique subdomain that reflects your brand, such as 'email.yourbrand.com'.
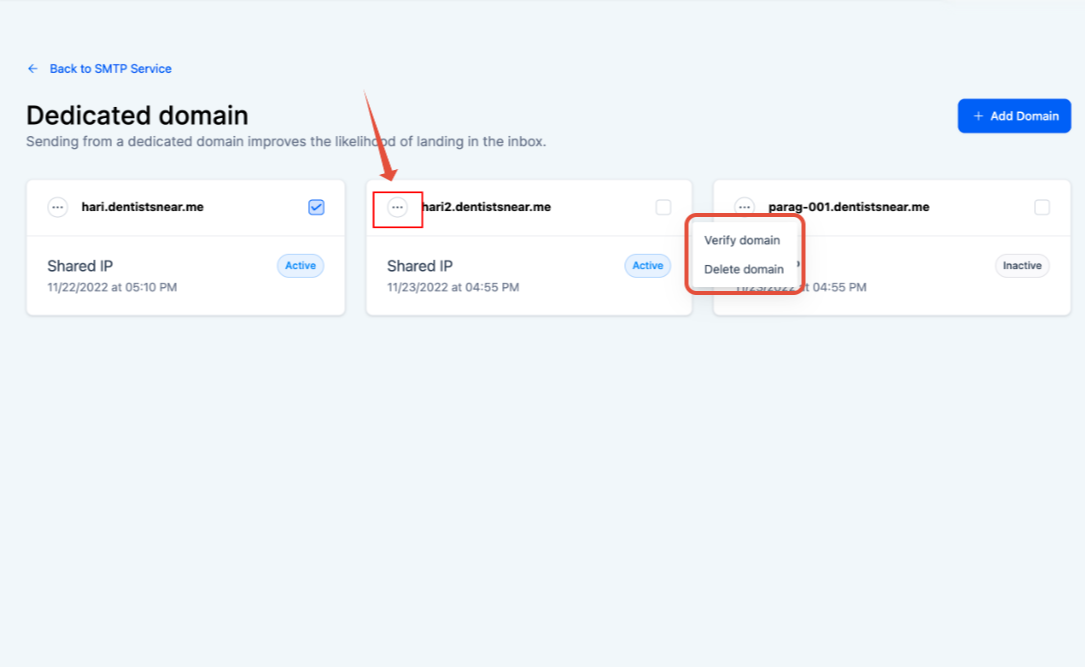
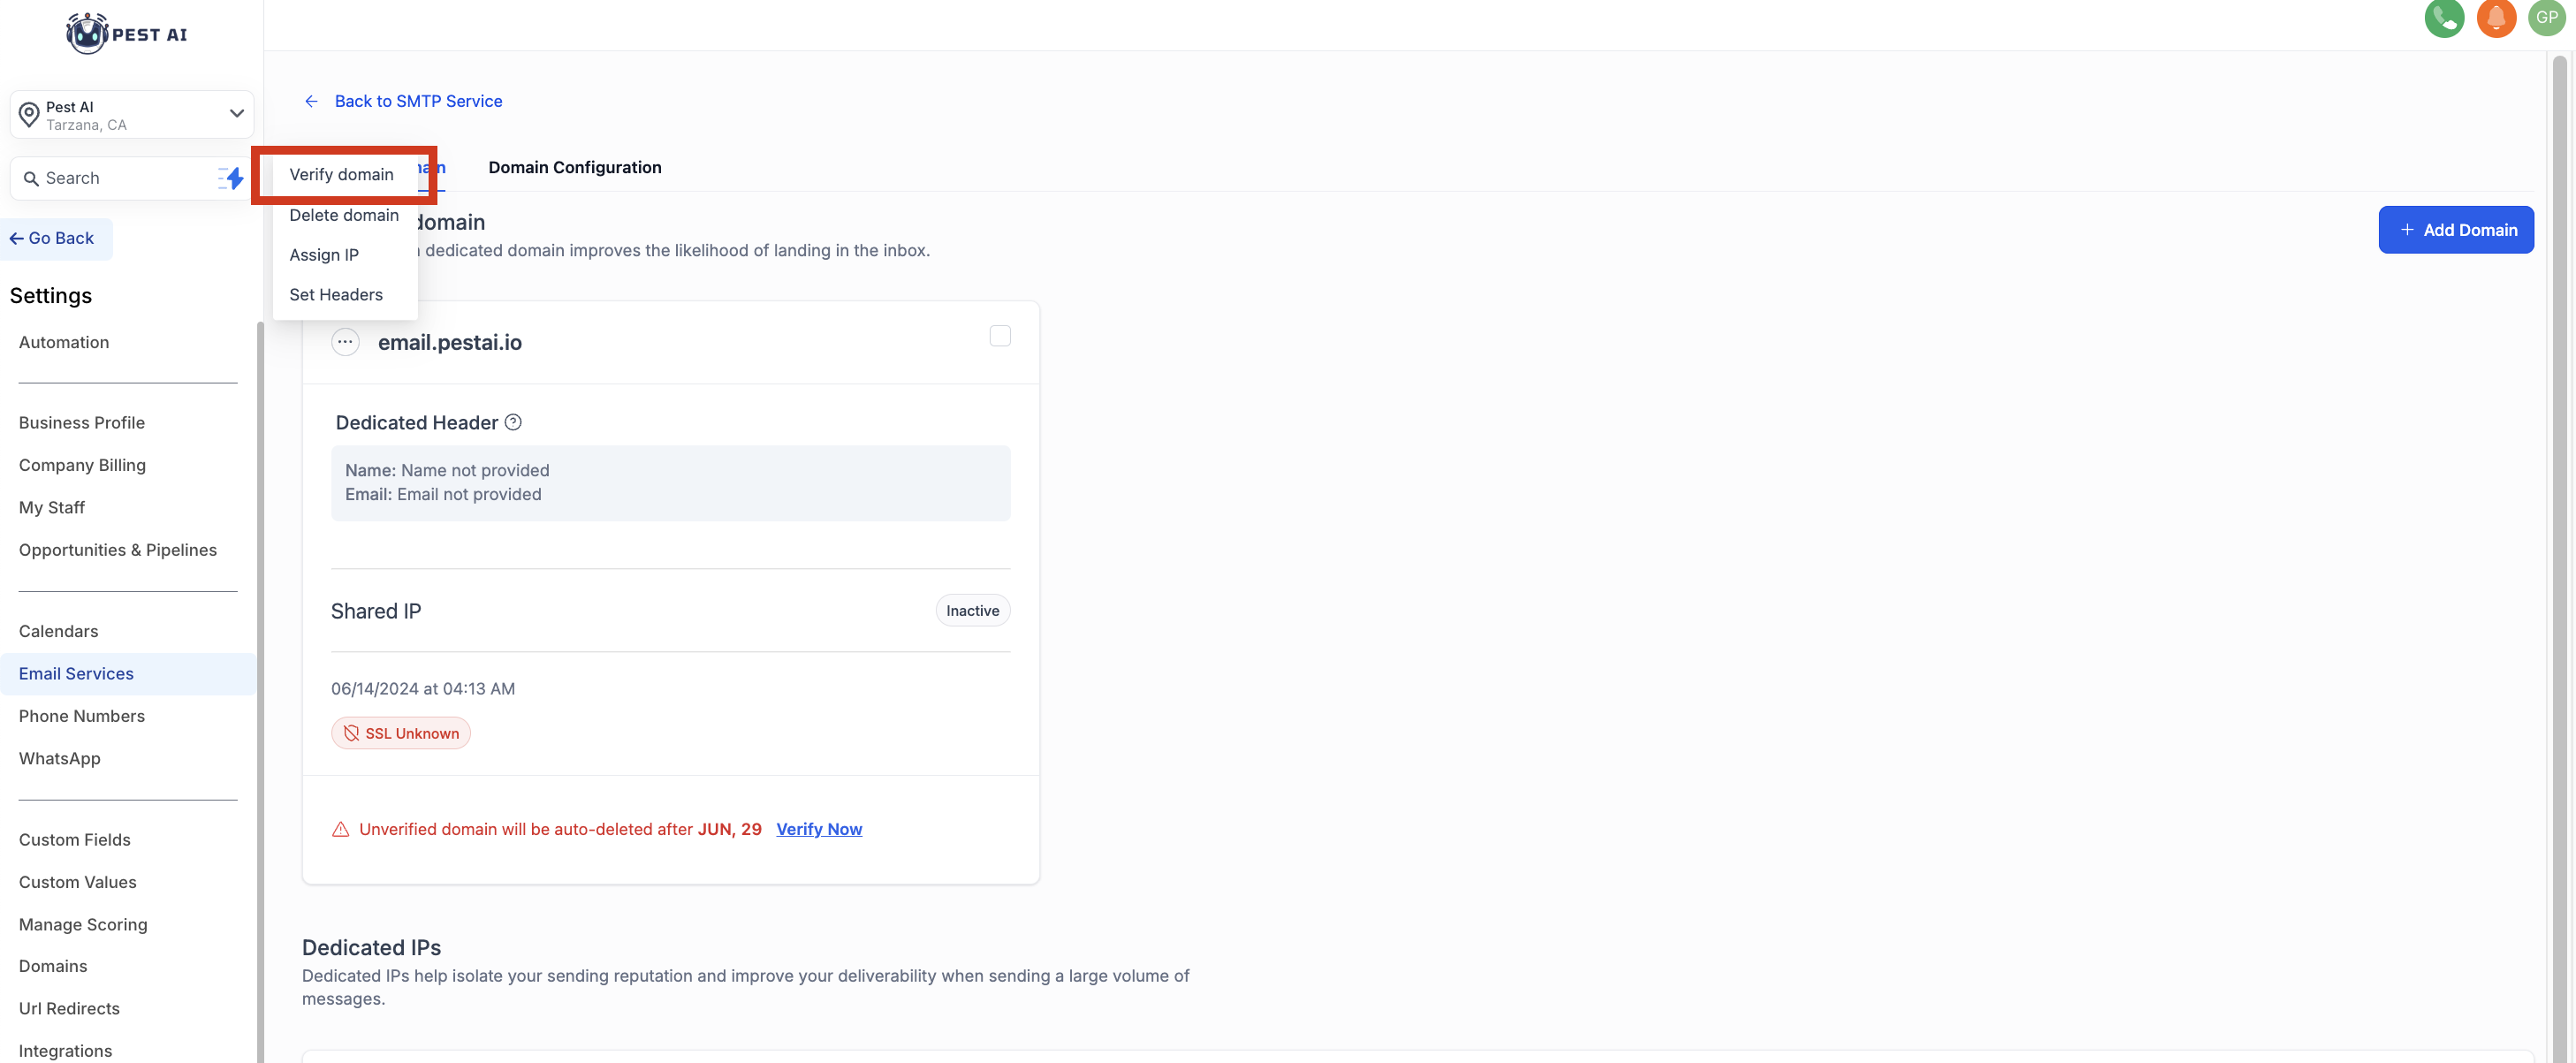
Verifying a Domain:
1. Navigate to Settings - > Email settings - > Domain services
2. All the unverified domains will be in an inactive state
3. Click on the three-dot and verify button
4. You will be able to see the same records and unverified records. once you have added all the records click Verify button again
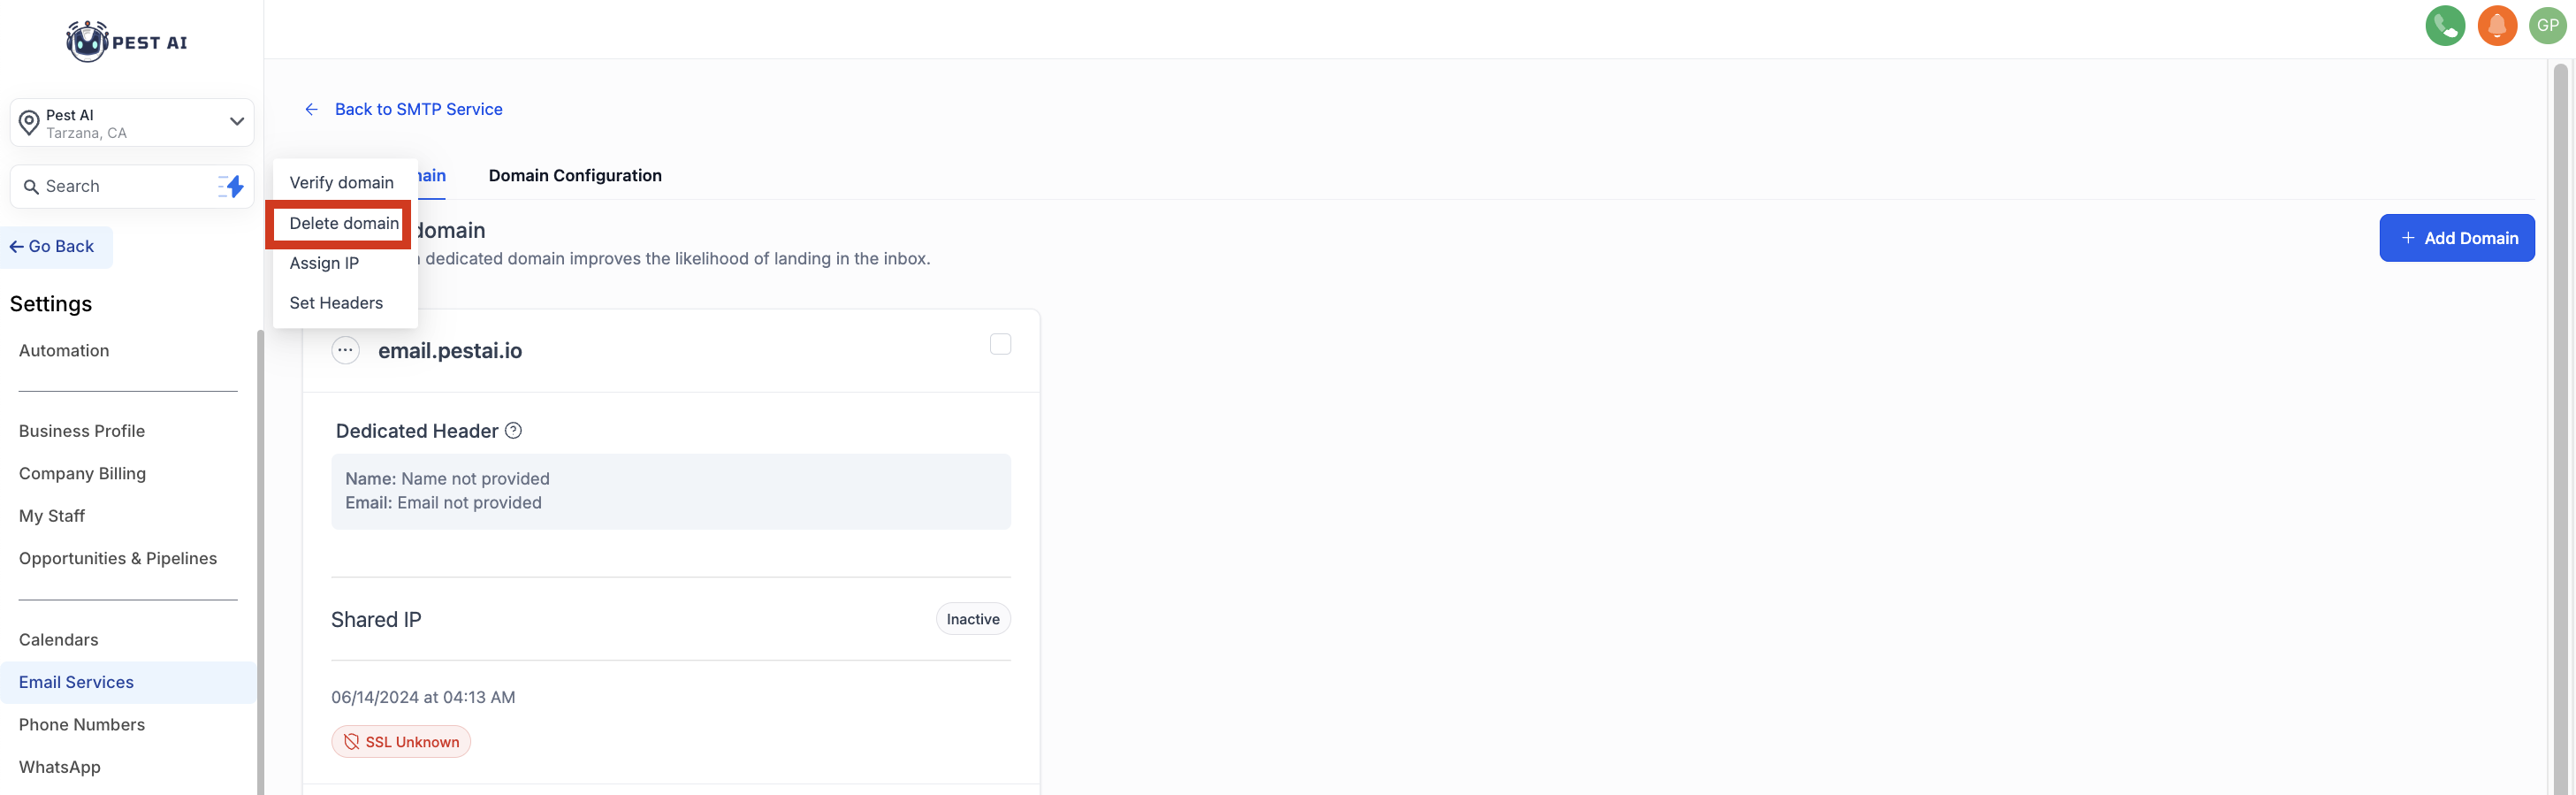
Deleting a Domain:
To delete, navigate to the respective domain settings and use the option to remove the domain.
Moving a Domain:
Remove the domain from the previous service provider and set it up anew in Pest AI.
Activating a Domain:
Check the appropriate box in the domain settings to make it your active/default sending domain.
This guide ensures you are equipped to effectively set up and manage a dedicated sending domain within PEST AI, thereby optimizing your email communications for better deliverability and engagement.
