Navigate to Payments and select the Invoice tab.
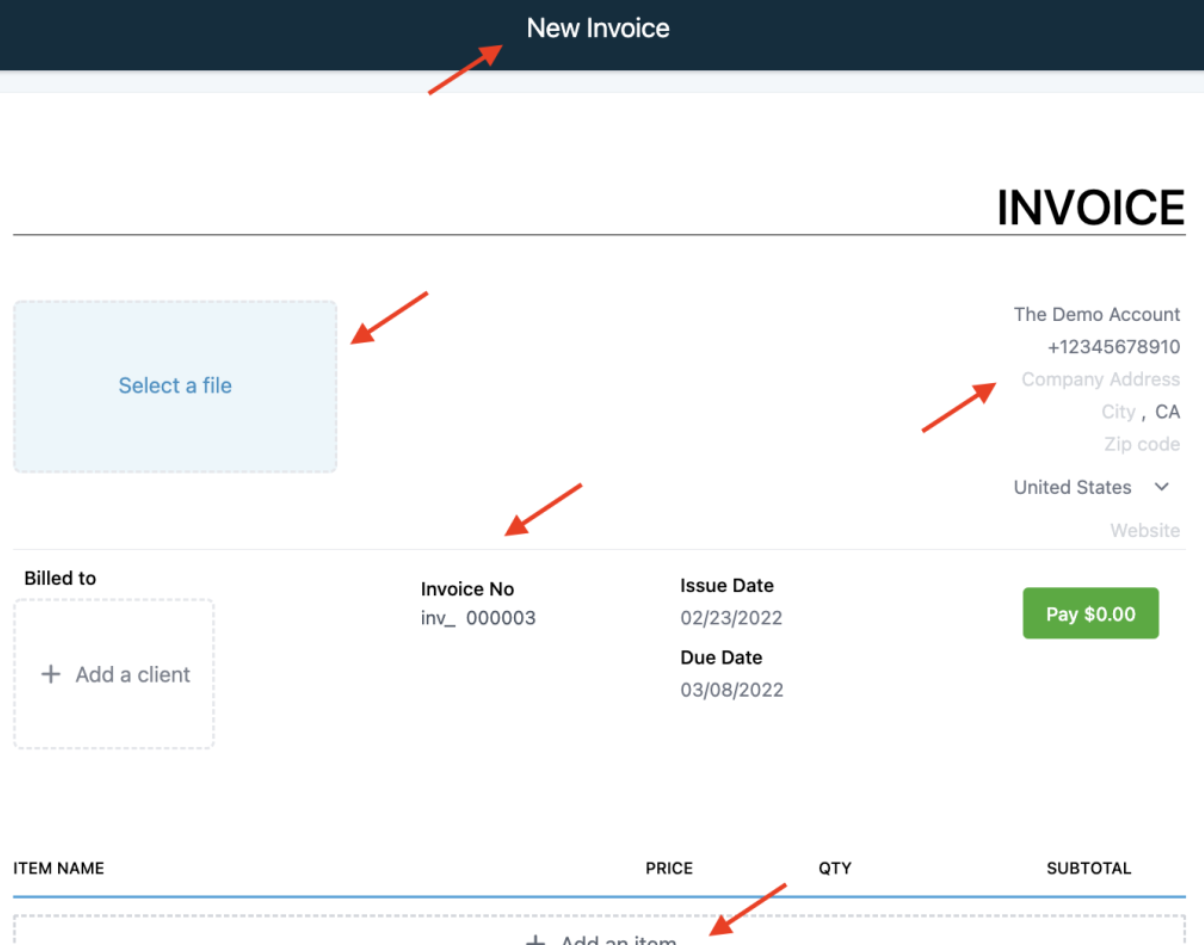
Click +New to begin crafting your invoice.
If desired, click the gear icon to modify the sender name displayed on your invoices.
NOTE: You can add general notes to the invoice using the gear icon near the "New" button.
Branding: Update the image in the top left corner by clicking on it. The media library will provide options to either pick an existing image or upload a fresh one.
Sender Information: Edit the details in the top right by clicking the text. Ensure this data accurately reflects your business.
Recipient Details: Furnish the client/customer’s details under “Billed to” by clicking the corresponding box.
Invoice Details: Adjust the Invoice Number, Issue Date, and Due Date by selecting each section respectively.
Invoice Items: Click “+Add an item” to introduce products from your products tab to the invoice.
NOTE: Remember, to invoice a product, it must already exist in your product list. For guidance on setting up new products, refer to our product tutorials.Pricing: Modify the Price and Quantity by clicking their respective fields.
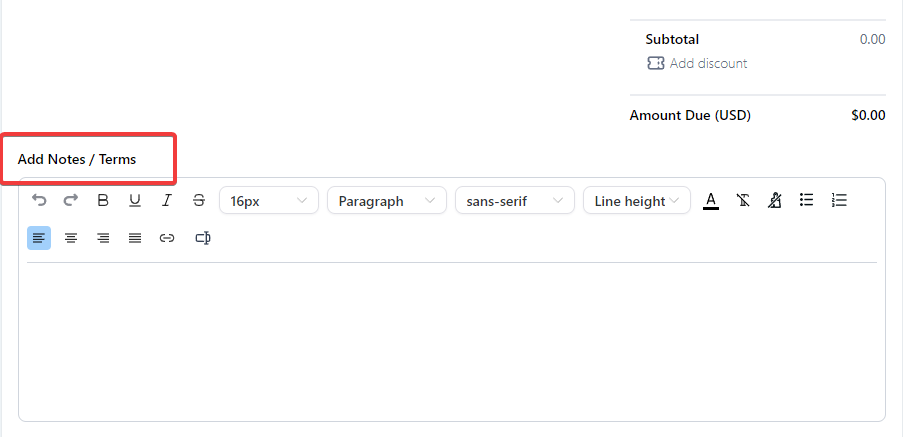
Additional Terms: Customize any additional terms, conditions, and notes as needed.
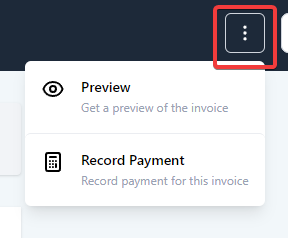
The three-dot menu will allow you to view a preview or record a payment
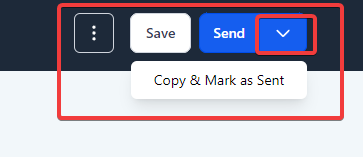
Upon finalizing the invoice details, use the Send button in the top right to dispatch your invoice.
If you opt to send it via another medium, choose “Copy and Mark as Sent”.
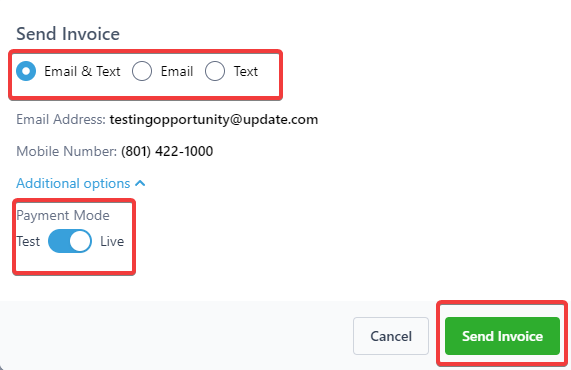
Upon clicking “Send”, a popup facilitates the choice between dispatching the invoice via either email, text, or both.
In “Additional Options”, you can toggle between test and live payment modes.
If invoice sending fails due to template issues, specific error messages will be displayed to inform you of the problem.

Return to the Invoices tab to view an overview of your invoices.
The “Status” column details the current state of your invoice, be it draft, paid, or due within a specific timeframe.
Apply filters by status or date to refine your search. Alternatively, the Transaction tab stores invoice data and you can download the data from the invoices area as well.

NOTE: Navigate to Payments > Transactions to review both successful and failed transactions.
You now have an option in the invoice settings to define a custom title and the terms/notes for the invoice which appears at the top right of the document
The title and notes are by default INVOICE and is case sensitive
They can no longer be 25 characters
The specified text will appear in any new invoice that gets created after changing the title


Select the “Settings” tab > Taxes.
Press “Add Tax” or “Create Tax” and in the ensuing popup, provide details like Tax name, rate (as a percentage), a brief description, and the Tax ID number if applicable.
Choose the “add discount” icon when creating or editing an invoice to apply a markdown to your invoice.

Benefits of Payment Plans in Invoicing:
Allows for upfront deposits and breaking payments into separate installments.
Payments can be set by percentage or fixed amounts.
Specific dates can be assigned for different payments.
Users can change the payment schedule at a later date.

An example is shown with two payments: one paid and one pending.

Within a specific Invoice, access the three-dot menu when editing or creating an invoice to reveal additional functionalities.
Pick “Record Payment”. The subsequent popup presents two alternatives:
Charge a card: Enter card specifics (optionally saving it to contact) and charge it. Alternatively, use a card previously linked with the client.
Record manually: If a payment is processed externally, like cash or check, use this to log it manually.

Businesses can now conveniently void sent, overdue, or paid invoices, addressing the common challenge when a client discontinues midway between a scheduled recurring template, leaving unpaid invoices. Voiding these invoices rectifies any misalignment with payment stats.
For invoices already settled (via card payments or recorded manually), remember to process a full refund before voiding them.
Locate the desired invoice.
Click on the three-dot menu for options.
Select "Void".

NOTE: Once voided, an invoice cannot be reinstated.Navigate to Payments → Transactions. Choose the Refund action available under the three dots corresponding to the successful transaction. This area displays all refund attempts, both successful and failed, for that transaction. You shouldn’t need to access the payment provider dashboard separately.

There is flexibility in either fully or partially refunding manual payments recorded on invoices.
TIP: Always double-check refund amounts and details to avoid discrepancies.
By default, voided invoices remain hidden in the list view. However, a dedicated Void filter in the Payments > Invoices section can retrieve them.
To locate a voided invoice, click on the Filters button, choose Status, and then pick Void from the dropdown list.
Voiding an invoice has no bearing on the invoice statistics displayed on the invoices list page. Furthermore, comprehensive audit logs are maintained for all void, delete, and refund operations.
To void an invoice, simply navigate to Payments > Invoices. Click on the iconic three dots, choose void, and upon the confirmation prompt, select void again.

With CompanyName, you're equipped with an all-encompassing invoicing system that goes beyond creation and dispatch. The integrated functionalities to void invoices and process refunds position businesses to manage their finances effectively.
Remember, whether successful or failed, every transaction is easily accessible under Payments > Transactions. Dive into Pest AI and experience streamlined, effective invoicing.
